Install And Configure PostmarketOS With Plasma Mobile On The PinePhone
- Introduction
- What not to post online
- Setting up the build environment
- Initialize the pmbootstrap configuration for the pinephone
- Identify the block special file name
- Deploy to the SD card
- A bit about LUKS
- NCurses Over Serial
- Boot into postmarketOS
- Resize the screen
- Set the timezone, date & time
- What’s in the default runlevel?
- Improve our getty configuration
- Configuring Wifi
- NTP time syncing
- Update APK Index
- Configure Logging
- Upgrade to latest repository
- Configure x-forwarding
- Set a theme
- How to take a screen shot
- Audio configuration
- DBus Basics
- Configure the modem
- GPRS & LTE configuration
- Send and receive SMS
- Make phone calls
- Conclusion
Introduction
In this post I will install PostmarketOS + Plasma Mobile on the PinePhone. At the time of this writing many Plasma Mobile features are either not fully integrated or not working at all. I will be focusing on the configuring postmarketOS so that by the end of this post you should be able to make phone calls and both send and receive SMS. I will also delve into extra detail on subjects that I find interesting or that I think might be helpful for you to know when trouble shooting issues.
You might notice that sometimes I add env TEMP=/dev/tmp to the beginning of some commands. That is because my temp directory is not executable. You most likely will not need to do the same.
What not to post online
It is common for people to innocently reveal information that they shouldn’t when seeking help online. After all, the very fact that they are asking for help indicates that they lack some level of knowledge, which is fine, we all need to begin our journey of learning somehow and asking questions is a great starting point. Sometimes people reveal information that can cause them serious trouble.
Always redact the following details from command line output, configuration files, logs, screen shots, and written text that you share with others when seeking help or for any other reason. Never post a log or config file without sanitizing it!! In the words of Gandalf the Grey - Keep it secret, keep it safe!
- IMSI
- It is imperative that you never reveal your SIM card’s International Mobile Subscriber Identity to anyone.
- Private Cryptographic Keys
- Never reveal private keys of any kind. I have seen people accidentally send their private SSH keys to paste sites such as https://termbin.com. In the case of SSH, public keys have the file extension
puband the private ones have the same name without any file extension.
It is a very good idea to not share the following information with anyone that you do not fully trust:
- IP Address
- In particular your devices external IP Addresses, but I also redact or conceal information about the topology of my home network.
- LUKS Header
- Do not post your LUKS header because it provides an attacker with one piece of the puzzle to decrypt an encrypted volume
Information you might want to keep private because they could be used to leak some information about you
- ICCID
- Integrated Circuit Card Identifier can be used to identify the country and possibly the mobile network that the card was manufactured for.
If you take photos of your SIM, you should know that many SIM cards have the IMSI printed on their casing. It is also easy to take photos of serial numbers uniquely identifying your hardware such as the PinePhone’s modem. This section is by no means complete, I include it simply to raise awareness.
Setting up the build environment
Ensure ~/.local/bin exists
Check that you have a ~/.local/bin directory. If it does not exist, then create it using file-hierarchy man(7) as a guide. Below is the first level directory hierarchy of my ~/.local/ path, including group and owner permissions:
tree --noreport -L 1 -pudg ~/.local/home/dustfinger/.local
├── [drwxr-x--- dustfinger dustfinger] bin
├── [drwx------ dustfinger dustfinger] lib64
├── [drwx------ dustfinger dustfinger] share
└── [drwx------ dustfinger dustfinger] varIf the following command returns a 0, then you will need to add ~/.local/bin to your path at the user session level:
echo $PATH | grep -ci '\.local/bin'1Exactly how you do this in a persistent way depends on the shell being used. In general, you will need to set $PATH in one of the following files: ~/.profile, ~/.<shell>_profile, ~/.<shell>_login. For example, if you are using Bash, then you can simply add the following to the bottom of ~/.bash_profile.
PATH=$PATH:~/.local/bin/After that, run source ~/bash_profile in each of your open shells. The next time you login, it will be sourced automatically.
Install or clone pmbootstrap
You have two choices. You can install pmbootstrap using pip by following these instructions, or you can clone the pmbootstrap repository and link to the executable. I chose to clone the repository and link to the executable. There are two reasons for this: it will make it easier for me to debug the code and contribute to the project if I choose to, and I find that having the source code on my local system makes it more convenient to use as a reference.
cd ~/dev
git clone https://gitlab.com/postmarketOS/pmbootstrap.git
Cloning into 'pmbootstrap'...
remote: Enumerating objects: 1461, done.
remote: Counting objects: 100% (1461/1461), done.
remote: Compressing objects: 100% (443/443), done.
remote: Total 18404 (delta 1132), reused 1248 (delta 1011), pack-reused 16943
Receiving objects: 100% (18404/18404), 6.90 MiB | 3.03 MiB/s, done.
Resolving deltas: 100% (11560/11560), done.Now add a link to the pmbootstrap script from your ~/.local/bin directory.
ln -s "$PWD/pmbootstrap/pmbootstrap.py" ~/.local/bin/pmbootstrap
ls -lah ~/.local/bin/pmbootstrap
lrwxrwxrwx 1 dustfinger dustfinger 47 May 24 06:55 /home/dustfinger/.local/bin/pmbootstrap -> /home/dustfinger/dev/pmbootstrap/pmbootstrap.pyAt the time of this article the commit for the master branch of pmbootstrap was:
cd ~/dev/pmbootstrap
git rev-parse HEAD
pmbootstrap --version
445410d08c56a1fd2093ce2c0dda55ba2ac805de
1.20.0Run pmbootstrap --help for CLI documentation.
Clone pmaports
Cloning pmaports is entirely optional. If you do not perform this step, then pmbootstrap will clone pmaports into its local git cache. I prefer to keep all source repositories in one place, i.e. ~/dev. For that reason, and for the same reasons that I chose to clone pmbootstrap, I will now clone pmaports.
cd ~/dev
git clone https://gitlab.com/postmarketOS/pmaports.git
At the time of this article the commit has for the master branch of pmaports was:
cd ~/dev/pmaports
git rev-parse HEADa17a93102614fb2dba48cac2383b3e4280544241Initialize the pmbootstrap configuration for the pinephone
Invoking pmbootstrap init will perform the following steps:
- Perform sanity checks and take actions if necessary
- Invoke initialize config subroutine
- If
~/.config/pmbootstrap.cfgexists- load the config
- set default values
- remove invalid or outdated settings
- If config did not exist, load defaults
- Ask for work path
- If path does not exist, create it
- Create and set
/WORK_PATH/version - Create
/WORK_PATH/cache_git
- update config with work path setting and save
~/.config/pmbootstrap.cfg. - Perform version migration if necessary
- Clone pmaports
- Get path to pmaports repository
- If
--aportsoptional parameter is provided, then create link/WORK_PATH/cache_git/pmaportstargeting provided path - else use
/WORK_PATH/cache_git/pmaports
- If
- If repository does not exist at path, then clone it
- Get path to pmaports repository
- Choose Release Channel
- Ask for vendor
- Ask for device code name
- Ask if it is okay to install non-free firmware
- Ask for username
- Ask for UI
- Ask for build options: Parallel jobs, ccache per arch.
- Ask for extra packages to be installed to rootfs
- Ask for timezone
- Ask for hostname
- Ask for SSH keys
- Save configuration
- Remove (zap) existing chroots. i.e. will remove /WORK_PATH/chroot_*
The pmbootstrap init command runs interactively, storing inputs from the user in the pmbootstrap configuration file, i.e. ~/.config/pmbootstrap.cfg. If the pmbootstrap.cfg already exists, then it will use the values contained within as defaults the next time you initialize pmbootstrap.
I will walk through each user interaction of the pmbootstrap init sub command. Do not run this command with sudo or you will end up with incorrect ownership and permissions applied to the resulting artifacts. The command will use sudo internally and prompt you for credentials when required. Only provide the --aports optional parameter if you cloned pmaports above.
env TEMP=~/dev/tmp/ pmbootstrap --aports=~/dev/pmaports initSteps 1-4 have been completed. We are now on step 5. Hit <RET> keeping the default working directory.
[11:04:02] Location of the 'work' path. Multiple chroots (native, device arch, device rootfs) will be created in there.
[11:04:02] Work path [/home/dustfinger/.local/var/pmbootstrap]:
Steps 5-8 have been completed. The working path has been created and now contains a version file, a log.txt file and a directory named cache_git.
tree --noreport -pug ~/.local/var//home/dustfinger/.local/var/
└── [drwx------ dustfinger dustfinger] pmbootstrap
├── [drwx------ dustfinger dustfinger] cache_git
├── [-rw-r--r-- dustfinger dustfinger] log.txt
└── [-rw-r--r-- dustfinger dustfinger] versionWe are now on step 9. You will be asked to choose a postmarketOS release channel. At the time of writing there are two options, stable and edge. Since stable is marked as a work in progress we will stick with the default channel which is edge.
[11:05:22] NOTE: pmaports path: /home/dustfinger/dev/pmaports
[11:05:22] Choose the postmarketOS release channel.
[11:05:22] Available (2):
[11:05:22] * edge: Rolling release channel
[11:05:22] * stable: Upcoming beta release (WIP, DO NOT USE!)
[11:05:22] Channel [edge]:
On step 10 you will be asked to choose a vendor. Enter pine64 and hit <RET>.
[11:06:12] Choose your target device vendor (either an existing one, or a new one for porting).
[11:06:12] Available vendors (49): alcatel, amazon, asus, bq, chuwi, fairphone, finepower, fly, fujitsu, google, gp, hisense, htc, huawei, infocus, jolla, leeco, lenovo, lg, medion, meizu, motorola, nextbit, nobby, nokia, oneplus, oppo, ouya, pine64, planet, purism, qemu, raspberry, samsung, semc, sharp, sony, surftab, t2m, tablet, teclast, tokio, wiko, wileyfox, wingtech, xiaomi, yu, zte, zuk
[11:06:12] Vendor [qemu]: pine64
Step 11: You will be asked to enter a device codename; enter pinephone and hit <RET>.
[11:07:18] Available codenames (6): a64lts, dontbeevil, pinebookpro, pinephone, pinetab, rockpro64
[11:07:18] Device codename: pinephone
Step 12, if you would like to be able to use Wifi and Bluetooth, then hit <RET> accepting the default choice to install the nonfree firmware.
[11:10:14] This device has proprietary components, which trade some of your freedom with making more peripherals work.
[11:10:14] We would like to offer full functionality without hurting your freedom, but this is currently not possible for your device.
[11:10:14] device-pine64-pinephone-nonfree-firmware: Wifi and Bluetooth firmware
[11:10:14] Enable this package? (y/n) [y]:
Step 13, enter a username that you would like created for your phone and hit <RET>.
[11:12:32] Username [user]: dustfingerStep 14, enter plasma-mobile-extras and hit <RET>.
[11:13:18] Available user interfaces (12):
[11:13:18] * none: No graphical environment
[11:13:18] * gnome: (Wayland) Gnome Shell (not for armhf)
[11:13:18] * i3wm: (X11) Tiling WM (keyboard required)
[11:13:18] * kodi: (Wayland) 10-foot UI useful on TV's
[11:13:18] * mate: (X11) MATE Desktop Environment, fork of GNOME2 (stylus recommended)
[11:13:18] * phosh: (Wayland) Mobile UI developed for the Librem 5 (works only with numeric passwords!)
[11:13:18] * plasma-desktop: (X11/Wayland) KDE Desktop Environment (works well with tablets)
[11:13:18] * plasma-mobile: (Wayland) Mobile variant of KDE Plasma (slow without hardware acceleration, allows only numeric passwords!)
[11:13:18] * plasma-mobile-extras: Plasma Mobile with more apps pre-installed (video and music players, pdf reader, etc.)
[11:13:18] * shelli: Plain console with touchscreen gesture support
[11:13:18] * sway: (Wayland) Tiling WM, drop-in replacement for i3wm (DOES NOT RUN WITHOUT HW ACCELERATION!)
[11:13:18] * weston: (Wayland) Reference compositor (demo, not a phone interface)
[11:13:18] * xfce4: (X11) Lightweight GTK+2 desktop (stylus recommended)
[11:13:18] User interface [weston]: plasma-mobile-extras
Step 15, it is safe to choose the default by just hitting <RET>, but feel free to change this if you desire. The valid units for ccache are: K|M|G|T|Ki|Mi|Gi|Ti. I kept with the defaults.
[11:15:50] Build options: Parallel jobs: 9, ccache per arch: 5G
[11:15:50] Change them? (y/n) [n]:
Step 16, enter ofonoctl,minicom with no space after the comma and hit <RET>. The ofonoctl command is used to control the ofono daemon and minicom is a serial communication program that we will use to send AT commands to initialize the modem.
[11:17:00] Additional packages that will be installed to rootfs. Specify them in a comma separated list (e.g.: vim,file) or "none"
[11:17:00] Extra packages [none]: ofonoctl,minicom
Step 17: pmbootstrap will attempt to detect the timezone from the host machine, but it might fail.
[11:31:07] WARNING: Unable to determine timezone configuration on host, using GMT.Pmbootstrap assumes that a symlink exists named either /etc/zoneinfo/localtime or /etc/localtime pointing to the timezone in /usr/share/zoneinfo/. Not all distributions have such a symlink. This is what the configuration looks like on my Gentoo host:
cat /etc/timezone
ls -lah /etc/localtime
file /etc/localtime
Canada/Mountain
-rw-r--r-- 1 root root 2.3K Dec 6 05:55 /etc/localtime
/etc/localtime: timezone data, version 2, 5 gmt time flags, 5 std time flags, no leap seconds, 150 transition times, 5 abbreviation charsAs you can see, Gentoo keeps the timezone in /etc/timezone and /etc/localtime is the actual timezone file rather than a symlink. If your timezone is not detected, then like me, you will have to set the timezone manually later.
Step 18: You can customize the hostname of your phone if you wish, or hit <RET> to accept the default. I am going to call my phone Second Chance from the sci-fi Novel Pandora’s Star by Peter F. Hamilton.
[11:31:07] Device hostname (short form, e.g. 'foo') [pine64-pinephone]: second-chanceStep 19: You will now be asked if you wish to copy your SSH keys from your host machine to your PinePhone. If you choose y here, then all files matching the pattern ~/.ssh/id_*.pub/ will be copied to $HOME/.ssh/. Perhaps you have public keys that you do not want copied to your phone. My preference is to manually copy specific SSH keys to my PinePhone if, and when I have a need to. I just kept the default by hitting <RET>.
[11:50:22] Would you like to copy your SSH public keys to the device? (y/n) [n]:Step 20, pmbootstrap will save your inputs to ~/.config/pmbootstrap.cfg.
cat ~/.config/pmbootstrap.cfg[pmbootstrap]
aports = /home/dustfinger/dev/pmaports
ccache_size = 5G
is_default_channel = False
device = pine64-pinephone
extra_packages = ofonoctl,minicom
hostname = second-chance
jobs = 9
kernel = stable
keymap =
nonfree_firmware = True
nonfree_userland = False
ssh_keys = False
timezone = GMT
ui = plasma-mobile-extras
ui_extras = False
user = dustfinger
work = /home/dustfinger/.local/var/pmbootstrapStep 21, a reminder to run pmbootstrap status regularly to keep things up to date.
[11:51:02] WARNING: The chroots and git repositories in the work dir do not get updated automatically.
[11:51:02] Run 'pmbootstrap status' once a day before working with pmbootstrap to make sure that everything is up-to-date.
[11:51:02] Done!
Identify the block special file name
Insert your SD card into your computer. My computer does not have an SD card reader, so I use an SD card USB adapter. Once inserted, the SCSI (Pron. “scuzzy”, Small Computer System Interface) device, will be registered with the SD mass-storage driver and assigned a letter. Letter assignment is in alphabetic order, meaning that the first SCSI device registered will be given the block special file name /dev/sda, the second device registered will be named /dev/sdb and so on. Additional block special file names will be assigned in numeric order providing an interface to each partition of the disk, e.g /dev/sdx1, /dev/sdx2 etc. A disk image includes the partition table; for this reason, when we want to write an image to a disk, we need only know the letter assignment of the block special file name, e.g /dev/sdb. However; if we want to mount a disk’s partition with read or write access, then we need to know the block special file name including the partition number, e.g /dev/sdb1. To find the block special file names of your SD card, run dmesg.
dmesg | tail[1578133.409947] usb-storage 1-2:1.0: USB Mass Storage device detected
[1578133.410221] scsi host4: usb-storage 1-2:1.0
[1578134.429208] scsi 4:0:0:0: Direct-Access Generic STORAGE DEVICE 1404 PQ: 0 ANSI: 6
[1578134.429571] sd 4:0:0:0: Attached scsi generic sg1 type 0
[1578134.676148] sd 4:0:0:0: [sdb] 124735488 512-byte logical blocks: (63.9 GB/59.5 GiB)
[1578134.677349] sd 4:0:0:0: [sdb] Write Protect is off
[1578134.677356] sd 4:0:0:0: [sdb] Mode Sense: 21 00 00 00
[1578134.678529] sd 4:0:0:0: [sdb] Write cache: disabled, read cache: enabled, doesn't support DPO or FUA
[1578134.692971] sdb: sdb1 sdb2
[1578134.697055] sd 4:0:0:0: [sdb] Attached SCSI removable diskFrom the output above we can see that my SCSI device was the second such device registered on my system and was therefore assigned the letter b. So I will need to use /dev/sdb as the SD card device name when writing the postmarketOS image to disk. If the tail of dmesg displays information from events unrelated to inserting the SD card, then try increasing the number of lines of output shown via the -n optional parameter, e.g. dmesg | tail -n 50.
Referring to /dev/sdb/ as the SD card is a misnomer because the device name refers to the Small Computer System Interface (SCSI) used to read and write to the SD card and not the card itself. In my case, the device refers to my SD card USB adapter. If I insert the SD card USB adapter without the SD card, then the device is still registered with the mass-storage driver, but without the numbered block special file names that interface with the disk’s partitions.
dmesg | tail[1578380.920621] usb 1-2: new high-speed USB device number 96 using xhci_hcd
[1578380.936431] usb 1-2: New USB device found, idVendor=05e3, idProduct=0751, bcdDevice=14.04
[1578380.936433] usb 1-2: New USB device strings: Mfr=3, Product=4, SerialNumber=0
[1578380.936434] usb 1-2: Product: USB Storage
[1578380.936435] usb 1-2: Manufacturer: USB Storage
[1578380.937969] usb-storage 1-2:1.0: USB Mass Storage device detected
[1578380.938165] scsi host4: usb-storage 1-2:1.0
[1578381.981465] scsi 4:0:0:0: Direct-Access Generic STORAGE DEVICE 1404 PQ: 0 ANSI: 6
[1578381.981862] sd 4:0:0:0: Attached scsi generic sg1 type 0
[1578382.197257] sd 4:0:0:0: [sdb] Attached SCSI removable diskI am telling you all this because the order that devices are registered in is not guaranteed. Perhaps one day you have another mass storage device attached to your computer and now the special file name that you were so used to referring to your SD card is in fact referring to the one and only drive containing you precious family photos. Every single time you deploy an image to any disk, be absolutely certain that you have the correct special file name for the particular disk that you intended to completely overwrite.
It is crucial that you write the image to the correct device. When I provide the device name /dev/sdb to the pmbootstrap install command, you must remember to replace the device name with the name to your device.
Deploy to the SD card
Invoking pmbootstrap install will perform the following steps:
- PREPARE NATIVE CHROOT
- CREATE DEVICE ROOTFS (“pine64-pinephone”)
- PREPARE INSTALL BLOCKDEVICE
- FILL INSTALL BLOCKDEVICE
- FLASHING TO DEVICE
CAUTION: It is crucial that you pick the correct device name, because all existing data on the device will be removed. If you are unsure, simply remove the SD card and see if the device you think is your SD card still has one or more numbered block special file names, e.g ls /dev/sdb1/. If the numbered device names are only present while your card is inserted, then you can be confident that you have the correct device name.
Now that we know the correct device name, we can install postmarketOS + Plasma Mobile onto the SD card. I am going to tell pmbootstrap to encrypt my disk by passing the optional flag --fde which stands for full disk encryption, although it actually only encrypts the root partition leaving the boot partition unencrypted.
Despite the fact that the L in LUKS (Linux Unified Key Setup) stands for Linux, LUKS is a platform-independent on-disk encryption open standard. LUKS was a proof of concept for TKS1 (Template Key Setup 1), but by LUKS version 1.0 the specification switched to the TKS2 variant, making it easier to implement a transparent hard disk encryption subsystem. The LUKS 2.0 specification is a work in progress, but as of cryptsetup 2.1, LUKS2 has become the default format type.
Before trusting your data to LUKS, you should read the LUKS FAQ which covers some risks of using encrypted storage, how to trouble shoot issues, backup and data recovery, and a select number of security aspects. For cryptsetup usage instructions refer to CRYPTSETUP(8). As mentioned in the previous paragraph, even though LUKS2 is currently a work in progress, it is actually the default format as of cryptsetup v2.1. It is possible that your system has an older version of cryptsetup installed. It is important to know what version of the LUKS format your disk was encrypted with when reading the LUKS FAQ, which, at the time of this writing, is LUKS1 specific. If you do not wish to have the data on your disk encrypted, then simply remove the --fde optional parameter from the install command shown below. However; I recommend that you protect your privacy by encrypting your root partition as I have done.
Do not run pmbootstrap install with sudo, the command will make internal calls to sudo when necessary and you will be prompted to enter your credentials as required. If something goes wrong and you need to run the install command again, be sure to zap the chroot environments first with pmbootstrap zap.
env TEMP=~/dev/tmp/ pmbootstrap install --fde --sdcard=/dev/sdbThe install script will also prompt you to set a password for your user account. At the time of writing, the virtual keyboard that is presented to you when entering your login password on the PlasmaMobile is a number pad. That means you must enter a numeric pin for your user’s password or you will not be able to unlock the PlasmaMobile desktop. I know that is not secure, hopefully an alpha numeric virtual keyboard will be available in the future.
[13:55:22] *** (1/5) PREPARE NATIVE CHROOT ***
Password:
[13:55:37] Update package index for x86_64 (4 file(s))
[13:55:40] Download http://dl-cdn.alpinelinux.org/alpine/edge/main/x86_64/apk-tools-static-2.10.5-r1.apk
[13:55:40] (native) install alpine-base
[13:55:45] (native) install cryptsetup util-linux e2fsprogs parted dosfstools
[13:55:47] *** (2/5) CREATE DEVICE ROOTFS ("pine64-pinephone") ***
[13:55:47] Update package index for aarch64 (4 file(s))
[13:55:50] (native) install qemu-aarch64
[13:55:50] Register qemu binfmt (aarch64)
[13:55:51] (rootfs_pine64-pinephone) install alpine-base
[13:55:56] (rootfs_pine64-pinephone) install postmarketos-base device-pine64-pinephone device-pine64-pinephone-nonfree-firmware postmarketos-ui-plasma-mobile-extras ofonoctl minicom
Password:
[14:02:35] (rootfs_pine64-pinephone) write /etc/os-release
[14:02:35] (rootfs_pine64-pinephone) install
[14:02:39] (rootfs_pine64-pinephone) install
[14:02:42] (rootfs_pine64-pinephone) mkinitfs postmarketos-allwinner
[14:03:08]  *** SET LOGIN PASSWORD FOR: 'dustfinger' ***
New password:
Retype new password:
passwd: password updated successfully
If you have installed postmarketOS in the past, then you will be warned that the SD card contains an installation of postmarketOS. In that case, type y and <RET> to remove the previous installation.
[14:04:14] NOTE: No valid keymap specified for device
[14:04:16] *** (3/5) PREPARE INSTALL BLOCKDEVICE ***
[14:04:16] (native) mount /dev/install (host: /dev/sdb)
[14:04:16] WARNING: This device has a previous installation of pmOS. CONTINUE? (y/n) [n]: y
Enter a strong password for full disk encryption. Unlike when you unlock the PinePhone’s desktop, you will be provided a standard virtual keyboard for unlocking the encrypted LUKS container, so please do include upper and lower case letters as well as numbers and special symbols. You want this passphrase to be strong so that it cannot easily be cracked; however, it is recommended that you limit the character set of the passphrase to the 95 printable characters from 7-bit ASCII. The reason to limit the characters used in the passphrase is because 7-bit ASCII stays the same for all ASCII variants and UTF-8. In other words, If the system’s character encoding changes, your passphrase will stay the same so long as you follow this recommendation.
[14:13:22] (native) partition /dev/install (boot: 84M, root: the rest)
[14:13:22] WARNING: Full disk encryption is enabled!
[14:13:22] Make sure that osk-sdl has been properly configured for your device
[14:13:22] or else you will be unable to unlock the rootfs on boot!
[14:13:22] If you started a device port, it is recommended you disable
[14:13:22] FDE by re-running the install command without '--fde' until
[14:13:22] you have properly configured osk-sdl. More information:
[14:13:22] <https://postmarketos.org/osk-port>
[14:13:22] (native) format /dev/installp2 (root, luks), mount to /dev/mapper/pm_crypt
[14:13:22]  *** TYPE IN THE FULL DISK ENCRYPTION PASSWORD (TWICE!) ***
Enter passphrase for /dev/installp2:
WARNING: Locking directory /run/cryptsetup is missing!
Enter passphrase for /dev/installp2:
The warning about the missing /run/cryptsetup directory is apparently a known and benign issue. The postmarketOS PinePhone wiki Installation section links to the same Debian mailing list email, but I was not able to find anything specifically about this on the cryptsetup issues tracker.
The root file system that pmbootstrap prepared in ~/.local/var/pmbootstrap/chroot_rootfs_pine64-pinephone/ will now be deployed to the SD card.
[14:14:32] (native) format /dev/mapper/pm_crypt
[14:15:26] (native) mount /dev/mapper/pm_crypt to /mnt/install
[14:15:26] (native) format /dev/installp1 (boot, ext2), mount to /mnt/install/boot
[14:15:26] *** (4/5) FILL INSTALL BLOCKDEVICE ***
[14:15:26] (native) copy rootfs_pine64-pinephone to /mnt/install/
[14:15:34] Embed firmware u-boot/pine64-pinephone/u-boot-sunxi-with-spl.bin in the SD card image at offset 8 with step size 1024
[14:16:28] *** (5/5) FLASHING TO DEVICE ***
[14:16:28] Run the following to flash your installation to the target device:
[14:16:28] * If the above steps do not work, you can also create symlinks to the generated files with 'pmbootstrap export' and flash outside of pmbootstrap.
[14:16:28] NOTE: chroot is still active (use 'pmbootstrap shutdown' as necessary)
[14:16:28] Done
If you take a look in the working directory, you will notice that many new artifacts have been created.
ls -lah ~/.local/var/pmbootstraptotal 2.3M
drwx------ 15 dustfinger dustfinger 19 May 24 14:11 .
drwx------ 3 dustfinger dustfinger 3 May 24 11:05 ..
-rwx------ 1 dustfinger dustfinger 2.9M May 24 14:11 apk.static
drwxr-xr-x 2 root root 599 May 24 14:13 cache_apk_aarch64
drwxr-xr-x 2 root root 57 May 24 14:11 cache_apk_x86_64
drwxr-xr-x 2 root root 2 May 24 13:55 cache_ccache_aarch64
drwxr-xr-x 2 12345 12345 2 May 24 13:55 cache_ccache_x86_64
drwxr-xr-x 2 root root 2 May 24 13:55 cache_distfiles
drwx------ 2 dustfinger dustfinger 2 May 24 11:05 cache_git
drwxr-xr-x 2 dustfinger dustfinger 11 May 24 13:55 cache_http
drwxr-xr-x 4 root root 4 May 24 13:55 cache_rust
drwxr-xr-x 19 root root 19 May 24 14:11 chroot_native
drwxr-xr-x 20 root root 20 May 24 14:11 chroot_rootfs_pine64-pinephone
drwxr-xr-x 2 12345 12345 2 May 24 13:55 config_abuild
drwxr-xr-x 2 root root 10 May 24 14:11 config_apk_keys
-rw-r--r-- 1 dustfinger dustfinger 384K May 24 14:20 log.txt
drwxr-xr-x 3 root root 3 May 24 13:55 packages
-rw-r--r-- 1 dustfinger dustfinger 2 May 24 11:05 version
-rw-r--r-- 1 dustfinger dustfinger 142 May 24 14:11 workdir.cfgYou can use the pmbootstrap chroot command to enter either the chroot_native or chroot_rootfs_pine64-pinephone by passing the corresponding suffix via the optional -s parameter, e.g. pmbootstrap chroot -s rootfs_pine64-pinephone. Once you have finished looking around you should deactivate the chroot by running pmbootstrap shutdown.
pmbootstrap shutdown[14:20:51] Unregister qemu binfmt (aarch64)
[14:20:51] DoneThe deployment will have created two partitions on your SD card. Your device name might be different than mine, see Identify the block special file name
/dev/sdb    # block special device name
/dev/sdb1   # unencrypted boot partition
/dev/sdb2   # luks encrypted parition containing the operating system and your personal data
A bit about LUKS
Determine if a partition is LUKS encrypted
The pmbootstrap install command does not perform full raw disk encryption; although doing so is possible, it makes booting the device more complicated. Instead, the boot partition is left unencrypted and only the root partition is encrypted. If we try to mount the root partition directly the file-system will not be recognized.
sudo mount /dev/sdb2 /mnt/usbPassword:
mount: /mnt/usb: unknown filesystem type 'crypto_LUKS'.You can test if a device has been LUKS encrypted using the isLuks subcommand. The subcommand succeeds if it is LUKS encrypted and fails otherwise. Normally, isLuks is silent and simply returns success or failure, but by adding the -v optional flag we can make it verbose.
sudo cryptsetup isLuks -v /dev/sdb1Command failed with code -1 (wrong or missing parameters).sudo cryptsetup isLuks -v /dev/sdb2Command successful.Determine the format of a LUKS encrypted partition
The isLuks subcommand can also determine the format used in a LUKS encrypted partition via the --type optional parameter. The valid types are: plain, luks (default), luks1, luks2, loopaes or tcrypt.
sudo cryptsetup isLuks -v --type luks /dev/sdb2Command successful.sudo cryptsetup isLuks -v --type luks1 /dev/sdb2Command failed with code -1 (wrong or missing parameters).sudo cryptsetup isLuks -v --type luks2 /dev/sdb2Command successful.A quick look at a LUKS header
The LUKS format keeps metadata in the LUKS header. The LUKS header is what allows LUKS to provide features such as salting, iterated PBKDF2 passphrase hashing and, key management. The two significant downside of the LUKS header are:
- The header is visible making it obvious that the disk is encrypted with LUKS
- If the header is not backed up and becomes damaged, then the data on the disk is not recoverable unless you happen to still have the disk mounted.
It is best not to post your header publicly because it provides an attacker with one piece of the puzzle to decrypt an encrypted volume even if the header has been stripped from the volume. Of course, an attacker would still need a passphrase for one of the key slots. The luksDump subcommand can be used to send the header to standard output. This is what a LUKS2 header looks like:
sudo cryptsetup luksDump /dev/sdb2sudo cryptsetup luksDump /dev/sdb2
LUKS header information
Version: 2
Epoch: 3
Metadata area: 16384 [bytes]
Keyslots area: 16744448 [bytes]
UUID: 5c616a99-5054-40ac-958d-11e90e0b4c41
Label: (no label)
Subsystem: (no subsystem)
Flags: (no flags)
Data segments:
0: crypt
offset: 16777216 [bytes]
length: (whole device)
cipher: aes-cbc-plain64
sector: 512 [bytes]
Keyslots:
0: luks2
Key: 256 bits
Priority: normal
Cipher: aes-cbc-plain64
Cipher key: 256 bits
PBKDF: argon2i
Time cost: 4
Memory: 149551
Threads: 4
Salt: b5 a3 13 19 2a cf a9 15 23 a1 b3 df 13 46 2e 41
12 74 eb 32 74 b2 80 c3 46 01 26 92 ba 8f 3e da
AF stripes: 4000
AF hash: sha256
Area offset:32768 [bytes]
Area length:131072 [bytes]
Digest ID: 0
Tokens:
Digests:
0: pbkdf2
Hash: sha256
Iterations: 211406
Salt: 4b 72 65 ef 41 da 3b 69 af 09 51 cd 37 40 fe b3
26 0a 12 53 cc 52 02 46 78 a3 54 21 79 0e 18 b4
Digest: 66 83 25 b8 ca 9a 72 34 92 17 48 02 42 b7 8d 02
cf 3b 48 95 71 32 d5 f2 3c 86 25 67 3d fe 68 21See the LUKS 2.0 specification for details on each field in the header.
Test mounting our LUKS Encrypted Partition
In order to reveal the contents of a LUKS encrypted disk, we must call cryptsetup luksOpen subcommand, which maps the encrypted file system to a LVM logical device using the Linux device mapper. Remember that your block device name might be something other than /dev/sdb, so be sure to edit the command below with the correct device name.
sudo cryptsetup luksOpen /dev/sdb2 pinephoneEnter passphrase for /dev/sdb2:This will map the name /dev/mapper/pinephone to the LVM device.
ls -lah /dev/mapper/pinephonelrwxrwxrwx 1 root root 7 May 8 08:18 /dev/mapper/pinephone -> ../dm-2To see a full list of logical devices that use the device mapper driver you can simply run dmsetup ls
sudo dmsetup lspinephone (253:2)
crypt2 (253:1)
crypt1 (253:0)The dmsetup info command can be used to get more details about the device.
sudo dmsetup info pinephoneName: pinephone
State: ACTIVE
Read Ahead: 256
Tables present: LIVE
Open count: 0
Event number: 0
Major, minor: 253, 2
Number of targets: 1
UUID: CRYPT-LUKS2-01c8d337e5504121ba3eaba823ee5c38-pinephoneAfter the device has been decrypted, we still need to mount /dev/mapper/pinephone somewhere if we wish to interact with it using standard commands. I will just use /mnt/usb again because I am lazy ;-)
sudo mount /dev/mapper/pinephone /mnt/usb
ls -lah /mnt/usb
total 93K
drwxr-xr-x 21 root root 4.0K May 24 14:15 .
drwxr-xr-x 4 root root 5 Oct 18 2018 ..
drwxr-xr-x 2 root root 4.0K May 24 14:11 bin
drwxr-xr-x 2 root root 4.0K May 24 14:15 boot
drwxr-xr-x 2 root root 4.0K May 24 14:11 dev
drwxr-xr-x 61 root root 4.0K May 24 14:13 etc
drwxr-xr-x 3 root root 4.0K May 24 14:15 home
drwxr-xr-x 14 root root 4.0K May 24 14:11 lib
drwx------ 2 root root 16K May 24 14:15 lost+found
drwxr-xr-x 5 root root 4.0K May 24 14:11 media
drwxr-xr-x 7 root root 4.0K May 24 14:11 mnt
drwxr-xr-x 2 root root 4.0K May 24 14:11 opt
drwxr-xr-x 2 root root 4.0K May 24 14:11 proc
drwx------ 2 root root 4.0K May 24 14:11 root
drwxr-xr-x 6 root root 4.0K May 24 14:11 run
drwxr-xr-x 2 root root 4.0K May 24 14:11 sbin
drwxr-xr-x 2 root root 4.0K May 24 14:11 srv
drwxr-xr-x 2 root root 4.0K May 24 14:11 sys
drwxrwxrwt 2 root root 4.0K May 24 14:13 tmp
drwxr-xr-x 10 root root 4.0K May 24 14:11 usr
drwxr-xr-x 13 root root 4.0K May 24 14:11 varNow is a good time to copy anything over from your computer that you would like on your phone. For example, if you chose not to allow pmbootstrap to copy your SSH keys when we initialized the pmbootstrap configuration for the pinephone, now is your second chance. It is particularly valuable to copy the SSH keys over if you do not have a serial UART cable that adapts USB to a 3.5mm audio jack. Otherwise, you can wait until we get to the section on configuring x-forwarding.
Once you are finished, unmount the device and close the LUKS volume.
sudo umount /mnt/usb
sudo cryptsetup luksClose pinephone
NCurses Over Serial
I wrote an article that covers how to connect to the PinePhone via serial console using emacs serial-term. In this article we are going to be using ncurses applications which can appear garbled if unintended escape interpretation mangles byte sequences meant to be displayed as part of the the UI. I have written another article where I explain how to use SOcket CAT to relay STDIO and serial in raw mode which solves this problem. I will be using SOcket CAT to connect to the PinePhone, if you would like to use a different tool then that is fine. Otherwise, take the time now to install SOcket CAT for your distro before moving on.
Boot into postmarketOS
For this next part you will need a USB to 3.3V TTL converter that uses RS-232 for serial communication transmission and adapts to a 3.5mm audio jack. See Connect to the PinePhone over UART for some options.
With your PinePhone powered off, insert both your SIM card and your SD card into the appropriate sockets. Connect your PinePhone to your computer using your serial UART cable. You might notice a LED on the phone light red. Next, you will need to determine the attached serial port and ensure that your user has been added to the appropriate application group. Now fire up your favourite terminal emulator and run the following command, taking care to replace the serial port name appropriately.
socat -,rawer,escape=0x0f /dev/ttyUSB0,b115200,rawerPower on the PinePhone and wait for the input prompt on the phone’s display to decrypt the disk. As long as you connected to the UART serial console before powering on the phone, you should see output similar to the following in the terminal session:
DRAM: 2048 MiB
Trying to boot from MMC1
NOTICE:  BL31: v2.1(release):v3.10.0_rc3-151-ga4b61dc7d9
NOTICE:  BL31: Built : 16:21:59, Jun 12 2019
NOTICE:  BL31: Detected Allwinner A64/H64/R18 SoC (1689)
NOTICE:  BL31: Found U-Boot DTB at 0x40632d8, model: PinePhone
NOTICE:  BL31: PMIC: Detected AXP803 on RSB.


U-Boot 2020.04-rc3 (Mar 18 2020 - 13:16:10 +0000)

DRAM:  2 GiB
MMC:   Device 'mmc@1c11000': seq 1 is in use by 'mmc@1c10000'
mmc@1c0f000: 0, mmc@1c10000: 2, mmc@1c11000: 1
Loading Environment from FAT... Unable to use mmc 1:1... Hit any key to stop autoboot:  0
switch to partitions #0, OK
mmc0 is current device
Scanning mmc 0:1...
Found U-Boot script /boot.scr
949 bytes read in 1 ms (926.8 KiB/s)
## Executing script at 4fc00000
gpio: pin 98 (gpio 98) value is 1
gpio: pin 114 (gpio 114) value is 1
Booting from SD
arch=arm
baudrate=115200
board=sunxi
board_name=sunxi
boot_a_script=load ${devtype} ${devnum}:${distro_bootpart} ${scriptaddr} ${prefix}${script}; source ${scriptaddr}
boot_extlinux=sysboot ${devtype} ${devnum}:${distro_bootpart} any ${scriptaddr} ${prefix}${boot_syslinux_conf}
boot_net_usb_start=usb start
boot_prefixes=/ /boot/
boot_script_dhcp=boot.scr.uimg
boot_scripts=boot.scr.uimg boot.scr
boot_syslinux_conf=extlinux/extlinux.conf
boot_targets=fel mmc_auto usb0
bootargs=init=/init.sh rw console=tty0 console=ttyS0,115200 no_console_suspend earlycon=uart,mmio32,0x01c28000 panic=10 consoleblank=0 loglevel=1 cma=256M PMOS_NO_OUTPUT_REDIRECT pmos_boot=/dev/mmcblk0p1 pmos_root=/dev/mmcblk0p2
bootcmd=run distro_bootcmd
bootcmd_fel=if test -n ${fel_booted} && test -n ${fel_scriptaddr}; then echo '(FEL boot)'; source ${fel_scriptaddr}; fi
bootcmd_mmc0=devnum=0; run mmc_boot
bootcmd_mmc1=devnum=1; run mmc_boot
bootcmd_mmc_auto=if test ${mmc_bootdev} -eq 1; then run bootcmd_mmc1; run bootcmd_mmc0; elif test ${mmc_bootdev} -eq 0; then run bootcmd_mmc0; run bootcmd_mmc1; fi
bootcmd_usb0=devnum=0; run usb_boot
bootdelay=2
bootdev=0
bootfstype=ext4
bootm_size=0xa000000
console=ttyS0,115200
cpu=armv8
devplist=1
dfu_alt_info_ram=kernel ram 0x40080000 0x1000000;fdt ram 0x4FA00000 0x100000;ramdisk ram 0x4FE00000 0x4000000
distro_bootcmd=for target in ${boot_targets}; do run bootcmd_${target}; done
distro_bootcmd=for target in ${boot_targets}; do run bootcmd_${target}; done
ethaddr=02:ba:3a:fe:45:68
fdt_addr_r=0x4FA00000
fdtcontroladdr=bbf4ed50
fdtfile=allwinner/sun50i-a64-pinephone.dtb
fileaddr=4fc00000
filesize=3b5
kernel_addr_r=0x40080000
mmc_boot=if mmc dev ${devnum}; then devtype=mmc; run scan_dev_for_boot_part; fi
mmc_bootdev=0
partitions=name=loader1,start=8k,size=32k,uuid=${uuid_gpt_loader1};name=loader2,size=984k,uuid=${uuid_gpt_loader2};name=esp,size=128M,bootable,uuid=${uuid_gpt_esp};name=system,size=-,uuid=${uuid_gpt_system};
preboot=usb start
pxefile_addr_r=0x4FD00000
ramdisk_addr_r=0x4FE00000
scan_dev_for_boot=echo Scanning ${devtype} ${devnum}:${distro_bootpart}...; for prefix in ${boot_prefixes}; do run scan_dev_for_extlinux; run scan_dev_for_scripts; done;
scan_dev_for_boot_part=part list ${devtype} ${devnum} -bootable devplist; env exists devplist || setenv devplist 1; for distro_bootpart in ${devplist}; do if fstype ${devtype} ${devnum}:${distro_bootpart} bootfstype; then run scan_dev_for_boot; fi; done; setenv devplist
scan_dev_for_extlinux=if test -e ${devtype} ${devnum}:${distro_bootpart} ${prefix}${boot_syslinux_conf}; then echo Found ${prefix}${boot_syslinux_conf}; run boot_extlinux; echo SCRIPT FAILED: continuing...; fi
scan_dev_for_scripts=for script in ${boot_scripts}; do if test -e ${devtype} ${devnum}:${distro_bootpart} ${prefix}${script}; then echo Found U-Boot script ${prefix}${script}; run boot_a_script; echo SCRIPT FAILED: continuing...; fi; done
scriptaddr=0x4FC00000
serial#=92c002ba3afe4568
soc=sunxi
stderr=serial@1c28000
stdin=serial@1c28000
stdout=serial@1c28000
usb_boot=usb start; if usb dev ${devnum}; then devtype=usb; run scan_dev_for_boot_part; fi
uuid_gpt_esp=c12a7328-f81f-11d2-ba4b-00a0c93ec93b
uuid_gpt_system=b921b045-1df0-41c3-af44-4c6f280d3fae

Environment size: 3158/131068 bytes
Loading DTB
33835 bytes read in 4 ms (8.1 MiB/s)
Loading Initramfs
1426778 bytes read in 76 ms (17.9 MiB/s)
Loading Kernel
15601672 bytes read in 690 ms (21.6 MiB/s)
gpio: pin 115 (gpio 115) value is 1
Resizing FDT
Booting kernel
gpio: pin 116 (gpio 116) value is 1
gpio: pin 98 (gpio 98) value is 0
## Loading init Ramdisk from Legacy Image at 4fe00000 ...
   Image Name:   uInitrd
   Image Type:   AArch64 Linux RAMDisk Image (uncompressed)
   Data Size:    1426714 Bytes = 1.4 MiB
   Load Address: 00000000
   Entry Point:  00000000
   Verifying Checksum ... OK
## Flattened Device Tree blob at 4fa00000
   Booting using the fdt blob at 0x4fa00000
   Loading Ramdisk to 49ea3000, end 49fff51a ... OK
   Loading Device Tree to 0000000049e97000, end 0000000049ea2fff ... OK

Starting kernel ...

[    0.000000] Booting Linux on physical CPU 0x0000000000 [0x410fd034]
[    0.000000] Linux version 5.6.0 (pmos@build) (gcc version 9.3.0 (Alpine 9.3.0)) #2-postmarketos-allwinner SMP Mon May 11 18:30:53 UTC 2020
[    0.000000] Machine model: Pine64 PinePhone Braveheart (1.1)
[    0.000000] earlycon: uart0 at MMIO32 0x0000000001c28000 (options '')
[    0.000000] printk: bootconsole [uart0] enabled
### postmarketOS initramfs ###
Configuring kernel firmware image search path
modprobe: module sun6i_mipi_dsi not found in modules.dep
modprobe: module sun4i_drm not found in modules.dep
modprobe: module pwm_sun4i not found in modules.dep
modprobe: module sun8i_mixer not found in modules.dep
modprobe: module ext4 not found in modules.dep
modprobe: module usb_f_rndis not found in modules.dep
NOTE: Waiting 10 seconds for the framebuffer /dev/fb0.
If your device does not have a framebuffer, disable this with:
no_framebuffer=true in <https://postmarketos.org/deviceinfo>
Setting framebuffer mode to: U:720x1440p-0
Setup usb network
  /sys/class/android_usb does not exist, skipping android_usb
  Setting up an USB gadget through configfs
Starting udhcpd
  Using interface usb0
  Start the dhcpcd daemon (forks into background)
Mount boot partition (/dev/mmcblk0p1)
Extract /boot/initramfs-postmarketos-allwinner-extra
32175 blocks
The last line of output should indicate the number of blocks on the device. If your serial connection was not established before booting the PinePhone, then you will not see the output above. In that case, don’t fret and continue reading.
At this point, the initramfs is waiting for the passphrase required to unlock the encrypted root filesystem. The PinePhone screen should now be displaying an input field to enter the passphrase as well as a full virtual keyboard. Remember that you have two passwords; one is for opening the LUKS encrypted partition and the other is a simple numeric pin that is actually your postmarketOS user account password.
Enter your password for disk decryption. The initramfs will then open the LUKS encrypted file system and continue with the boot process. You will see output similar to the following in your serial console screen.
Check/repair root filesystem (/dev/mapper/root)
e2fsck 1.45.6 (20-Mar-2020)
pmOS_root: clean, 51568/3899392 files, 664293/15567360 blocks
Resize root filesystem (/dev/mapper/root)
resize2fs 1.45.6 (20-Mar-2020)
The filesystem is already 15567360 (4k) blocks long.  Nothing to do!

Mount root partition (/dev/mapper/root)
umount: can't unmount /dev: Invalid argument

   OpenRC 0.42.1.ea8a00c524 is starting up Linux 5.6.0 (aarch64)

/lib/rc/sh/init.sh: line 15: can't create /dev/null: Read-only file system
 * md5sum is missing, which suggests /usr is not mounted
 * If you have separate /usr, it must be mounted by initramfs
 * If not, you should check coreutils is installed correctly
 * Mounting /proc ... [ ok ]
 * Mounting /run ... * /run/openrc: creating directory
 * /run/lock: creating directory
 * /run/lock: correcting owner
/lib/rc/sh/gendepends.sh: line 28: can't create /dev/null: Read-only file system
 * Caching service dependencies ... [ ok ]
 * Clock skew detected with `(null)'
 * Adjusting mtime of `/run/openrc/deptree' to Sun May 24 20:11:53 2020

 * WARNING: clock skew detected!
 * Mounting devtmpfs on /dev ... [ ok ]
 * Mounting /dev/mqueue ... [ ok ]
 * Mounting /dev/pts ... [ ok ]
 * Mounting /dev/shm ... [ ok ]
 * Mount subpartitions of /dev/mmcblk0
device-mapper: reload ioctl on mmcblk0p1  failed: Resource busy
create/reload failed on mmcblk0p1
device-mapper: reload ioctl on mmcblk0p2  failed: Resource busy
create/reload failed on mmcblk0p2
 * Mount subpartitions of /dev/mmcblk2
 * Mounting /sys ... [ ok ]
 * Mounting security filesystem ... [ ok ]
 * Mounting debug filesystem ... [ ok ]
 * Mounting config filesystem ... [ ok ]
 * Mounting fuse control filesystem ... [ ok ]
 * Starting udev ... [ ok ]
 * Generating a rule to create a /dev/root symlink ... [ ok ]
 * Populating /dev with existing devices through uevents ... [ ok ]
 * WARNING: clock skew detected!
 * Loading modules ... [ ok ]
 * Setting system clock using the hardware clock [UTC] ... [ ok ]
 * Checking local filesystems  .../dev/mmcblk2p2 is in use.
e2fsck: Cannot continue, aborting.


 * Operational error
 [ !! ]
 * Remounting root filesystem read/write ... [ ok ]
 * Remounting filesystems ... [ ok ]
 * Mounting local filesystems ... [ ok ]
 * Configuring kernel parameters ...sysctl: error: 'net.ipv4.tcp_syncookies' is an unknown key
sysctl: error: 'kernel.unprivileged_bpf_disabled' is an unknown key
sysctl: error: 'kernel.sysrq' is an unknown key
 [ ok ]
 * Migrating /var/lock to /run/lock ... [ ok ]
 * Creating user login records ... [ ok ]
 * Wiping /tmp directory ... [ ok ]
 * Setting hostname ... [ ok ]
 * Starting busybox syslog ... [ ok ]
 * WARNING: clock skew detected!
 * Starting System Message Bus ... [ ok ]
 * Starting RNG Daemon ... [ ok ]
 * Starting WPA Supplicant ... [ ok ]
 * Starting networkmanager ... [ ok ]
 * Starting chronyd ... [ ok ]
 * Enabling EG25 WWAN module ... * Starting gpsd ... [ ok ]
 * /run/lightdm: creating directory
 * /run/lightdm: correcting owner
 * Starting Display Manager ... [ ok ]
 * Starting pinephone_setup-modem-audio ... * command_background option used but no pidfile specified
 [ !! ]
 * ERROR: pinephone_setup-modem-audio failed to start
 * Starting oFono ... [ ok ]
 * Starting ofono-auto-enable ... [ ok ]
ssh-keygen: generating new host keys: RSA DSA ECDSA ED25519
 * Starting sshd ... [ ok ]
 * Activating swap file ...Configured swap file size is 0, skipping creation.
 [ ok ]
 * Starting urfkill ... [ ok ]
 * Starting local ... [ ok ]

Welcome to postmarketOS
Kernel 5.6.0 on an aarch64 (/dev/ttyS0)
second-chance login:
You might notice some errors in the output. This is a work in progress and eventually those sorts of issues will be taken care of. Notice that the serial port that the login session is connected to on the device side is displayed in the welcome message above. You may now sign in by entering your user name and pin.
Welcome to postmarketOS
Kernel 5.6.0 on an aarch64 (/dev/ttyS0)
second-chance login: dustfinger
Password:
Welcome to postmarketOS!

This distribution is based on Alpine Linux.
Read both our wikis to find a large amount of how-to guides and
general information about administrating and development.
See <https://wiki.postmarketos.org> and <https://wiki.alpinelinux.org>.

You may change this message by editing /etc/motd.

second-chance:~$
Once signed in, you will probably be interested in knowing that the PostmarketOS default shell is ash (Almquist Shell). If you are familiar with bash, you should feel right at home with ash since it is essentially a light weight fork.
Resize the screen
The device side has no way of knowing the size of the terminal display. Use the stty command (see stty(1)) to print the number of rows and columns that the phone’s kernel thinks that your terminal has.
second-chance:~$ stty size52 80To set a specific number of rows and columns you can use stty rows 56 columns 192. If you are not sure the true number of rows and columns that your terminal has, you can simply run the resize (see resize(1)) command.
second-chance:~$ resizeCOLUMNS=191;LINES=56;export COLUMNS LINES;I have found that I need to run resize each time I connect over serial. Be sure to set the size again if the terminals dimensions change at any point. This could be automated, but I won’t be covering automation of screen resizing in this post.
Set the timezone, date & time
For some reason pmbootstrap did not detect the timezone of the host machine, that means I will need to set it manually. Unfortunately, I was not able to do this with the Plasma Mobile UI. The date controls seem to not be integrated yet. Thankfully, setting the timezone, date and time is straight forward to do via command line.
We can use the date command to find out what the current timezone, date and time are set to.
second-chance:~$ dateSat Apr 11 18:19:04 GMT 2020If pmbootstrap cannot determine your host’s timezone, then it will default to GMT (Greenwich Mean Time).
second-chance:~$ ls -la /etc/localtimelrwxrwxrwx 1 root root 17 Apr 12 2020 /etc/localtime -> /etc/zoneinfo/GMTTo set the timezone, we simply need to update the /etc/localtime soft link to point to the correct timezone information file in /usr/share/zoneinfo/. The timezone information file is a binary file, if you are curious about its format, refer to the tzfile(5) man page.
second-chance:~$ sudo ln -snf -T /usr/share/zoneinfo/Canada/Mountain /etc/localtime
second-chance:~$ ls -la /etc/localtime
lrwxrwxrwx 1 root root 35 Apr 11 12:35 /etc/localtime -> /usr/share/zoneinfo/Canada/MountainFinally, we can set the current date and time with the date command (see date(1)). The date command accepts a date in the following format: [MMDDhhmm[[CC]YY][.ss]]. The square brackets indicate optional date and time information. Enter the current date and time, then press <RET>.
second-chance:~$ sudo date 052506302020[sudo] password for dustfinger:
Mon May 25 06:30:00 MDT 2020Now, if you run the date command again with no parameters, the correct date, time and timezone should be displayed.
second-chance:~$ dateMon May 25 06:30:25 MDT 2020Don’t worry about getting the time set with a high degree of precision. There is chron job configured to correct time drift via NTP. See /etc/chrony/chron.conf.
What’s in the default runlevel?
This is a newly installed system that I did not fully configure myself. I would like to know what is registered with the default runlevel. PostmarketOS uses OpenRC init system, so to answer my question we can make use of the rc-update command (see rc-update(8)).
second-chance:~$ rc-update show default chronyd | default
dbus | default
eg25 | default
gpsd | default
gpsd_pinephone | default
haveged | default
lightdm | default
local | default
networkmanager | default
ofono | default
ofono-auto-enable | default
pinephone_setup-modem-audio | default
sshd | default
swapfile | default
udev-postmount | default
urfkill | default
wpa_supplicant | defaultI do not have an immediate need for the ssh daemon (sshd), so I am going to delete that from the default runlevel. Otherwise, I am happy with what is currently registered.
second-chance:~$ sudo rc-update del sshd defaultWe trust you have received the usual lecture from the local System
Administrator. It usually boils down to these three things:
#1) Respect the privacy of others.
#2) Think before you type.
#3) With great power comes great responsibility.
[sudo] password for dustfinger:
* service sshd removed from runlevel defaultThe daemon will remain running until I reboot the system or explicitly stop the service. There is no sense in leaving it running.
second-chance:~$ sudo rc-service sshd stop* Stopping sshd ... [ ok ]Improve our getty configuration
In order to have a modern terminal experience over the serial connection, we need to modify the terminal capabilities of the TTY at the login prompt. To accomplish that, we first need to select a Terminfo (see terminfo(5), Intro to Terminfo) which meets our requirements.
To see the currently selected Terminfo output the value of the TERM environment variable:
second-chance:~$ echo $TERMvt100The getty command that opens the login TTY with the vt100 Terminfo is located in /etc/inittab/.
second-chance:~$ grep -iE 'ttyS0.*vt100' /etc/inittabttyS0::respawn:/sbin/getty -L ttyS0 115200 vt100Here is the full list of valid Terminfo names supported by the PinePhone:
second-chance:~$ ls -lh /etc/terminfo/**/*-rw-r--r-- 1 root root 3.5K May 24 2020 /etc/terminfo/a/alacritty
-rw-r--r-- 1 root root 1.4K May 24 2020 /etc/terminfo/a/ansi
-rw-r--r-- 1 root root 308 May 24 2020 /etc/terminfo/d/dumb
-rw-r--r-- 1 root root 3.0K May 24 2020 /etc/terminfo/g/gnome
-rw-r--r-- 1 root root 3.2K May 24 2020 /etc/terminfo/g/gnome-256color
-rw-r--r-- 1 root root 2.8K May 24 2020 /etc/terminfo/k/kitty
-rw-r--r-- 1 root root 3.1K May 24 2020 /etc/terminfo/k/konsole
-rw-r--r-- 1 root root 3.2K May 24 2020 /etc/terminfo/k/konsole-256color
-rw-r--r-- 1 root root 1.8K May 24 2020 /etc/terminfo/k/konsole-linux
-rw-r--r-- 1 root root 1.7K May 24 2020 /etc/terminfo/l/linux
-rw-r--r-- 1 root root 2.1K May 24 2020 /etc/terminfo/p/putty
-rw-r--r-- 1 root root 2.2K May 24 2020 /etc/terminfo/p/putty-256color
-rw-r--r-- 1 root root 2.2K May 24 2020 /etc/terminfo/r/rxvt
-rw-r--r-- 1 root root 2.4K May 24 2020 /etc/terminfo/r/rxvt-256color
-rw-r--r-- 1 root root 1.5K May 24 2020 /etc/terminfo/s/screen
-rw-r--r-- 1 root root 1.7K May 24 2020 /etc/terminfo/s/screen-256color
-rw-r--r-- 1 root root 2.3K May 24 2020 /etc/terminfo/s/st-0.6
-rw-r--r-- 1 root root 2.6K May 24 2020 /etc/terminfo/s/st-0.7
-rw-r--r-- 1 root root 2.5K May 24 2020 /etc/terminfo/s/st-0.8
-rw-r--r-- 1 root root 2.7K May 24 2020 /etc/terminfo/s/st-16color
-rw-r--r-- 1 root root 2.6K May 24 2020 /etc/terminfo/s/st-256color
-rw-r--r-- 1 root root 2.6K May 24 2020 /etc/terminfo/s/st-direct
-rw-r--r-- 1 root root 1004 May 24 2020 /etc/terminfo/s/sun
-rw-r--r-- 1 root root 1.7K May 24 2020 /etc/terminfo/t/terminator
-rw-r--r-- 1 root root 3.0K May 24 2020 /etc/terminfo/t/terminology
-rw-r--r-- 1 root root 2.3K May 24 2020 /etc/terminfo/t/terminology-0.6.1
-rw-r--r-- 1 root root 3.0K May 24 2020 /etc/terminfo/t/terminology-1.0.0
-rw-r--r-- 1 root root 3.0K May 24 2020 /etc/terminfo/t/tmux
-rw-r--r-- 1 root root 3.1K May 24 2020 /etc/terminfo/t/tmux-256color
-rw-r--r-- 1 root root 1.2K May 24 2020 /etc/terminfo/v/vt100
-rw-r--r-- 1 root root 1.2K May 24 2020 /etc/terminfo/v/vt102
-rw-r--r-- 2 root root 1.3K May 24 2020 /etc/terminfo/v/vt200
-rw-r--r-- 2 root root 1.3K May 24 2020 /etc/terminfo/v/vt220
-rw-r--r-- 1 root root 839 May 24 2020 /etc/terminfo/v/vt52
-rw-r--r-- 1 root root 3.2K May 24 2020 /etc/terminfo/v/vte
-rw-r--r-- 1 root root 3.4K May 24 2020 /etc/terminfo/v/vte-256color
-rw-r--r-- 1 root root 3.6K May 24 2020 /etc/terminfo/x/xterm
-rw-r--r-- 1 root root 3.7K May 24 2020 /etc/terminfo/x/xterm-256color
-rw-r--r-- 1 root root 1.5K May 24 2020 /etc/terminfo/x/xterm-color
-rw-r--r-- 1 root root 2.2K May 24 2020 /etc/terminfo/x/xterm-xfree86It is important that you set a Terminfo that is compatible with the terminal emulator that you will be using when connecting to the PinePhone over serial. Since I am running xterm, one of the names under /etc/terminfo/x/ would be appropriate, but what if one day I need to login using tmux? That is why vt100 was chosen, it is compatible with a large variety of terminal emulators. A more modern, and reasonably safe, alternative is /etc/terminfo/l/linux and is another common default for getty over serial. I recommend testing a few of them out to help you make the best decision. To do that, you can set the TERM environment variable for the lifetime of a single command using env. To put our terminfo of choice to the test, we can use the nmtui command. First run nmtui without modifying the Terminfo so that you have a basis by which to compare, then try out a few reasonable options.
env TERM=linux nmtuiChoosing an incompatible Terminfo when running nmtui may result in problems ranging from unexpected behaviour, to a completely garbled and totally unusable ncurses UI. If you run into problems, remember that you can send a SIGINT to nmtui that will cause it to exit and return control to the command line prompt. Exactly how you send the SIGINT will depend on how you established your serial connection in the first place. Assuming that you followed along and ran the same socat command that I did, then you can send a SIGINT by pressing ESC ESC.
Some of the issues that you might run into may be subtle. For example, linux, xterm, xterm-color and xterm-xfree86 Terminfo generally all worked well during my testing, but the first screen of nmtui was always drawn twice. I even notice some artifacts while the screen is being rendered when using xterm-color. However; xterm-256color renders the screen only once and seems much faster to navigate. The fastest Terminfo by far is vt100, but it lacks color which is nice for screen shots ;-)
Once you have made your decision, use vi to edit /etc/inittab and locate the getty command which opens /dev/ttyS0.
sudo vi /etc/inittabReplace vt100 in that command with your chosen Terminfo. Or, if you are feeling confident, you can simply use sed (see sed(1)). A backup will be saved to /etc/inittab.bk.
second-chance:~$ sed -i 's/ttyS0 115200 vt100/ttyS0 115200 xterm-256color/' /etc/inittabOn your next reboot the Terminfo for the login session will be as you set it. I would rather not reboot now though, so let’s change our Terminfo for the current session by exporting a new value for the TERM environment variable.
export TERM=xterm-256colorConfiguring Wifi
PostmarketOS uses the NetworkManager daemon for configuring network interfaces. A simple way to configure the PinePhone’s wireless network interface is to use the Network Manager Text-based User Interface command named nmtui. I will be walking through one possible configuration for setting up Wi-Fi, but your local area network might require that you choose different configuration options other than the ones shown here. Please keep that in mind if you are following along, and choose the options that make the most sense for your local environment.
Before we get started, we need to determine the name of the wireless interface. We can do that by using the find command (see find(1)) to search for a directory named wireless under /sys/class/net/.
second-chance:~$ sudo find -L /sys/class/net/ -maxdepth 2 -type d -name 'wireless'/sys/class/net/wlan0/wirelessWe can see that there is one wireless network interface named wlan0. Now we can use the ip CLI (see ip(8)) to show us some information about the interface.
second-chance:~$ ip addr show wlan03: wlan0: <NO-CARRIER,BROADCAST,MULTICAST,UP> mtu 1500 qdisc mq state DOWN qlen 1000
link/ether bf:72:de:21:38:51 brd ff:ff:ff:ff:ff:ffThe wireless interface is currently down. Now we are ready to configure a new network connection for the wireless interface.
second-chance:~$ nmtui edit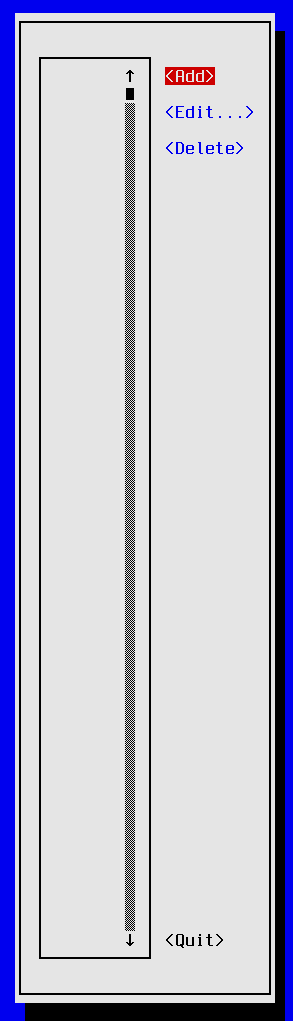
The network configuration edit menu appears displaying a list of configured network connections. If this is your first time configuring a network connection, then the selection list will be empty as shown in the screen shot above. Press <TAB> so that the <Add> button is highlighted, then hit enter.

The New Connection menu appears. Select Wi-Fi from the list of connection types and then press <TAB> until the <Create> navigation control is highlighted, then press <RET>.

Now that the type of connection has been decided we have arrived at the Edit Connection dialog. I will walk through filling out a possible valid configuration. Enter the following fields:
Profile name: Hidden SSID
Device: wlan0
SSID: HiddenSSID
Mode: <Client>
Security: WPA & WPA2 Personal
Password: <YOUR PASSWORD>
BSSID: f2:33:7c:80:ba:d1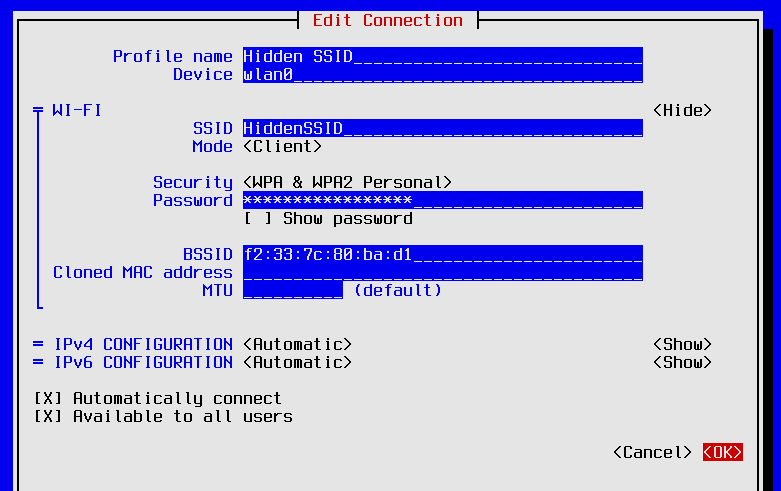
This is a simple configuration, I left all fields not explicitly mentioned to their default values. However; I recommend that you review all the configuration options available and choose the most secure settings that your router is capable of providing. Once you are happy with your choices, press <TAB> until the <OK> navigation control is highlighted and hit <RET>.
Look at the display on your phone. If the screen has locked, you will need to enter your pin in order to unlock it. The display should be showing a dialog prompting you to set a password for the KDE wallet. I entered a strong password and pressed the OK button. Do not choose the same password that you used for encrypting the root file system. It should also go without saying that you should not use the same password as your user’s PIN.
Now draw your attention back to your serial console session.
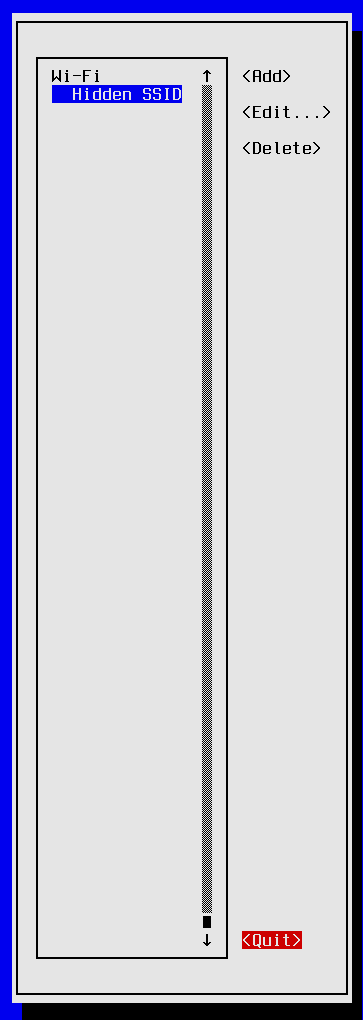
The UI should be back at the screen for selecting a network connection. The network selection box is no longer empty, it contains a single Wi-Fi connection with the profile name Hidden SSID. Hit the <TAB> key until <Quit> is highlighted, then press <RET> to exit nmtui.
The configuration is saved to /etc/NetworkManager/system-connection/.
From the console, use the nmcli to see the connection.
second-chance:~$ nmcli connection show
NAME         UUID                                  TYPE  DEVICE
Hidden SSID  b6e9fa71-9828-4912-9d8c-456be04e2a11  wifi  --
Use the nmcli con up command to start the Wi-Fi connection.
second-chance:~$ nmcli con up Hidden\ SSIDConnection successfully activated (D-Bus active path: /org/freedesktop/NetworkManager/ActiveConnection/1)If everything worked as intended, the wlan0 interface should now have an IP address.
second-chance:~$ ip addr show wlan05: wlan0: <BROADCAST,MULTICAST,UP,LOWER_UP> mtu 1500 qdisc mq state UP qlen 1000
link/ether 08:c1:de:23:02:10 brd ff:ff:ff:ff:ff:ff
inet 192.168.1.102/24 brd 192.168.1.255 scope global dynamic wlan0
valid_lft 43065sec preferred_lft 43065sec
inet6 efbd:3669:1d6c::ddf/128 scope global
valid_lft forever preferred_lft forever
inet6 efbd:3669:1d6c:0:7858:df42:e675:c583/64 scope global secondary dynamic
valid_lft 604662sec preferred_lft 86254sec
inet6 efbd:3669:1d6c:0:40c5:90e8:8190:64e8/64 scope global
valid_lft forever preferred_lft forever
inet6 ed63::28bc:a402:2d51:11d/64 scope link
valid_lft forever preferred_lft foreverTry pinging a domain on the internet that you know responds to ICMP echo requests.
second-chance:~$ ping bloggerbust.ca -c 3PING bloggerbust.ca (185.199.111.153): 56 data bytes
64 bytes from 185.199.111.153: seq=0 ttl=42 time=27.402 ms
64 bytes from 185.199.111.153: seq=1 ttl=42 time=28.191 ms
64 bytes from 185.199.111.153: seq=2 ttl=42 time=27.031 ms
--- bloggerbust.ca ping statistics ---
3 packets transmitted, 3 packets received, 0% packet loss
round-trip min/avg/max = 27.031/27.541/28.191 msYou should now be able to enable and disable Wi-Fi using the Quick Settings Tray.
NTP time syncing
Before continuing, please check the ntp security notice page for news about recent vulnerabilities and mitigation’s. NTP is already configured.
second-chance:~$ cat /etc/conf.d/ntpd# By default ntpd runs as a client. Add -l to run as a server on port 123.
NTPD_OPTS="-N -p pool.ntp.org"The chronyd is configured to monitor drift and perform the sync when necessary.
cat /etc/chrony/chrony.conf# default config
pool pool.ntp.org iburst
#initstepslew 10 pool.ntp.org
driftfile /var/lib/chrony/chrony.drift
rtcsync
cmdport 0
makestep 1 -1So if there is nothing to do, then why did I include a section on NTP at all? Well, as you have been made aware, NTP has known vulnerabilities. These vulnerabilities can be mitigated, but I felt it was important to raise awareness about the issue. Now that you are aware that there are issues, perhaps you will want to handle NTP differently over Tor. Consider the possibility of somehow using time skew corrections to deanonymize unsuspecting travellers on the Tor network; perhaps through some sort of fuzzy fingerprinting technique. That is all speculation of course, this is a subject matter that I have much to learn about. At any rate, it is never a waste of time to learn more about how your system is configured, especially when that system is societies primary form of communication.
See also Tails Time syncing.
Update APK Index
You are probably aware that postmarketOS is based on Alpine Linux. The package management tool for Alpine Linux is called apk. Now that we have an network connection, it is a good time to update the index of available packages. You need to run the apk update command at least once, before you can use any of the sub commands that rely on the index. This is what you will see if you try to run apk info prior to downloading the index.
second-chance:~$ apk info viWARNING: Ignoring APKINDEX.3f9c67ba.tar.gz: No such file or directory
WARNING: Ignoring APKINDEX.066df28d.tar.gz: No such file or directory
WARNING: Ignoring APKINDEX.b53994b4.tar.gz: No such file or directory
WARNING: Ignoring APKINDEX.30e6f5af.tar.gz: No such file or directoryLet’s update the index by running apk update
second-chance:~$ sudo apk updatefetch http://postmarketos1.brixit.nl/postmarketos/master/aarch64/APKINDEX.tar.gz
fetch http://dl-cdn.alpinelinux.org/alpine/edge/main/aarch64/APKINDEX.tar.gz
fetch http://dl-cdn.alpinelinux.org/alpine/edge/community/aarch64/APKINDEX.tar.gz
fetch http://dl-cdn.alpinelinux.org/alpine/edge/testing/aarch64/APKINDEX.tar.gz
2020-04-20 02:19:35.767440 [http://postmarketos1.brixit.nl/postmarketos/master]
v20200319-2692-g0c35cac407 [http://dl-cdn.alpinelinux.org/alpine/edge/main]
v20200319-2699-gfec8fe13ff [http://dl-cdn.alpinelinux.org/alpine/edge/community]
v20200319-2697-g856e44244b [http://dl-cdn.alpinelinux.org/alpine/edge/testing]
OK: 16469 distinct packages availableConfigure Logging
Alpine Linux default logger is busybox syslog. You can find the log configuration at /etc/conf.d/syslog. Run syslogd --help for configuration options. Busybox syslog is simple to configure, but I prefer a logging facility that is more customizable. Syslog-ng is also easy to configure, and it offers the ability to direct logging to appropriately named files which will keep your logs organized and make it easier to find what you are looking for. Perhaps the same is possible with syslogd, but it wasn’t immediately clear to me how to do that.
To install syslog-ng run:
second-chance:~$ sudo apk add syslog-ng(1/3) Installing ivykis (0.42.4-r0)
(2/3) Installing syslog-ng (3.27.1-r0)
Executing syslog-ng-3.27.1-r0.post-install
(3/3) Installing syslog-ng-openrc (3.27.1-r0)
Executing busybox-1.31.1-r16.trigger
Executing postmarketos-base-3-r34.trigger
Configuring a getty on port ttyS0 with baud rate 115200
OK: 1358 MiB in 597 packagesYou can find the configuration for syslog-ng in /etc/syslog-ng/syslog-ng.conf, but I think the default configuration is quite good, so I am going to leave it as is.
Delete syslog from the boot runlevel.
second-chance:~$ sudo rc-update del syslog boot* service syslog removed from runlevel bootStop the syslog daemon.
second-chance:~$ sudo rc-service syslog stop* Caching service dependencies ... [ ok ]
* Stopping busybox syslog ...Add syslog-ng to the boot runlevel.
second-chance:~$ sudo rc-update add syslog-ng boot* service syslog-ng added to runlevel bootStart the syslog-ng daemon.
second-chance:~$ sudo rc-service syslog-ng start* Starting syslog-ng ...You should start to see more log files showing up in /var/log.
second-chance:~$ ls -lah /var/log/total 44K
drwxr-xr-x 4 root root 4.0K May 27 06:23 .
drwxr-xr-x 12 root root 4.0K Dec 31 1969 ..
-rw-r--r-- 1 root root 0 May 27 05:53 auth.log
drwxr-sr-x 2 chrony chrony 4.0K May 24 14:11 chrony
-rw-r----- 1 root root 22.8K May 26 03:43 dmesg
-rw-r--r-- 1 root root 0 May 27 05:53 error.log
-rw-r--r-- 1 root root 0 May 27 05:53 kern.log
drwx--x--x 2 root root 4.0K May 26 03:43 lightdm
-rw-r--r-- 1 root root 0 May 27 05:53 mail.log
-rw-r----- 1 root adm 84 May 27 06:23 messages
-rw-rw-r-- 1 root utmp 0 Dec 31 1969 wtmpUpgrade to latest repository
You do not need to re-deploy with pmbootstrap to keep your system up to date with the latest repositories. Instead, on a daily basis, update the APK index and run apk upgrade.
second-chance:~$ sudo apk upgrade(1/11) Upgrading libgcc (9.3.0-r1 -> 9.3.0-r2)
(2/11) Upgrading libstdc++ (9.3.0-r1 -> 9.3.0-r2)
(3/11) Upgrading poppler-qt5 (0.88.0-r0 -> 0.88.0-r1)
(4/11) Upgrading okular-common (20.04.0-r0 -> 20.04.1-r0)
(5/11) Upgrading okular-mobile (20.04.0-r0 -> 20.04.1-r0)
(6/11) Upgrading kirigami-gallery (20.04.0-r0 -> 20.04.1-r0)
(7/11) Upgrading libgomp (9.3.0-r1 -> 9.3.0-r2)
(8/11) Upgrading ktp-common-internals (20.04.0-r0 -> 20.04.1-r0)
(9/11) Upgrading akonadi (20.04.0-r0 -> 20.04.1-r0)
(10/11) Upgrading kmime (20.04.0-r0 -> 20.04.1-r0)
(11/11) Upgrading akonadi-contacts (20.04.0-r0 -> 20.04.1-r0)
Executing busybox-1.31.1-r15.trigger
Executing postmarketos-base-3-r33.trigger
Configuring a getty on port ttyS0 with baud rate 115200
Executing shared-mime-info-1.15-r0.trigger
Executing gtk-update-icon-cache-2.24.32-r1.trigger
OK: 1352 MiB in 591 packagesHowever; apk upgrade will not update U-Boot. I might cover updating U-Boot in a future post.
Configure x-forwarding
Before we begin, I should mention that X-forwarding poses a security risk to the client side. That said, there might be times when you would like to use a GUI app on your mobile phone, but the GUI wasn’t designed for touch screens. For example, perhaps you would like to explore a dbus interface using dFeet. Unfortunately dFeet does not have a CLI and is not mobile friendly. In such cases, I will start sshd on the PinePhone and use x-forwarding to my development box. Once I am finished, I always shut down sshd. No sense in leaving it running since I have serial.
First, let’s configure the server side (PinePhone) by editing /etc/ssh/sshd_config (see sshd_config(5)).
sudo vi /etc/ssh/sshd_configPage down to the bottom of the file and add the following conditional block which will override the system wide X11Forwarding and X11UseLocalhost settings for your user.
Match User dustfinger
  X11Forwarding yes
  X11UseLocalhost yes
Start the SSH daemon.
second-chance:~$ sudo rc-service sshd start* Starting sshd ... [ ok ]If it is was already started, then you will have to restart it for the changes to take effect. Back on the client side, generate a new RSA key.
mkdir -p ~/.ssh
ssh-keygen -f ~/.ssh/id_second-chance_rsa
Generating public/private rsa key pair.
Enter passphrase (empty for no passphrase):
Enter same passphrase again:
Your identification has been saved in /home/dustfinger/.ssh/id_second-chance_rsa.
Your public key has been saved in /home/dustfinger/.ssh/id_second-chance_rsa.pub.
The key fingerprint is:
SHA256:3KcVsaPW0FxMatRMkX+/JKN21OPItaxi5P1wZBRliGo dustfinger@galactica
The key's randomart image is:
+---[RSA 3072]----+
| oB==+|
| +.=*..|
| ..O o |
| . .E= o. o|
| S.+ + .oo|
| . = +o=.|
| + =.O.+|
| * =o= |
| o o.o. |
+----[SHA256]-----+Edit $HOME/.ssh/config (see ssh_config(5)) creating a new file if it does not already exist. Add the following host specific configuration. Replace second-chance with the host name or IP address of your PinePhone.
host second-chance
     Hostname second-chance
     ForwardAgent yes
     ForwardX11 yes
     # ForwardX11Trusted yes
     IdentityFile ~/.ssh/id_second-chance_rsa
     User dustfinger
I commented out ForwardX11Trusted yes on purpose. Only set ForwardX11Trusted yes if you fully trust the server, i.e. your PinePhone. You may choose to leave that option commented out and instead pass -Y optional flag only when you require x-forwarding and untrusted X11 forwarding fails. For the purposes of this post I have uncommented that option for my own convenience.
Copy ssh id to remote authorized keys (see ssh-copy-id(1)).
ssh-copy-id -i ~/.ssh/id_second-chance_rsa.pub dustfinger@second-chance/usr/bin/ssh-copy-id: INFO: Source of key(s) to be installed: "/home/dustfinger/.ssh/id_second-chance_rsa.pub"
/usr/bin/ssh-copy-id: INFO: attempting to log in with the new key(s), to filter out any that are already installed
/usr/bin/ssh-copy-id: INFO: 1 key(s) remain to be installed -- if you are prompted now it is to install the new keys
dustfinger@second-chance's password:
Number of key(s) added: 1
Now try logging into the machine, with: "ssh 'dustfinger@second-chance'"
and check to make sure that only the key(s) you wanted were added.As long as you don’t see any warnings, such as Warning: untrusted X11 forwarding setup failed: xauth key data not generated, your SSH requests should have access to the display. You can test this by running seeing if the $DISPLAY variable is set.
ssh dustfinger@second-chance 'echo $DISPLAY'localhost:10.0Set a theme
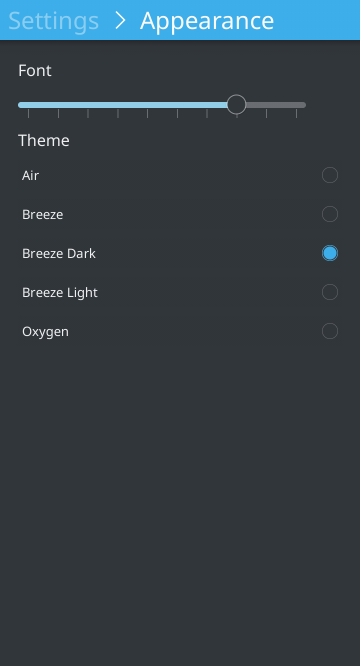
Early in my career, I spent many long days staring at CRT monitors. CRT monitors flicker each time the screen refreshes. Over time, the constant flickering began to affect my vision. Eventually, the whole world seemed to flicker. I found that dark themed applications reduced the effect that the flickering was having on my eyes. After that experience, I have been using dark themes whenever possible to reduce the amount of light that my eyes are subjected to on a daily basis. Modern flat screen monitors do not have a noticeable flicker. I now prefer dark themes for their aesthetic and light reducing affect. To enable a dark theme on Plasma Mobile:
Navigate to Settings and select Appearance
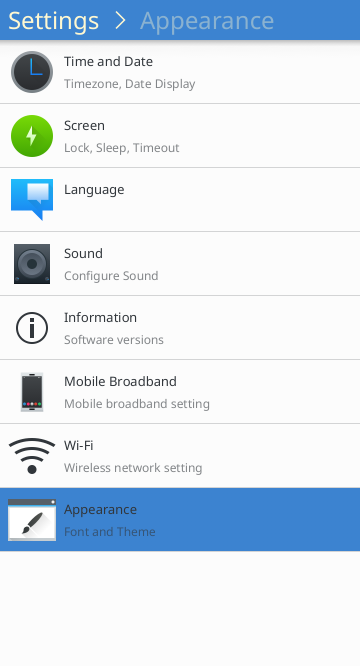
select Breeze Dark, or whatever suits you
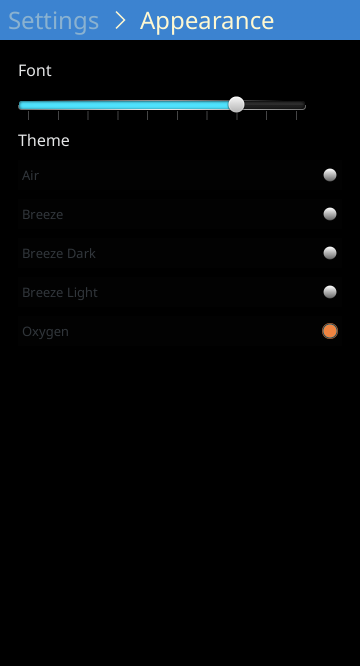
I quite like Oxygen as well:
How to take a screen shot
You might be wondering how I was able to take those screen shots when setting a theme. The quick settings tray contains a screen shot action item. To invoke it, swipe downwards from the top of the display and touch the icon labelled Screenshot.
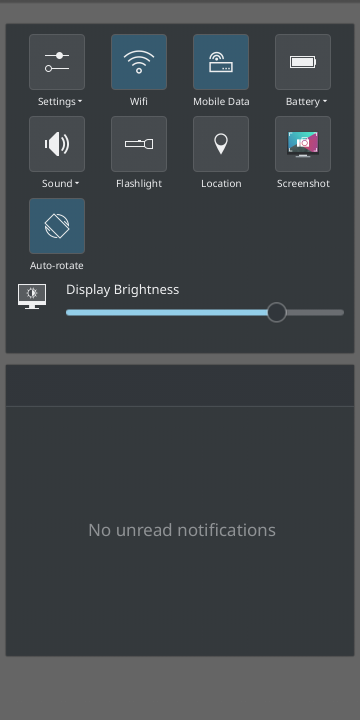
Unfortunately, the screen shot action item only captures a portion of the display. This will be fixed in a future update, but in the meantime I wanted another solution. I wanted to be able to take screen shots from a serial or SSH connection. The postmarketOS Plasma Mobile wiki page has a section on taking screenshots using qdbus. That sounded perfect to me. Their example uses the org.kde.KWin DBus service, but unfortunately qdbus couldn’t find it on the session bus. In fact, I didn’t have access to a session bus at all.
second-chance:~$ qdbus org.kde.KWinCould not connect to D-Bus server: org.freedesktop.DBus.Error.NotSupported: Unable to autolaunch a dbus-daemon without a $DISPLAY for X11Looking above the Taking screenshots heading, I noticed a section on running apps from an SSH session where they recommend exporting all of the environment variables available to the plasmashell process. After researching this a bit further, I discovered that having an environment setup similar to plasmashell is necessary for running many applications. So I decided to try it out.
second-chance:~$ export $(cat /proc/`pidof plasmashell`/environ | tr '\0' '\n')Unfortunately, the first time I tried to take a screen shot using org.kde.kwin.Screenshot.screenshotArea the request timed out waiting for a response.
second-chance:~$qdbus org.kde.KWin /Screenshot org.kde.kwin.Screenshot.screenshotArea 0 0 1440 720Error: org.freedesktop.DBus.Error.NoReply
Did not receive a reply. Possible causes include: the remote application did not send a reply, the message bus security policy blocked the reply, the reply timeout expired, or the network connection was brokenSubsequent attempts at taking a screenshot would result in an error complaining that one was already being taken.
second-chance:~$qdbus org.kde.KWin /Screenshot org.kde.kwin.Screenshot.screenshotArea 0 0 1440 720Error: org.kde.kwin.Screenshot.Error.AlreadyTaking
A screenshot is already been takenI am sure that there is a way to recover gracefully from that state, but I simply rebooted. How then was I able to take screen shots you ask? By exporting only the DBUS_SESSION_BUS_ADDRESS from the plasmashell environment, I gained access to that session bus.
second-chance:~$ export $(cat /proc/`pidof plasmashell`/environ | tr '\0' '\n' | grep -i dbus_session_bus_address)
second-chance:~$ qdbus
:1.1
org.freedesktop.ScreenSaver
org.kde.KWin
org.kde.kglobalaccel
org.kde.screensaver
:1.10
org.kde.GtkConfig
org.kde.StatusNotifierWatcher
org.kde.kappmenu
org.kde.kcookiejar5
org.kde.kded5
org.kde.kscreen.osdService
org.kde.plasmanetworkmanagement
:1.11
org.kde.ksmserver
:1.12
org.kde.baloo
:1.13
:1.14
:1.15
org.freedesktop.Notifications
org.kde.JobViewServer
org.kde.StatusNotifierHost-2905
org.kde.kuiserver
org.kde.plasmashell
:1.16
org.kde.calindac
:1.17
org.kde.polkit-kde-authentication-agent-1
:1.18
local.org_kde_powerdevil
org.freedesktop.PowerManagement
org.freedesktop.PowerManagement.Inhibit
org.kde.Solid.PowerManagement
org.kde.Solid.PowerManagement.PolicyAgent
:1.19
org.kde.ActivityManager
:1.20
org.PulseAudio1
org.pulseaudio.Server
:1.3
:1.31
:1.35
:1.36
:1.6
:1.8
org.kde.klauncher5
org.freedesktop.DBusThen I simply called the org.kde.kwin.Screenshot.interactive method, as opposed to org.kde.kwin.Screenshot.screenshotArea, which prompted me to select the window that I would like to take a screen shot of.
second-chance:~$ qdbus org.kde.KWin /Screenshot org.kde.kwin.Screenshot.interactive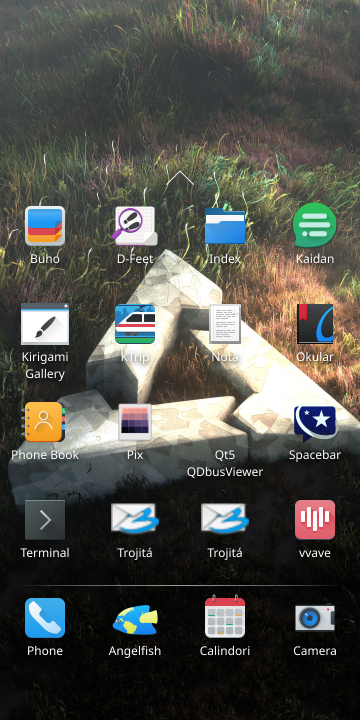
In this example I simply touched the desktop. Since the desktop window is separate from both the header and footer, the resulting image does not include features such as mobile signal strength and the current time. If you figure out how to take a full screen capture please comment and let us know the details. I have also tried org.kde.kwin.Screenshot.screenshotFullscreen, but at the time of this writing that only captured a portion of the display.
Audio configuration
The ALSA (Advanced Linux Sound Architecture) package can be installed to provide sound support for postmarketOS. The package includes a large number of drivers and various tools, such as the venerable alsamixer. To learn more about ALSA, checkout the ALSA project homepage. Also, be sure to check out the Independent ALSA and Linux audio support site.
second-chance:~$ sudo apk add alsa-utils(1/4) Installing dialog (1.3.20200327-r0)
(2/4) Installing fftw-single-libs (3.3.8-r0)
(3/4) Installing alsa-utils (1.2.2-r0)
(4/4) Installing alsa-utils-openrc (1.2.2-r0)
Executing busybox-1.31.1-r14.trigger
Executing eudev-3.2.9-r3.trigger
Executing postmarketos-base-3-r33.trigger
Configuring a getty on port ttyS0 with baud rate 115200
OK: 1697 MiB in 578 packagesInspect which groups both root and your user belong to.
second-chance:~$ groupsdustfinger wheel audio input video netdev plugdevsecond-chance:~$ groups rootroot bin daemon sys adm disk wheel floppy dialout tape videoBoth of these users should be a member of the audio group.
second-chance:~$ sudo usermod -aG audio $USER
second-chance:~$ sudo usermod -aG audio root
Start the alsa daemon.
second-chance:~$ sudo rc-service alsa start[sudo] password for dustfinger:
* Restoring Mixer Levels ...
* No mixer config in /var/lib/alsa/asound.state, you have to unmute your card!
[ ok ]From the output above it looks like we have to unmute the Master simple control. Once we have done that, we will be able to use the PinePhone’s volume button to adjust the volume. However, I thought I would quickly cover the basics of how to use amixer since we are touching on it anyway. For more information on usage, see the Amixer wiki page.
To display general mixer information use the amixer info sub command.
second-chance:~$ amixer infoCard default 'pulse'/'PulseAudio'
Mixer name : 'PulseAudio'
Components : ''
Controls : 4
Simple ctrls : 2You can see that there are 2 simple controls and 4 not-so-simple controls :-P. If you would like to know the complete list of valid simple control names that can be used with the sset and sget subcommand, simply run amixer scontrols.
second-chance:~$ amixer scontrolsSimple mixer control 'Master',0
Simple mixer control 'Capture',0To display the complete list of valid control identifiers that can be used with the cset and cget subcommands, run amixer controls.
second-chance:~$ amixer controlsnumid=4,iface=MIXER,name='Master Playback Switch'
numid=3,iface=MIXER,name='Master Playback Volume'
numid=2,iface=MIXER,name='Capture Switch'
numid=1,iface=MIXER,name='Capture Volume'For example, if we wanted to use cget to display information about the Master Playback Volume, we can pass it the key name and the value ‘Master Playback Volume’
second-chance:~$ amixer cget name='Master Playback Volume'numid=3,iface=MIXER,name='Master Playback Volume'
; type=INTEGER,access=rw------,values=2,min=0,max=65536,step=1
: values=58982,58982To display an overview of the configuration, use the amixser scontents.
second-chance:~$ amixer scontentsSimple mixer control 'Master',0
Capabilities: pvolume pswitch pswitch-joined
Playback channels: Front Left - Front Right
Limits: Playback 0 - 65536
Mono:
Front Left: Playback 58982 [90%] [off]
Front Right: Playback 58982 [90%] [off]
Simple mixer control 'Capture',0
Capabilities: cvolume cswitch cswitch-joined
Capture channels: Front Left - Front Right
Limits: Capture 0 - 65536
Front Left: Capture 65536 [100%] [on]
Front Right: Capture 65536 [100%] [on]In the above output, you might notice that the Master control is indicated as being off. When you see [off] that means it is muted. Your master control was probably unmuted automatically when you started the alsa daemon, but I will show you how to unmute the master control just in case. To turn the Master control on, simply unmute it with the following command:
second-chance:~$ amixer sset Master unmuteSimple mixer control 'Master',0
Capabilities: pvolume pswitch pswitch-joined
Playback channels: Front Left - Front Right
Limits: Playback 0 - 65536
Mono:
Front Left: Playback 58982 [90%] [on]
Front Right: Playback 58982 [90%] [on]Try playing with the PinePhone’s volume control to increase or decrease the volume, then output the configuration again and observe that the volume percentage has changed accordingly.
second-chance:~$ amixer scontentsSimple mixer control 'Master',0
Capabilities: pvolume pswitch pswitch-joined
Playback channels: Front Left - Front Right
Limits: Playback 0 - 65536
Mono:
Front Left: Playback 36043 [55%] [on]
Front Right: Playback 36043 [55%] [on]
Simple mixer control 'Capture',0
Capabilities: cvolume cswitch cswitch-joined
Capture channels: Front Left - Front Right
Limits: Capture 0 - 65536
Front Left: Capture 65536 [100%] [on]
Front Right: Capture 65536 [100%] [on]From the output above we can see that my volume is now at 55%. To test the sound we can run the speaker-test command. The -l optional parameter controls the number of loops. See speaker-test(1) for more information.
second-chance:~$ speaker-test -c2 -l 1speaker-test 1.2.2
Playback device is default
Stream parameters are 48000Hz, S16_LE, 2 channels
Using 16 octaves of pink noise
Rate set to 48000Hz (requested 48000Hz)
Buffer size range from 96 to 1048576
Period size range from 32 to 349526
Using max buffer size 1048576
Periods = 4
was set period_size = 262144
was set buffer_size = 1048576
0 - Front Left
1 - Front Right
Time per period = 11.079789Alsa configuration paths. Take the time to become familiar with the configuration files:
/etc/conf.d/alsa/usr/share/alsa//etc/alsa/conf.d//usr/share/pulseaudio/alsa-mixer/
Finally, add the alsa daemon to the default runlevel so that it starts automatically the next time we boot the phone.
second-chance:~$ sudo rc-update add alsa default* service alsa added to runlevel defaultDBus Basics
DBus is a service for Inter-Process Communication (IPC). When a service registers itself with DBus, it publishes an interface to facilitate interoperabillity with other processes. The oFono daemon is one such service. We will be using DBus to get information about our modem and configuration from the oFono daemon. Many frameworks wrap the low level libdbus XML bindings providing higher level bindings for their own API. High-level Interface bindings use appropriate programming language constructs, meaning that bindings for Java based services would normally expose a Java interface and Python based services would normally expose a Python interface etc.
I am going to show you how to find your way around dbus from the CLI. In the next two sections I will show you how to install and use Qt DBus Viewer and GNOME D-Feet D-Bus Debugger to do the same thing with a UI.
In order to send a message to a service that is registered with DBus, we first need to know its name. Thankfully, DBus registers its own service named org.freedesktop.DBus that exposes the method org.freedesktop.DBus.ListNames for just this purpose. We can call it using the dbus-send command on any system running dbus like this:
second-chance:~$ dbus-send --system --print-reply --dest=org.freedesktop.DBus /org/freedesktop/DBus org.freedesktop.DBus.ListNamesThere are many ways to do the same thing. Plasma Mobile comes with Qt which includes qdbus (see qdbus(1)) and provides shorter commands. Yet another option is gdbus (see gdbus(1)) which comes with GLib. One advantage of gdbus is bash completion. It would have been my first choice, save for the fact that my login shell is the Almquist Shell and it does not appear to support completion for gdbus. In general bash completion seems to work. Maybe I need to configure gdbus, or install another package, to get that spport in this environment. If you know the answer, please comment. At any rate, I am going to stick with qdbus for the remainder of this post for simplicity.
The following qdbus command is equivalent:
second-chance:~$ qdbus --system:1.0
fi.w1.wpa_supplicant1
:1.1
org.freedesktop.NetworkManager
:1.11
org.freedesktop.URfkill
:1.112
:1.113
:1.12
:1.13
:1.14
:1.15
:1.16
org.freedesktop.UPower
:1.165
:1.17
:1.18
:1.19
:1.20
:1.27
:1.28
:1.29
:1.3
org.freedesktop.DisplayManager
:1.30
:1.4
:1.5
org.ofono
:1.6
org.freedesktop.login1
:1.7
org.freedesktop.Accounts
:1.8
org.freedesktop.PolicyKit1
:1.9
org.freedesktop.DBusTo get a list of object paths that are exposed by the org.ofono service we can call:
second-chance:~$ qdbus --system org.ofono/
/bluetooth
/bluetooth/profile
/bluetooth/profile/dun_gw
/bluetooth/profile/hfp_ag
/bluetooth/profile/hfp_hf
/quectelqmi_0
/quectelqmi_0/context1
/quectelqmi_0/operator
/quectelqmi_0/operator/<REDACTED>An object path contains methods and signals. To list only the methods exposed by the object /quectelqmi_0/context1, we can use grep to filter the result.
second-chance:~$ qdbus --system org.ofono /quectelqmi_0/context1 | grep -i methodmethod QString org.freedesktop.DBus.Introspectable.Introspect()
method QVariantMap org.ofono.ConnectionContext.GetProperties()
method void org.ofono.ConnectionContext.SetProperty(QString property, QDBusVariant value)The qdbus CLI uses the Qt API bindings which is why we are seeing types such as QString or QBusVariant from the Qt D-Bus type system. If we do the same thing with dbus-send, then we will see GVariant types being used from the low-level DBus bindings instead.
second-chance:~$ qdbus --system org.ofono /quectelqmi_0/context1 org.freedesktop.DBus.Introspectable.Introspect | grep -i method<node><interface name="org.freedesktop.DBus.Introspectable"><method name="Introspect"><arg name="xml" type="s" direction="out"/>
</method></interface><interface name="org.ofono.ConnectionContext"><method name="GetProperties"><arg name="properties" type="a{sv}" direction="out"/>
</method><method name="SetProperty"><arg name="property" type="s" direction="in"/>
</method><signal name="PropertyChanged"><arg name="name" type="s"/>That should give you an idea of how to get information. Careful not to get your APIs crossed.
Qt DBus Viewer
The Qt DBus Viewer is a reasonable choice since PlasmaMobile already uses Qt. The UI is partially touch friendly, but the layout is not responsive enough to be considered practicable while rendered in portrait view.
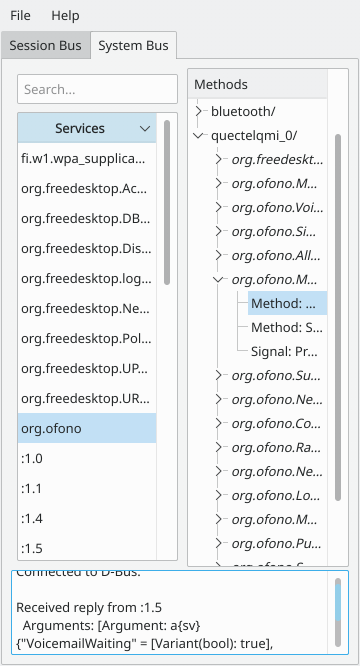
At the time of writing Plasma Mobile’s screen rotation is not working, without some investigation it is not clear how to switch from portrait to landscape. Scrolling is also an issue since it requires that you touch and drag the narrow scroll bar with your wide fingers. If you attempt to touch and drag a window pane, you will select a region of text instead. If you choose to install Qt D-Bus Viewer, then I recommend that you configure x-forwarding and forward the display to your desktop where the user experience will be as intended.
You might already think that you have qdbusviewer installed because the command is in the $PATH.
second-chance:~$ which qdbusviewer/usr/bin/qdbusviewerHowever, if you execute the command, it will become clear that it is missing at least one implementation binary.
second-chance:~$ qdbusviewerqdbusviewer: could not exec '/usr/lib/qt5/bin/qdbusviewer': No such file or directoryYou can install qdbusviewer by running the following command.
second-chance:~$ sudo apk add qt5-qdbusviewer[sudo] password for dustfinger:
fetch http://postmarketos1.brixit.nl/postmarketos/master/aarch64/APKINDEX.tar.gz
fetch http://dl-cdn.alpinelinux.org/alpine/edge/main/aarch64/APKINDEX.tar.gz
fetch http://dl-cdn.alpinelinux.org/alpine/edge/community/aarch64/APKINDEX.tar.gz
fetch http://dl-cdn.alpinelinux.org/alpine/edge/testing/aarch64/APKINDEX.tar.gz
(1/1) Installing qt5-qdbusviewer (5.14.2-r0)
Executing busybox-1.31.1-r16.trigger
Executing gtk-update-icon-cache-2.24.32-r1.trigger
OK: 1358 MiB in 597 packagesQt package information:
second-chance:~$ apk info --description --webpage --size --depends --provides --license qt5-qdbusviewerqt5-qdbusviewer-5.14.2-r0 description:
D-Bus debugger and viewer
qt5-qdbusviewer-5.14.2-r0 webpage:
https://www.qt.io/developers/
qt5-qdbusviewer-5.14.2-r0 installed size:
208896
qt5-qdbusviewer-5.14.2-r0 depends on:
so:libQt5Core.so.5
so:libQt5DBus.so.5
so:libQt5Gui.so.5
so:libQt5Widgets.so.5
so:libQt5Xml.so.5
so:libc.musl-aarch64.so.1
so:libstdc++.so.6
qt5-qdbusviewer-5.14.2-r0 provides:
cmd:qdbusviewer-qt5
qt5-qdbusviewer-5.14.2-r0 license:
(LGPL-2.0-or-later OR GPL-3.0-only OR GPL-2.0-or-later) AND Qt-GPL-exception-1.0 AND GFDL-1.3-or-laterOnce you have x-forwarding configured, you will be able to render the Qt D-Bus instance that is running on your phone on your computer’s monitor:
dustfinger@galactica ~/ $ ssh second-chance qdbusviewer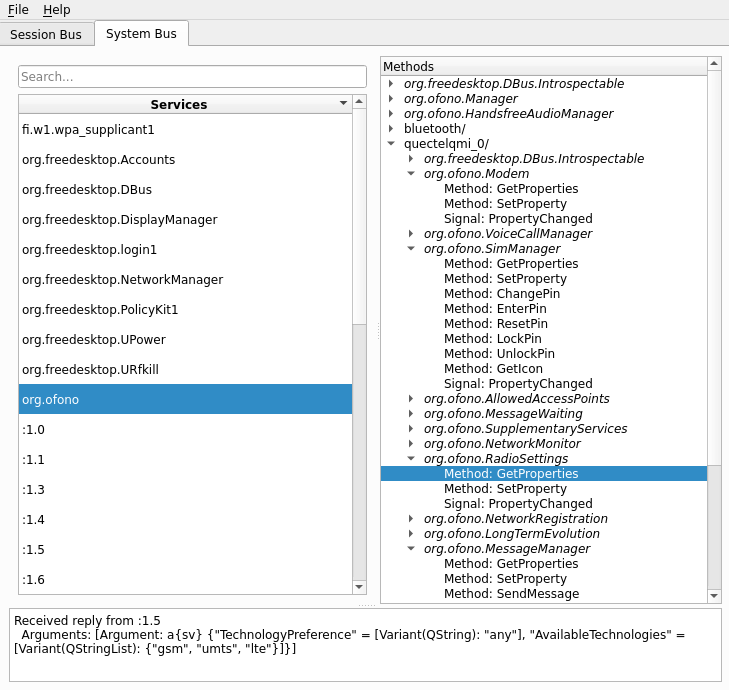
The tool is dead simple. Use the tab to switch between Session and System Bus. Services which are registered with DBus are listed by name in the left pane. Selecting a service will cause Qt D-Bus Viewer to display a list of root level interfaces or object paths depending on what the service exposes. Root level interfaces are actually defined in the object path /, but the UI omits that object path for convenience. Expanding an object path will reveal its interface in a tree-view. To execute a method, simply double click it.
Take a moment to play around with it. Don’t forget to visit the Qt D-Bus documentation and keep the Qt D-Bus type system handy for reference.
GNOME D-Feet D-Bus Debugger
D-Feet is buggy when operated from the PinePhone touch display. Although you can scroll by touch-dragging a window pane, the UI frequently stops responding after selecting a bus name. Since, in my case at least, it is not practicable from the touch interface, I recommend that you configure x-forwarding and interact with d-feet from your computer.
To illustrate my experience I took a screen capture after I managed to call getProperties from the Sim Manager:
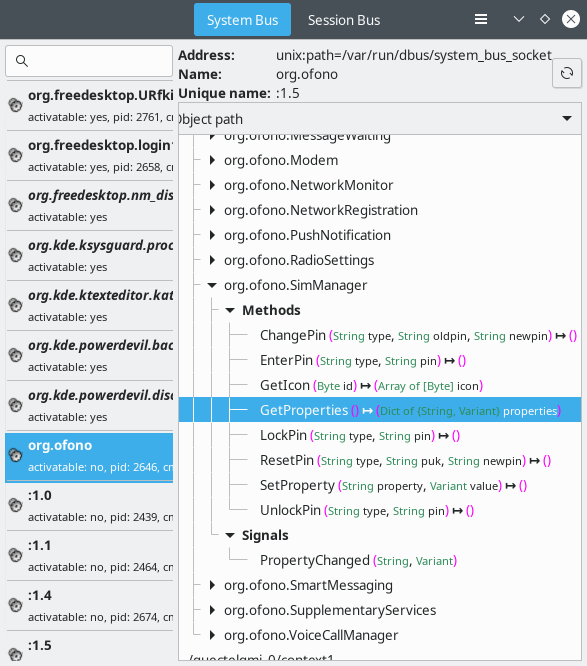
I then selected another bus name which caused the UI to stop responding at the moment that both bus names were highlighted.
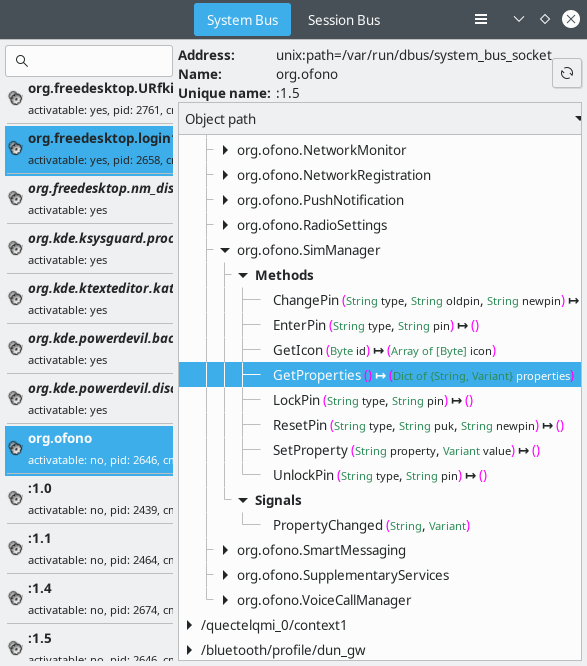
I discovered that swiping down to reveal the quick settings tray often, but not always, causes D-Feet UI to become responsive again. So if you are experimenting with D-Feet from the touch screen of your phone and the UI locks up, you could try swiping down to get it to respond. Failing that, there is always SIGINT, i.e. kill -2 `pidof d-feet`.
To install dFeet run the following command:
second-chance:~$ sudo apk add d-feetfetch http://postmarketos1.brixit.nl/postmarketos/master/aarch64/APKINDEX.tar.gz
fetch http://dl-cdn.alpinelinux.org/alpine/edge/main/aarch64/APKINDEX.tar.gz
fetch http://dl-cdn.alpinelinux.org/alpine/edge/community/aarch64/APKINDEX.tar.gz
fetch http://dl-cdn.alpinelinux.org/alpine/edge/testing/aarch64/APKINDEX.tar.gz
(1/3) Installing gobject-introspection (1.64.1-r2)
(2/3) Installing py3-gobject3 (3.36.1-r0)
(3/3) Installing d-feet (0.3.15-r2)
Executing busybox-1.31.1-r16.trigger
Executing glib-2.64.3-r0.trigger
Executing gtk-update-icon-cache-2.24.32-r1.trigger
OK: 1356 MiB in 594 packagesMake sure that sshd is running:
second-chance:~$ sudo rc-service sshd status* status: stoppedStart the daemon if it is not running:
second-chance:~$ sudo rc-service sshd start* Starting sshd ...
[ ok ]From your home computer launch d-feet:
dustfinger@galactica ~/ $ ssh second-chance d-feetJust like Qt DBus Viewer, D-Feet is dead simple to use. Services which are registered with DBus are listed by name in the left pane. Selecting a service will cause D-Feet to display that service’s address, name, unique name and object path in the right pane. Expanding an object path will reveal its interface in a tree-view. To execute a method, simply double click it.
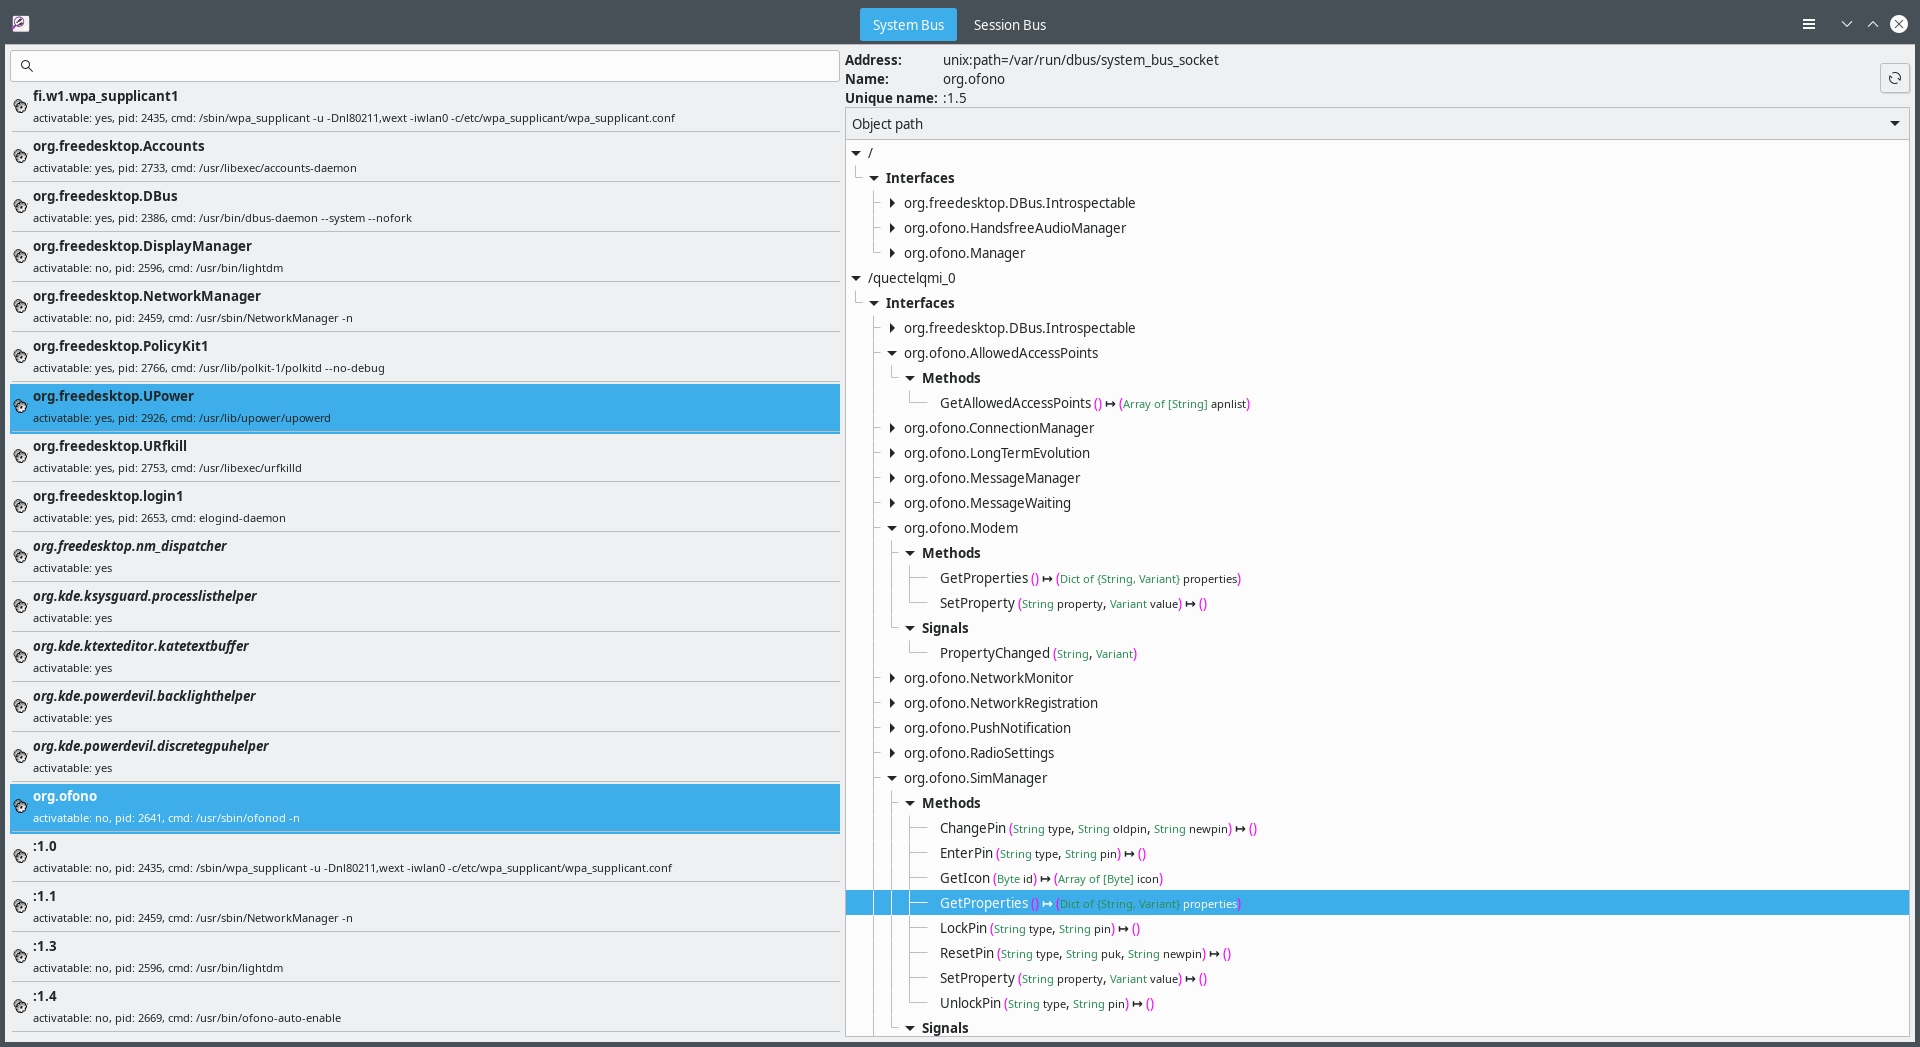
Take a moment and play aroud with D-Feet via x-forwarding and don’t forget to visit the Gnome wiki D-Feet documentation. I also recommend that you keep this reference on GVariant types and the GLib APIs handy.
Configure the modem
In the subsections to follow we are going to be configuring our modem, which will involve connecting to the modem over a serial port and running a number of AT commands (Attention commands). Recent versions of postmarketOS now handle this configuration for you; however, if you have difficulty configuring your APN settings or making a phone call it can be helpful to understand how to validate the modem’s configuration when trouble shooting.
There are many tools available that will allow you to connect to a modem; I have decided to use minicom. I will also be showing you how to run AT commands directly from the command line. Regardless of how you choose to send AT commands to the modem there are two pre-requisites that must be satisfied.
- We need to know the special file name of the serial port
- Our user must have read and write permissions to the special file name of the serial port
Identify the serial port
The output from dmesg can be used to determine which serial ports the modem is attached to.
second-chance:~$ dmesg | grep -i modem[ 80.291634] usbserial: USB Serial support registered for GSM modem (1-port)
[ 80.292045] option 3-1:1.0: GSM modem (1-port) converter detected
[ 80.294623] usb 3-1: GSM modem (1-port) converter now attached to ttyUSB0
[ 80.294965] option 3-1:1.1: GSM modem (1-port) converter detected
[ 80.298683] usb 3-1: GSM modem (1-port) converter now attached to ttyUSB1
[ 80.298975] option 3-1:1.2: GSM modem (1-port) converter detected
[ 80.301833] usb 3-1: GSM modem (1-port) converter now attached to ttyUSB2
[ 80.310246] option 3-1:1.3: GSM modem (1-port) converter detected
[ 80.310645] usb 3-1: GSM modem (1-port) converter now attached to ttyUSB3In the above output, we can see that USB serial support was registered for a GSM modem. The modem is connected to the PinePhone via a USB converter. Whenever a USB converter is attached to a serial device you will see the text converter now attached to <SPECIAL FILE NAME> in the output of dmesg.
Now that we have the names of the serial ports, we can determine the group ownership of the special file names via the ls command.
second-chance:~$ ls -lah /dev/ttyUSB*crw-rw---- 1 root dialout 188, 0 May 16 05:08 /dev/ttyUSB0
crw-rw---- 1 root dialout 188, 1 May 16 05:08 /dev/ttyUSB1
crw-rw---- 1 root dialout 188, 2 May 16 05:08 /dev/ttyUSB2
crw-rw---- 1 root dialout 188, 3 May 16 05:08 /dev/ttyUSB3The dialout group is the typical application group for modems, but it is always worth confirming the actual group name by looking it up yourself. After all, it is always possible that group ownership was not set correctly, or that a different application group was used for this purpose.
We can use the groups command to find out if our user is already a member of dialout.
second-chance:~$ groups $USERdustfinger wheel audio input video netdev plugdevIn my case, dustfinger is not a member of the dialout group. I will add dustfinger to the dialout group using gpasswd.
second-chance:~$ sudo gpasswd -a $USER dialout[sudo] password for dustfinger:
Adding user dustfinger to group dialoutYou might be wondering how we know which of the four serial ports to connect to. Thankfully postmarketOS created descriptive symlinks to each of these ports. We can use the find command to locate those symlinks:
second-chance:~$ find /dev -maxdepth 1 -type l -exec ls -la '{}' \; | grep ttyUSBlrwxrwxrwx 1 root root 7 Jun 4 05:09 /dev/EG25.MODEM -> ttyUSB3
lrwxrwxrwx 1 root root 7 Jun 4 05:09 /dev/EG25.AT -> ttyUSB2
lrwxrwxrwx 1 root root 7 Jun 4 05:09 /dev/EG25.NMEA -> ttyUSB1It should be obvious that when establishing an interactive session with the modem using a tool like minicom the correct port is the one with the alias EG25.MODEM. In fact, we can simply use the alias if we prefer.
Enable oFono debug logging
There are two debugging features that you can enable to gain some insight when trouble shooting issues with your modem or SIM configuration. To enable them, I found it easiest to create the following config file for ofonod.
second-chance:~$ sudo vi /etc/conf.d/ofono# optional parameters to be passed to ofonod. See ofonod --help
OFONOD_OPTS="-d"
# enable or disable AT debugging
ENABLE_AT_DEBUGGING=trueNext, I modified /etc/init.d/ofono
second-chance:~$ sudo vi /etc/init.d/ofonoand added a start_pre function to conditionally export the AT debug environment variable based on the value of $ENABLE_AT_DEBUGGING.
start_pre() {
        # enable / disable AT debugging
        if [ -n "$ENABLE_AT_DEBUGGING" ]; then
                if yesno "$ENABLE_AT_DEBUGGING"; then
                        einfo "AT debugging is enabled by config"
                        export OFONO_AT_DEBUG=1
                else
                        einfo "AT debugging is disabled by config"
                        export OFONO_AT_DEBUG=0
                fi
        fi

        einfo "command_args_foreground = $command_args_foreground"
}
I also added $OFONOD_OPTS to the command_args_forground assignment.
command_args_foreground="$OFONOD_OPTS -n"Now restart the oFono service and you should see the following output:
second-chance:~$ sudo rc-service ofono restart* Caching service dependencies ... [ ok ]
* Stopping oFono ... [ ok ]
* AT debugging is enabled by config
* command_args_foreground = -d -n
* Starting oFono ... [ ok ]You probably don’t want to leave all that debugging enabled permanently, so don’t forget to disable it once you are happy with your configuration.
Connect to the modem
You may skip this step if you would prefer to send the AT commands directly from the shell.
The line speed for the Quectel EG25 is 1152008n1 which is the default line speed for minicom. The only thing we need to tell minicom is the port.
minicom -D /dev/ttyUSB2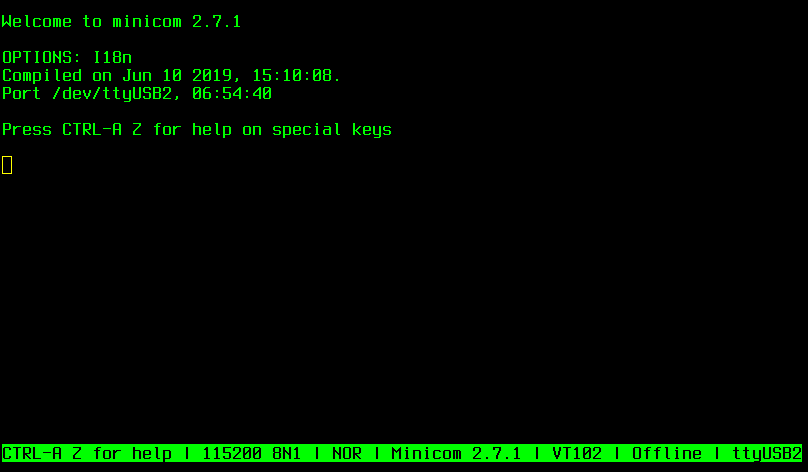
AT Command Basics
Please refer to the Quectel EC25 AT commands manual when following along. There is an appendix on page 192 with many useful tables, such as terms & abbreviations and error codes.
There are three categories of AT commands supported by the Quectel EC25.
- Basic Syntax ::
AT<x><n>where<x>is the command and<n>represents 0 or more arguments - S parameter syntax ::
ATS<n>=<m>where<n>is a register index and<m>is the value to assign - Extended syntax :: see table below
| Type | Syntax | Description |
|---|---|---|
| Test | AT+ |
returns list of parameters and value ranges accepted by the write command or internal processes |
| Read | AT+ |
Returns current parameter(s) value(s) |
| Write | AT+ |
Set parameter(s) value(s) |
| Execute | AT+ |
Read non-variable parameters affected by internal processes in the UE |
When powering down the modem it is recommended that you call AT+QPOWD. See 1.6 Turn off Procedure of the manual. You don’t need to worry about this anymore though, because postmarketOS handles this in the eg25 service. It does not actually call the AT command, but instead it powers off the GPIO pins. If you ever want to restart the module without rebooting your phone, you can simply call:
second-chance:~$ sudo rc-service eg25 restartSend an AT command from the shell
Sending an AT command directly from the shell is straight forward and I recommend this approach. I chose to use minicom for demonstration purposes and for fun. The most basic AT command is named AT and simply returns OK.
second-chance:~$ echo "AT" | atinout - /dev/EG25.AT -AT
OKConfigure the modem for audio
It is no longer necessary to perform this step manually. PostmarketOS now has a service named pinephone_setup-modem-audio that calls /usr/bin/pinephone_setup-modem-audio which runs the AT+QDAI AT command for you. If you need to change your audio routing for some reason, then you will need to update that script or it will just reset the configuration on next reboot. You are welcome to read on for learning purposes, or skip to the next section.
It is time to configure the modem for audio by running the Quectel Digital Audio Interface (QDAI) configuration write command defined on page 193 of the AT commands manual.
AT+QDAI=1,0,0,2,0,1,1,1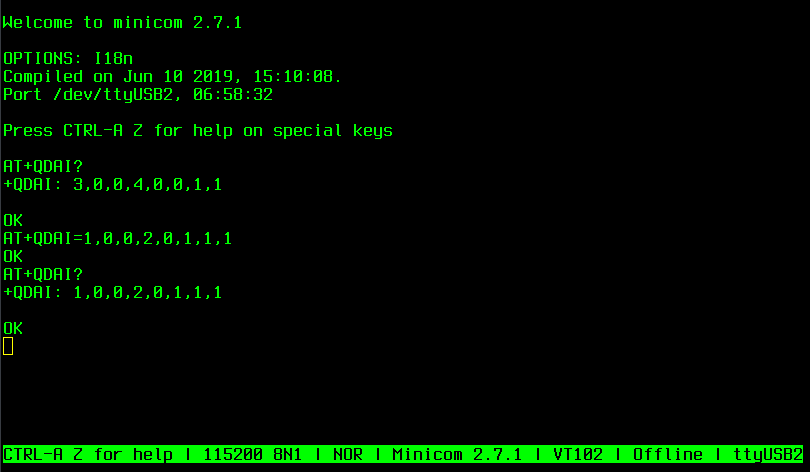
The command only needs to be run one time since the configuration is persistent, but the effects will not be realized until the module is rebooted.
This sets modem to:

  1 - Digital PCM
  0 - I2S master
  0 - Primary mode (short sync)
  1 - 256kHz clock (256kHz / 16bit = 16k samples/s)
  0 - 16bit linear format
  1 - 16kHz sample
  1 - 1 slot
  1 - map to first slot (the only slot)
See page 194 of the AT commands manual for a full explanation of the parameters and their values.
Check Audio Mode
The audio mode controls where the audio from the modem is sent. The audio mode has three states as defined on page 192:
| Value | Description |
|---|---|
| 0 | audio configured for handset |
| 1 | audio configured for headset |
| 2 | audio configured for speaker |
It is unlikely for this mode to be set incorrect, but if you find that you are not hearing any sound after configuring the modem for audio, then it is easy enough to call the AT+QAUDMOD read command for confirmation.
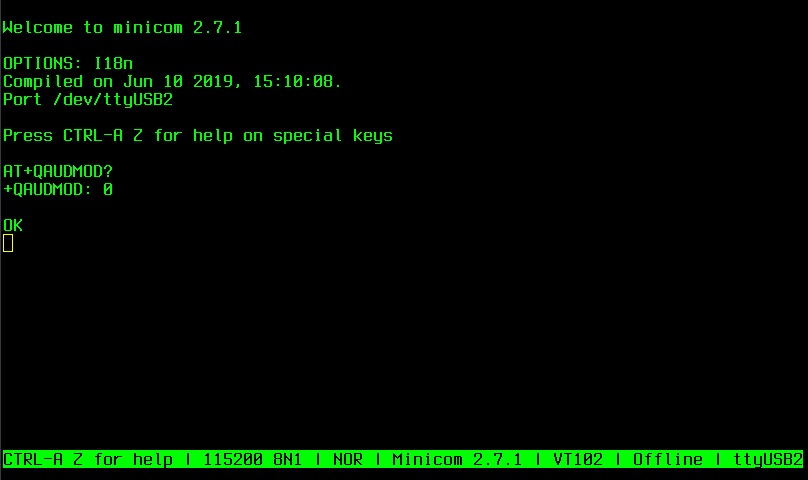
Check Audio Mute
If nobody can hear you during a phone call, you can check to see if uplink voice muting is enabled via the AT+CMUT command on page 189 of the AT commands manual.
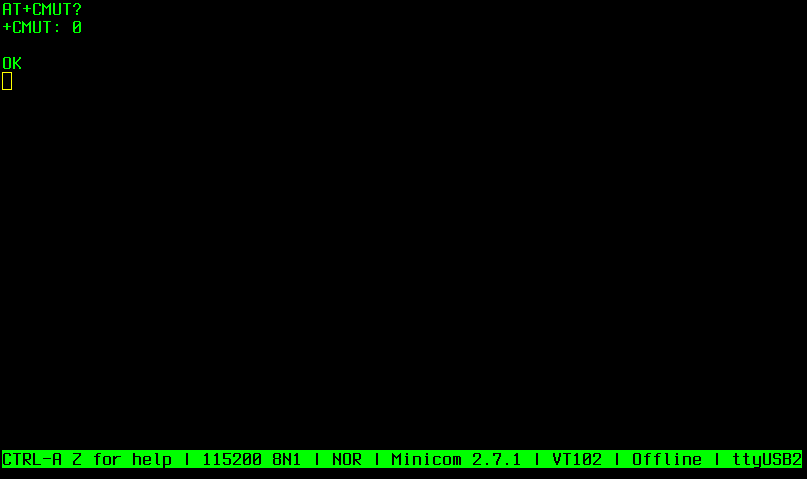
| Value | Description |
|---|---|
| 0 | Mute off |
| 1 | Mute on |
Enable Full Functionality
As was the case with audio configuration, the /usr/bin/pinephone_setup-modem-audio will enable full phone functionality. However, at the time of writing there is a bug in the code such that if your modem was previously configured with the recommended audio routing, then the script will exit before ensuring that full functionality is also configured.
# Read current config RET=$(echo "AT+QDAI?" | atinout - $DEV -)

if echo $RET | grep -q $QDAI_CONFIG
then
        echo "Modem audio already configured"
        exit 0
fi

# ... Setting full functionality happens below, but code exits above
# if audio routing was already configured.
To check that the modem’s phone functionality is set to full run the AT+CFUN read command (pg 26).
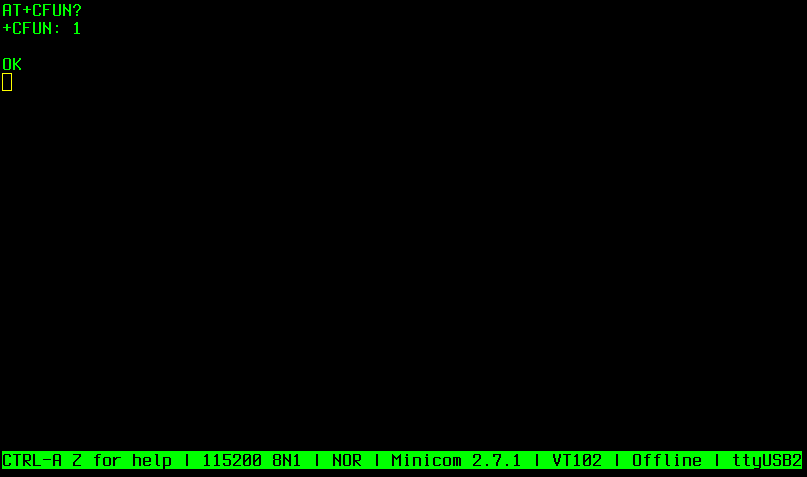
| Value | Description |
|---|---|
| 0 | Minimum functionality |
| 1 | Full functionality (default) |
| 4 | radio (transmit & receive) disabled |
Unfortunately the manual does not clearly specify what minimal functionality means. Here are two known symptoms that might indicate that the modem is not in full functionality mode.
AT+COPS?returns a 0, meaning that the operator mode and registration areUNKNOWN- Checking PIN status with
AT+CPIN?returns+CME ERROR: 13
Run AT+CFUN 1,1, to enable full modem functionality.
Enable (U)SIM card detection
Card detection is what allows a modem to detect a SIM card that was inserted after the modem was already powered on. SIM hot-swapping means that the modem supports the removal of one SIM card and the insertion of another SIM card without having to power-cycle the modem in between. Since the PinePhone’s SIM socket is obstructed by the battery when powered on, the PinePhone doesn’t truly support hot-swapping SIM cards. That being said, the Quectel EC25 modem does support hot-swapping and we can exploit that feature to validate that the modem has detected the SIM. To get the current settings we need to call the AT+QSIMDET read command on page 70.
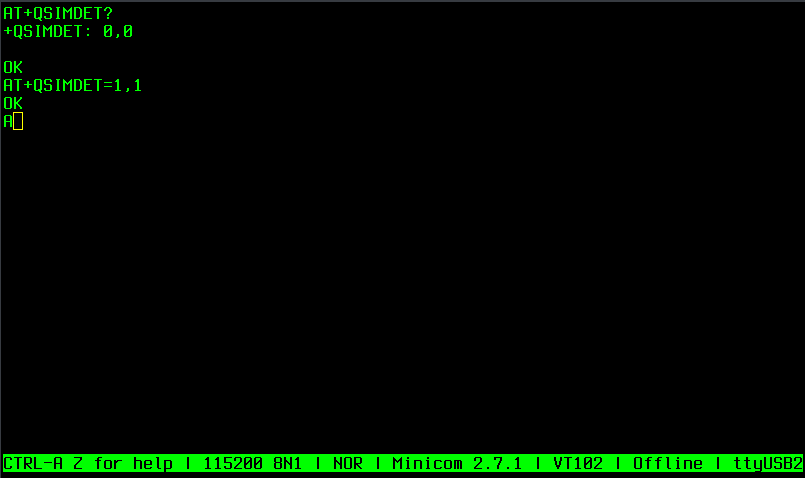
The result has the form +QSIMDET: <enable>,<insert level>.
| Name | Value | Description |
|---|---|---|
| enable | 0 | disabled |
| enable | 1 | enabled |
| insert level | 0 | low |
| insert level | 1 | high |
A modem power-cycle is required before hot-swap detection becomes effective. If the insert level you pick is inconsistent with the hardware design, then detection will not work. I found that SIM hot-swap detection worked when I enabled the high insert level. To check that the modem has detected a SIM, run the AT+QSIMSTAT read command on page 71. You can also enable SIM insert status reporting via the AT+QSIMSTAT write command as seen below.

Status reporting also requires a modem power-cycle before it becomes effective. You might wonder why you would want to enable SIM insert status reporting since it is not possible to insert a SIM into a PinePhone while the battery is in place. I have a nano-SIM from a Nexus 6P. The PinePhone socket fits a micro-SIM, so I had to fashion a nano-SIM to micro-SIM card adapter out of the cardboard packaging that my SD card came in. The nano-SIM is not only narrower and shorter, but also thinner than the micro-SIM. If the SIM contact area does not fully connect with that of the socket, then the modem will not be able to read the SIM. I enabled SIM insert status reporting so that I can detect if at anytime the SIM’s contact moves out of place. It might be that SIM status reporting isn’t necessary for my use case; I have not experimented enough with the feature yet to know for sure.
Power Saving
The modem supports the ability to enter sleep mode. To find out whether or not sleep mode is enabled you can call the AT+QSCLK read command on page 207.
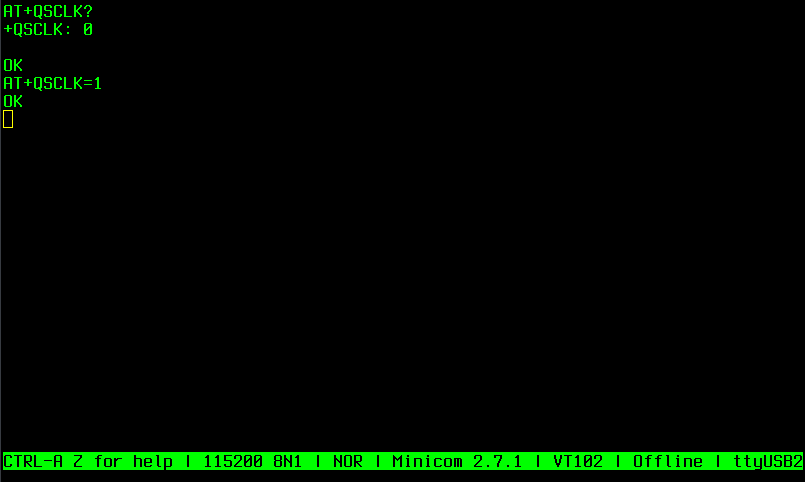
Since I am feeling adventurous, I decided to enable sleep mode to see if the battery life improves as a result. If you choose to do the same, take note in case it causes connectivity issues and needs to be disabled, i.e. enable at your own risk.
Get the SIM’s IMSI
We are going to need the IMSI number when configuring APN settings in the next section. You can do that by running the AT+CIMI execute command (pg 60). Remember not to share your IMSI with anyone.
AT+CIMI
<REDACTED-IMI>

OK
Power-cycle the modem
Power cycling the modem is as simple as restarting the eg25 service. It takes a little while, so be patient.
second-chance:~$ sudo rc-service eg25 restart* Caching service dependencies ... [ ok ]
* Disabling EG25 WWAN module ...
* Enabling EG25 WWAN module ...However, if you don’t restart the oFono daemon, then the quectelqmi object path will change in the org.ofono dbus service.
second-chance:~$ sudo qdbus --system org.ofono | grep -E 'quectelqmi_\d$'/quectelqmi_1For that reason you should also restart ofonod.
second-chance:~$ sudo rc-service ofono restart && sudo qdbus --system org.ofono | grep -E 'quectelqmi_\d' * Stopping oFono ... [ ok ]
* AT debugging is enabled by config
* command_args_foreground = -d -n
* Starting oFono ...                                                     [ ok ]
/quectelqmi_0GPRS & LTE configuration
Before we can send or receive SMS and make phone calls we need to first configure oFono appropriately for our carrier service. Here are some ways that you can look up your APN settings:
- Check the list of tested APN settings by carrier service for the PinePhone
- Search your carrier service for published APN Settings
- Here is a DuckDuckGo search for complete list of APN settings
My carrier is Koodo and I was able to find the APN settings at koodomobile.com. Hopefully you are able to find your APN settings without difficulty.
Determine your operator service name
If your SIM is already registered with a carrier service, then you will be able to get the current service name, status and technology from the modem using DBus:
second-chance:~$ sudo qdbus --system org.ofono /quectelqmi_0 org.ofono.NetworkRegistration.GetProperties | grep -iE '(name|status|technology)'Name: Koodo
Status: registered
Technology: lteDetermine what technology standards your operator supports
First scan for operators in the area:
second-chance:~$ sudo qdbus --system org.ofono /quectelqmi_0 org.ofono.NetworkRegistration.ScanError: org.freedesktop.DBus.Error.NoReply
Did not receive a reply. Possible causes include: the remote application did not send a reply, the message bus security policy blocked the reply, the reply timeout expired, or the network connection was broken.If you see that error, just ignore it. After the scan has completed, calling GetOperators should return a list of operators returned from the scan which are providing service in your area. Locate the structure containing your operator’s service name and then look at the Name, Status and Technologies fields. The technologies field should contain the complete list of standards that the operator supports.
sudo env DISPLAY=0.0 dbus-send --system --print-reply --dest=org.ofono /quectelqmi_0 org.ofono.NetworkRegistration.GetOperatorsmethod return time=1590502077.356864 sender=:1.72 -> destination=:1.92 serial=255 reply_serial=2
array [
struct {
object path "/quectelqmi_0/operator/<REDACTED>"
array [
dict entry(
string "Name"
variant string "Koodo"
)
dict entry(
string "Status"
variant string "current"
)
dict entry(
string "MobileCountryCode"
variant string "<REDACTED>"
)
dict entry(
string "MobileNetworkCode"
variant string "<REDACTED>"
)
dict entry(
string "Technologies"
variant array [
string "umts"
string "lte"
]
)
]
}Shutdown Ofono service
Since we are going to be manually configuring the APN settings, we must shutdown the oFono daemon, otherwise our changes will not persist.
second-chance:~$ sudo rc-service ofono stop[sudo] password for dustfinger:
* Stopping oFono ... [ ok ]
* Disabling EG25 WWAN module ...For those that are curious: Quectel teamed up with Qualcomm a couple of years ago to accelerate the production of Cellular Vehicle-to-Everthing (C-V2X) technology. Now, in 2020, we have Qualcomm Linux Modems by Quectel that use the Qualcomm MSM Interface (QMI). So, if you know that you have a modem that uses QMI, then you can exploit this knowledge to verify which network interface is exposed by the modem.
second-chance:~$ sudo find -L /sys/class/net/ -maxdepth 2 -type d -name 'qmi'/sys/class/net/wwan0/qmiThe resulting path has the following form: /sys/class/net/<network interface>/qmi.
Configure APN settings (MVNO)
I am going to configure my modem for LTE/GPRS coverage. The oFono framework keeps settings in files called stores which are kept in /var/lib/ofono/<IMSI>/{gprs,lte,netreg,radiosetting,sms,voicecall}. These settings files are essentially INI files, so you will be setting key value pairs. You can find out what each key value pair is for by reading the appropriate doc files in the repository.
- connman-api.txt
- contains properties relevant to APN
- lte-api.txt
- contains properties relevant to lte
Those documentation files are really about the oFono daemon so they are also valuable reference when making calls over DBus. For our purpose, we only care about the Properties section. Here is what my gprs file contained before editing.
second-chance:~$ sudo cat /var/lib/ofono/$(echo "AT+CIMI" | atinout - /dev/EG25.AT - | grep -iE '[0-9]')/gprs[sudo] password for dustfinger:
[Settings]
Powered=true
RoamingAllowed=false
[context1]
Name=Internet
AccessPointName=
Username=
Password=
AuthenticationMethod=chap
Type=internet
Protocol=ipFirst, we will edit the lte settings. The configurable properties for lte are straight forward. The most interesting property is the DefaultAccessPointName which defines the APN that will be selected for the next automatic activation. If you set the DefaultAccessPointName to empty string, then it will clear the default APN from the modem’s memory.
second-chance:~$ sudo vi /var/lib/ofono/$(echo "AT+CIMI" | atinout - /dev/EG25.AT - | grep -iE '[0-9]')/lte[Settings]
DefaultAccessPointName=sp.koodo.com
Protocol=dual
AuthenticationMethod=None
Username=
Password=There will not be a one-to-one relationship between the APN settings that you find online for your carrier and what you need to configure for oFono, but it should be fairly straight forward to translate. For example, since the Koodo APN settings page shows Blank for Username and Password it made sense to set AuthenticationMethod to None and leave both Username and Password values empty. How did I know to set AuthenticationMethod to None rather than leaving it blank like I did with Username and Password? Look at the properties section in the lte-api.txt and locate the documentation for the AuthenticationMethod property, there you will find a list of valid values. Similarly, the Koodo APN page shows the field IP Type set to IPv4v6, so I set the Protocol property to dual; again, referring to lte-api.txt.
Configuring the gprs is more involved. Keep in mind that Koodo is a Mobile Virtual Network Operator (MVNO), that means another operator provides the network infrastructure which Koodo makes use of. Between the two operators I was actually able to figure out a couple of different configurations that all worked fine. The only apparent difference was the DNS settings after connecting to the network.
Using the APN settings at koodomobile.com as a guide, I translated each field into an appropriate property understood by ofonod by looking them up in the Connection Context hierarchy - Properties section of connman-api.txt. I then updated the gprs section named context1 as shown below.
second-chance:~$ sudo vi /var/lib/ofono/$(echo "AT+CIMI" | atinout - /dev/EG25.AT - | grep -iE '[0-9]')/gprs[Settings]
Powered=true
RoamingAllowed=false
[context1]
Name=Koodo
AccessPointName=sp.koodo.com
Username=
Password=
AuthenticationMethod=none
Type=mms
Protocol=dual
MessageCenter=http://aliasredirect.net/proxy/koodo/mmsc
MessageProxy=74.49.0.18:80I should mention that if you enter an invalid configuration, the system might revert your settings in /var/lib/ofono/<IMSI>/{gprs,lte} back to their defaults as soon as the oFono service has been started. In that case, you will need to shutdown the oFono service, edit the configuration and bring the service back online until the configuration is accepted. With that said, it is time to start the oFono service.
second-chance:~$ sudo rc-service ofono start* AT debugging is enabled by config
* command_args_foreground = -d -n
* Starting oFono ... [ ok ]and check DBus to see if the context was picked up by the modem.
second-chance:~$ sudo qdbus --system org.ofono | grep -i context/quectelqmi_0/context1
/quectelqmi_0/context2You might be surprised to see that the modem has two contexts in memory considering that I only configured a single context. Let’s shutdown the oFono service and take another look at the gprs configuration.
second-chance:~$ sudo rc-service ofono stop && sudo vi /var/lib/ofono/$(echo "AT+CIMI" | atinout - /dev/EG25.AT - | grep -iE '[0-9]')/gprs[Settings]
Powered=true
RoamingAllowed=false
[context1]
Name=Koodo
AccessPointName=sp.koodo.com
Username=
Password=
AuthenticationMethod=none
Type=mms
MessageCenter=http://aliasredirect.net/proxy/koodo/mmsc
MessageProxy=74.49.0.18:80
[context2]
Name=attach.telus.com
AccessPointName=
Username=
Password=
AuthenticationMethod=chap
Type=internet
Protocol=ipIt turns out that context2 has no value set for AccessPointName, but it does have an interesting Name property. After quite a bit of experimenting I decided to try assigning the AccessPointName property the same value as the Name property. I then assigned a meaningful name to the Name property and set the other fields exactly the same as context1.
[context2]
Name=Telus
AccessPointName=attach.telus.com
Username=
Password=
AuthenticationMethod=none
Type=mms
MessageCenter=http://aliasredirect.net/proxy/koodo/mmsc
MessageProxy=74.49.0.18:80
Telus is the name of the Mobile Network Operator (MNO) that Koodo uses for its network infrastructure.
With that change in place, let’s start the oFono daemon and double checked that both contexts are recognized by oFono.
second-chance:~$ sudo rc-service ofono start 1> /dev/null && sudo qdbus --system org.ofono | grep -i context/quectelqmi_0/context1
/quectelqmi_0/context2Both contexts were recognized, but it never hurts to double check the settings after a significant change.
second-chance:~$ qdbus --system org.ofono /quectelqmi_0/context1 org.ofono.ConnectionContext.GetProperties && qdbus --system org.ofono /quectelqmi_0/context2 org.ofono.ConnectionContext.GetPropertiesAccessPointName: sp.koodo.com
Active: false
AuthenticationMethod: none
IPv6.Settings: MessageCenter: http://aliasredirect.net/proxy/koodo/mmsc
MessageProxy: 74.49.0.18:80
Name: Koodo
Password:
Protocol: ip
Settings: Type: mms
Username:
AccessPointName: attach.telus.com
Active: false
AuthenticationMethod: none
IPv6.Settings: MessageCenter: http://aliasredirect.net/proxy/koodo/mmsc
MessageProxy: 74.49.0.18:80
Name: Telus
Password:
Protocol: ip
Settings: Type: mms
Username:If the settings were rejected by oFono, then they will be reverted. In that case, you will need to stop the oFono daemon and try tweaking your configuration settings before moving on. You might have noticed that neither context is active. I will be talking about what to do if your context does not become active in the next section.
Ensure a context is Active
A context should be activated automatically. To see if context1 is activate, filter the results of org.ofono.ConnectionContext.GetProperties using grep.
second-chance:~$ qdbus --system org.ofono /quectelqmi_0/context1 org.ofono.ConnectionContext.GetProperties | grep ActiveActive: falseContext activation might take several seconds after the oFono daemon has started, so if you check for an active context immediately after oFono starts you might not find one. In that case, wait a few seconds and try again.
If you have ever called ofonoctl wan only to find an empty record set, that is because it was unable to find IPv4 or IPv6 settings which is a symptom of not having an active context.
sudo ofonoctl wanInterface Protocol APN Method Address Gateway DNS
----------- ---------- ---------------- -------- -------------- ----------- ----------------------------The reason why the context was not able to activate is because the connection manager is not attached.
second-chance:~$ qdbus --system org.ofono /quectelqmi_0 org.ofono.ConnectionManager.GetProperties | grep AttachedAttached: falseThe obvious question to ask now is, how do we get the connection manager to return true for the Attached property? The easiest thing to do is restart the eg25 service.
second-chance:~$ sudo rc-service eg25 restart && sudo rc-service ofono restart* Disabling EG25 WWAN module ...
* Enabling EG25 WWAN module ...
* Stopping oFono ... [ ok ]
* AT debugging is enabled by config
* command_args_foreground = -d -n
* Starting oFono ... [ ok ]… and like magic, everything is happy once again.
second-chance:~$ qdbus --system org.ofono /quectelqmi_0 org.ofono.ConnectionManager.GetProperties | grep Attached && qdbus --system org.ofono /quectelqmi_0/context1 org.ofono.ConnectionContext.GetProperties | grep Active && ofonoctl wanAttached: true
Active: true
Interface    Protocol    APN               Method    Address         Gateway      DNS
-----------  ----------  ----------------  --------  --------------  -----------  ----------------------------
wwan0 ipv4 sp.koodo.com static <REDACTED> <REDACTED> <REDACTED>, <REDACTED>You are probably wondering how we got into this state in the first place. Unfortunately, I am not sure. I have seen it happen quite a few times now though. If you know the reason, please comment.
Static IP allocation
There are two prerequisite that must be met before adding a route
- you must ensure that a context is active
- the method of configuring the host must be static
To determine if IP allocation is static, simply ask the connection manager.
second-chance:~$ qdbus --system org.ofono /quectelqmi_0/context1 org.ofono.ConnectionContext.GetProperties | grep -E '^Method'Method: staticIf the Method is dhcp, then you will need to use a dhcp client, such as udhcpc (already installed), for dynamic IP allocation. Technically, you can still add the route while following along, even if the method is dynamic, but realize that your IP could expire during use. I won’t be covering dhcp in this post since that is not my use case, but in a future post I hope to show how to configure Network Manager with oFono which will handle dynamic IP allocation for you.
At this point we have established that manual IP allocation is necessary. Now, we must obtain our assigned IP Address and Gateway from the connection context. I think it will be a bit easier to take a look at all of the connection properties at once, rather than filtering fields using grep.
second-chance:~$ qdbus --system org.ofono /quectelqmi_0/context1 org.ofono.ConnectionContext.GetPropertiesAccessPointName: sp.koodo.com
Active: true
AuthenticationMethod: none
IPv6.Settings: MessageCenter: http://aliasredirect.net/proxy/koodo/mmsc
MessageProxy: 74.49.0.18:80
Name: Koodo
Password:
Protocol: ip
Settings: Address: <REDACTED>
DomainNameServers: <REDACTED>
<REDACTED>
Gateway: <REDACTED>
Interface: wwan0
Method: static
Netmask: 255.255.255.0
Type: mms
Username:The first thing I want to mention is that qdbus doesn’t format this output perfectly. Whenever a property is a dictionary, qdbus prints the next property on the same line. For example, Message Center and Address should both be on their own lines. I will reformat the output for clarity.
AccessPointName: sp.koodo.com
Active: true
AuthenticationMethod: none
IPv6.Settings:
MessageCenter: http://aliasredirect.net/proxy/koodo/mmsc
MessageProxy: 74.49.0.18:80
Name: Koodo
Password:
Protocol: ip
Settings:
  Address: <REDACTED-ADDRESS>
  DomainNameServers: <REDACTED-DNS-1>
  <REDACTED-DNS-2>
  Gateway: <REDACTED-GATEWAY>
  Interface: wwan0
  Method: static
  Netmask: 255.255.255.0
Type: mms
Username:
The second thing to notice is that the Protocol property is set to ip. That means that the carrier service has assigned me an IPv4 address. All of the IPv4 settings are found in the Settings property. If the protocol had been ipv6 instead, then the IPv6.Settings property would have been populated.
Let’s make sure we are in a consistent starting state by purging all allocated addresses from the interface using the flush sub command. Please be aware that the flush sub command will ruthlessly remove all routes linked to the device’s interface. As you become comfortable with manipulating routes you will find that you can modify or remove an invalid route. So you can see that flushing is usually not necessary, but it will ensure we are in an consistent state moving forward.
second-chance:~$ sudo ip addr flush dev wwan0The routing table should not show any routes for interface wwan0, but you will see routes for wlan0 if you have Wi-Fi up.
ip route show172.16.0.0/16 dev usb0 scope link src 172.16.42.1As you can see, there exists a link scope route for usb0. Notice that the IP address is followed by a forward slash and then a decimal number. The decimal number actually represents the prefix length which is the count of leading one bits in the routing mask, traditionally called the network mask. We can use, the ipcalc command to calculate the prefix length of any IP address given a routing mask.
second-chance:~$ ipcalc -p <REDACTED-ADDRESS> 255.255.255.0PREFIX=24The arrangement of IP/PREFIX is known as Classless Inter-Domain Routing (CIDR) notation and is equivalent to the more traditional representation of IP/Netmask. We can use the ip (see ip(8)) command to add the address provided by oFono to our interface using either CIDR or traditional notation (thank you sicelo). However; we can avoid unnecessarily calculating the prefix length by sticking with tradition using the netmask already provided to us by oFono.
second-chance:~$ sudo ip addr add <REDACTED-ADDRESS>/255.255.255.0 dev wwan0Let’s see if that had any effect on our routing table.
second-chance:~$ ip route show<REDACTED-SUBNET>/24 dev wwan0 scope link src <REDACTED-ADDRESS>
172.16.0.0/16 dev usb0 scope link src 172.16.42.1Our newly added link scope route for wwan0 represented in CIDR notation is now in the routing table. Before our network interface can be used to access the internet, we must first add an route to the gateway defined in our active context for the wwan0 interface. Let’s add a default route (for all addresses) via the gateway <REDACTED-GATEWAY> now.
second-chance:~$ sudo ip route add default via <REDACTED-GATEWAY> dev wwan0Another look at our routing table will show the newly added route.
second-chance:~$ ip route showdefault via <REDACTED-GATEWAY> dev wwan0
<REDACTED-SUBNET>/24 dev wwan0 scope link  src <REDACTED-ADDRESS>
172.16.0.0/16 dev usb0 scope link src 172.16.42.1The connection context tells us which DNS addressess our carrier service would like us to use when resolving domain names. If you are wondering whether or not you should trust your carrier service’s DNS or a third party, such as OpenNic, OpenDNS , DNSCrypt etc., then I recommend reading DNSCrypt Reduces Privacy. I am not suggesting that defending ones privacy is hopeless, but it is a topic deserving of its own series of blog posts. For the purposes of this article, I will be adding my carrier service’s DNS to resolv.conf.
echo "nameserver <REDACTED-DNS-1>" | sudo tee -a /etc/resolv.conf
echo "nameserver <REDACTED-DNS-2>" | sudo tee -a /etc/resolv.conf
Now we should be able to ping a domain on the Internet:
ping bloggerbust.caPING bloggerbust.ca (185.199.111.153): 56 data bytes
64 bytes from 185.199.111.153: seq=0 ttl=42 time=27.402 ms
64 bytes from 185.199.111.153: seq=1 ttl=42 time=28.191 ms
64 bytes from 185.199.111.153: seq=2 ttl=42 time=27.031 ms
--- bloggerbust.ca ping statistics ---
3 packets transmitted, 3 packets received, 0% packet loss
round-trip min/avg/max = 27.031/27.541/28.191 msYou have probably heard of ofonoctl by Martin Braam. When you run ofonoctl wan, it locates your active context and tabulates the IP Address, Gateway and DNS just as we did above. When you add the --connect optional parameter, ofonoctl flushes your wwan0 interface (only if the allocation method is static) and adds the IP Address and DNS that it found in the active context. When you add the --append-dns optional parameter, then it will append the DNS to your /etc/resolv.conf for you. So why the heck did I just make you do it all manually? Now you know how it works. Now you will have an idea what might be wrong the next time you run:
ofonoctl wan --connect --append-dnsInterface Protocol APN Method Address Gateway DNS
----------- ---------- ---------------- -------- -------------- ----------- ----------------------------… and an empty record-set is displayed.
There is still an issue that you will be dealing with. Every time you bring up or down the Wi-Fi connection, Network Manager will completely override /etc/resolv.conf. In a future post I will write about how to deal with this issue. For now, just be aware that this is happening and know that you will have to re-append the DNS each time. You might want to write yourself a script to do that for you.
Send and receive SMS
UPDATE: Spacebar is now working. Message history is not persistentn yet. Phone numbers in Spacebar are not yet resolved to contact names added to the Phone Book app. I have found that the first time I start space bar it often crashes and I have to start it again.
Plasma Mobile has an SMS app named Spacebar, but at the time of writing I was not able to get Spacebar working. Instead, we are going to test both sending and receiving SMS from the command line. To receive SMS we will run a dbus-monitor process in the background that will read all messages on the org.ofono.MessageManager interface and print it to STDOUT.
second-chance:~$ sudo env DISPLAY=:0.0 dbus-monitor --system "type='signal',interface='org.ofono.MessageManager',member='IncomingMessage'"&signal time=1589836625.655331 sender=org.freedesktop.DBus -> destination=:1.151 serial=2 path=/org/freedesktop/DBus; interface=org.freedesktop.DBus; member=NameAcquired
string ":1.151"
signal time=1589836625.655487 sender=org.freedesktop.DBus -> destination=:1.151 serial=4 path=/org/freedesktop/DBus; interface=org.freedesktop.DBus; member=NameLost
string ":1.151"To send a message use the ofonoctl sms command.
second-chance:~$ ofonoctl sms <PHONE-NUMBER-NO-SPACES> --message "Let me know if you receive this message. I am sending it from postmarketOS/PlasmaMobile."Sentsecond-chance:~$ signal time=1589837304.873843 sender=:1.73 -> destination=(null destination) serial=321 path=/quectelqmi_0; interface=org.ofono.MessageManager; member=IncomingMessage string "Message received! We are at a little garden centre near stony plain."
array [
dict entry(
string "LocalSentTime"
variant string "2020-05-18T15:28:19-0600"
)
dict entry(
string "SentTime"
variant string "2020-05-18T17:28:19-0400"
)
dict entry(
string "Sender"
variant string "<PHONE-NUMBER-REDACTED>"
)
]Make phone calls
Plasma Mobile has a phone app that works fine for both sending and receiving phone calls. I do not hear any sound when dialing, but I do hear the phone ringing while I wait for someone to answer. When someone does answer, they can hear me clearly, but I have been told that I sound a bit “tinny”. If the receiving phone is within a couple of meters of the PinePhone, then the audio of the PinePhone becomes noisy with interference.
UPDATE: for a while I was unable to hear or be heard during phone calls. An update this weekend fixed whatever was wrong. I can now both make and receive phone calls. I have found that sometimes I need to restart the eg25 and ofono services once before phone calls work properly: sudo rc-service eg25 restart && sudo rc-service ofono restart, then wait about 10 seconds or so before making a phone call. There are new updates nearly every day, so your experience might be different.
Conclusion
At this point you should be able to send and receive SMS and make phone calls. This was a long post and there was a lot that I didn’t cover. I have updated this post several times and I am now ready to move on. You can watch for new related posts under the mobile category, or use the tags: Pine Phone, PostmarketOS, Plasma Mobile/. The PostmarketOS PinePhone wiki has instructions for setting up and experimenting with components not covered here. Enjoy!
In my next post, I am going to write about my first attempt at configuring Network Manager with oFono as the modem manager.
Comments
Thank you for the great in depth article. This was and will be very helpful.
 David Slaughter
18/06/2020
Thank you Darcy & Lukasz!
I enjoyed writing this article and I plan on improving it with more updates. It is not meant as a terse step by step guide for an audience that wants to get their phone up and running as quickly as possible. PostmarketOS + Plasma Mobile isn’t ready for that sort of use-case anyway. Instead, it is an account of my own learning and exploration, written in a slight conversational tone, and is intended for those that would like to better understand how things work.
If either of you have any suggestions for improvements please let me know. I have already received valuable feedback from #postmarketOS (irc.freenode.net) and #pinephone (irc.pine64.org) channels. Thank you everyone for your tips and suggestions.
 Trevor Wilson
17/06/2020
What an incredibly comprehensive write-up. I appreciate all of the security- and privacy-mindfulness throughout your post, especially involving LUKS (which is a pre-requisite for true mobile security). Thank you for your work on this!
 Darcy Sabatino
17/06/2020
Amazing write-up, great job!
 Lukasz Erecinski
17/06/2020
Your Welcome Sundar!
I added more detail to GPRS & LTE configuration. I also added a new section on taking screen shots over serial / SSH in a Qt environment. I will probably update this a couple of more times before moving on to something new.
Trevor Wilson
17/06/2020
This is the best write-up I have seen in configuring postmarketOS with Plasma on PinePhone! Thank you very much. Awesomeoness!
 Sundar
15/06/2020