How To Configure Minicom To Connect Over USB Serial UART
Introduction
I recently wrote about my first experience connecting to the pinephone via serial console. This post documents how to configure Minicom for establishing an interactive terminal session with a device connected to your computer via a serial port. The configuration will be saved to file so that it can be reused to connect to the same device again in the future, which is convenient. My version of minicom at the time of writing is minicom version 2.7 (compiled Jan 8 2018).
Conventions
If you are unfamiliar with my key binding notation please refer to my appendix on Key-binding notation.
Determine the device name
I assume that you have a USB TTL to RS-232 serial cable and a device with a Serial UART (Universally Asynchronous Receiver/Transmitter). Connect your device to your computer via the serial cable. To confirm that your computer has detected the UART connection simply run the usb-devices command and filter the output for the text “UART”.
usb-devices | grep -C4 -i uartT: Bus=01 Lev=01 Prnt=01 Port=01 Cnt=02 Dev#= 57 Spd=12 MxCh= 0
D: Ver= 2.00 Cls=00(>ifc ) Sub=00 Prot=00 MxPS= 8 #Cfgs= 1
P: Vendor=0403 ProdID=6001 Rev=06.00
S: Manufacturer=FTDI
S: Product=FT232R USB UART
S: SerialNumber=<REDACTED>
C: #Ifs= 1 Cfg#= 1 Atr=a0 MxPwr=90mA
I: If#=0x0 Alt= 0 #EPs= 2 Cls=ff(vend.) Sub=ff Prot=ff Driver=ftdi_sioThe first line tells us the bus number, port and device number. Looking further down the list we can see that the manufacturer is FTDI. We can now filter the dmesg output by the serial cable’s manufacturer name to get the name of the TTY device that it is attached to.
dmesg | grep -i FTDI[1458143.861386] usb 1-2: Manufacturer: FTDI
[1458143.864821] ftdi_sio 1-2:1.0: FTDI USB Serial Device converter detected
[1458143.865597] usb 1-2: FTDI USB Serial Device converter now attached to ttyUSB0In my case the TTY device name was ttyUSB0; however, if your cable is not a USB converter, then it might be named ttyS0 instead. If your system architecture is ARM, you might see a name like this ttyAMA0 and if it is a Samsung, then the device might be named ttySAC0. There are more serial port names than I mention here. Also, the index number at the end of the name is determined by the devices minor number and may not be 0. The device name for a serial connection is properly referred to as a serial port. The rest of this blog post will simply use ttyUSB0 as the name of the serial port, but you must use the correctly named serial port assigned to your connected device if you are following along.
Device group ownership
Our user account requires rw permissions to initiate a connection with the device. This is achieved by adding the correct group membership to our user account. We can look up the required group membership using the ls command.
ls -lah /dev/ttyUSB0crw-rw---- 1 root uucp 188, 0 Mar 24 06:16 /dev/ttyUSB0The output from ls shows us that the uucp group has rw permissions to the device. Another common group that is used for the group ownership of serial devices is the dialout group. If your system uses the dialout group rather than uucp, then in your mind simply substitute dialout in place of uucp for the rest of this post. It makes semantic sense for the dialout group to be used if the device is a modem or a fax.
We can use the groups command to find out if our user is already a member of uucp.
groups $USERwheel audio video usb users dustfinger plugdev libvirt docker developerSince my user is not a member of the uucp group, I will add the group membership using gpasswd.
sudo gpasswd -a $USER uucpAdding user dustfinger to group uucpOn a side note, UUCP stands for Unix to Unix Copy. Now that we have the right group membership, we can establish a serial connection.
Minicom configuration quirks
By default, minicom reads and writes configuration files to a path that is set at compile time. To find out where that is on your system, simply run the following command.
minicom -h | grep -iE '(directory | compiled)'The configuration directory for the access file and the configurations
is compiled to /etc/minicom.Minicom has some quirks when it comes to saving and loading configuration files.
- If you pass the optional flag
-swhich starts minicom directly in the configuration menu, then Minicom’s behaviour is to save the configuration to the compiled in directory only, regardless of whether or not you are running as root. If, on the other hand, you navigate to the configuration menu after having started minicom without the-sflag, then minicom will save the configuration files to your home directory. - Custom configuration names will be saved as
.minirc.<custom_name>. - If you provide a path to the configuration, all instances of the path separator will be replaced by an underscore and the resulting string will be used as the
<custom_name>. i.e$HOME/.myminircwould become/home/dustfinger/.minirc._home_dustfinger_.myminirc. - When loading a saved configuration into minicom, pass only the
<custom_name>part of the configuration file. Minicom will resolve the full path name to the configuration file on its own.
Note: The minicom repository has a TODO item to move .minirc* to .config/minicom/, which would be a nice change since I don’t like polluting my top level dot files with a bunch of related configurations.
With all that in mind, let’s configure minicom for our non-root user account.
Configure minicom for use over UART serial term
My preference is to name custom minicom configuration files using the convention <SERIAL_PORT>.<DEVICE> which would be saved to my home directory as $HOME/.minirc.<SERIAL_PORT>.<DEVICE>.
Start minicom by passing it an appropriate custom configuration name. Since the named configuration does not yet exist, minicom will simply load its default settings.
minicom ttyUSB0.pinephone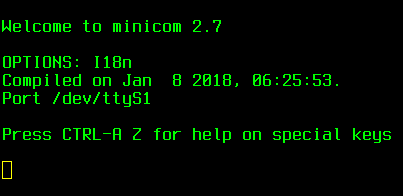
Type C-A o to navigate to the configuration menu.
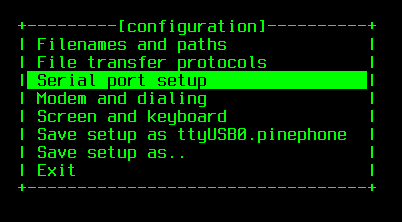
Use the down arrow to select Serial Port Setup and hit <RET>.

If you do not know what 8N1 means, then please read my brief write up on serial communication before proceeding.
- Type
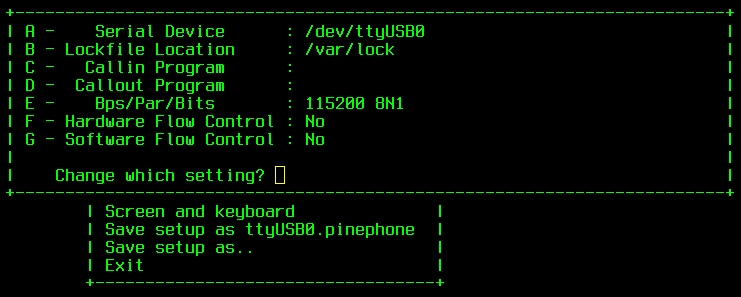
Ato edit the Serial Device and change the port to the correct value, which is/dev/ttyUSB0/in my case. Type
Eto enter the line speed required by your device.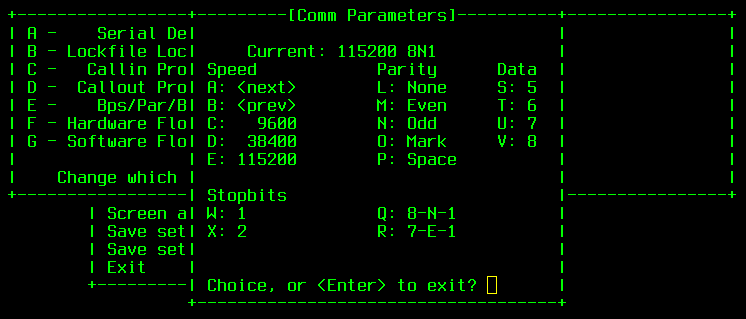
Setting the line speed should be self explanatory. The UI is divided into columns. The first three columns represent each of the comm parameters encoded in the line speed. The fifth column provides key bindings to set the two most common Parity, Data and Stopbit combinations. The most common baud rates (speeds) have quick keys
C–> 9600,D–> 38400,E–> 115200. Since the line speed of my PinePhone is1152008n1I can keep the default value. However, if I needed to set it, the fastest way would be to typeE Q <RET>.Type
Fto disable Hardware Flow Control.
If you choose to enable flow control, then it must be configured on both sides of the connection for it to work. If your hardware does not support flow control, then you can enable software flow control instead. You can use stty ixon to enable flow control on the current TTY and stty -ixon to disable it. I won’t be setting flow control up in this post. Here is my final serial configuration, your comm parameters might differ.
Hit <RET> to return to the configuration menu. Use the down arrows to select Modem and dialing and hit <RET> to navigate to the Modem and dialing parameter setup screen. Blank out fields A through I and K by pressing each key binding and using the backspace button to clear the field. Press the <RET> key to commit each field edit. The menu should now look like this:

Hit <RET> to return to the configuration menu. Use the down arrow to select Save setup as ttyUSB0.pinephone and hit <RET>. Finally, arrow down until Exit is highlighted and press <RET>. You should now be back at the Welcome screen. Type A x to quit.
The resulting configuration file
Now take a look at the resulting configuration file:
cat ~/.minirc.ttyUSB0.pinephone# Machine-generated file - use setup menu in minicom to change parameters.
pu port /dev/ttyUSB0
pu minit
pu mreset
pu mdialpre
pu mdialsuf
pu mdialpre2
pu mdialsuf2
pu mdialpre3
pu mdialsuf3
pu mconnect
pu mhangup
pu rtscts NoThe names of each setting in your custom configuration file should match mine with the exception of the port name. If you edited any other lines, even if you did not change the value, the edited setting will also be written to the configuration file. For example, if you edited the line speed, then you will also see settings for baudrate, bits, parity and stopbits.
Connect to your device
To connect to your device you can simply pass minicom the custom configuration name.
minicom ttyUSB0.pinephone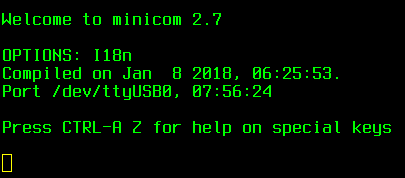
The Welcome screen will appear, but this time it will show your customized OPTIONS and Port. Turn on your device.
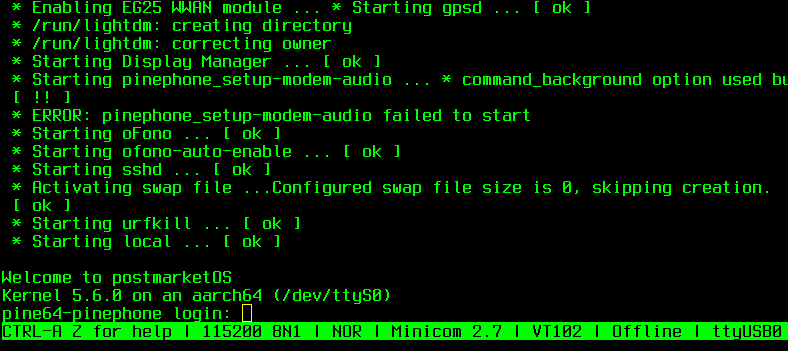
You will see a lot of output being written to the screen as your device loads. In the end, you should see a login prompt. Since minicom is a terminal emulator, you can click on the screen and enter your login credentials as if you were connected to the device with a keyboard and monitor.
If your device was already booted when you started minicom you won’t see any login prompt. That is because the receiver missed the transmitters bits when the device booted during the time that the connection was not established. In that case, simply type your username and hit <RET>, then you will be prompted for the password as normal.
Minicom might not be the best tool for the job
After configuring minicom and successfully connecting to my PinePhone over serial UART, I found that Minicom’s escape interpretation garbles the UI of ncurses applications. Take a look at how nmtui renders:
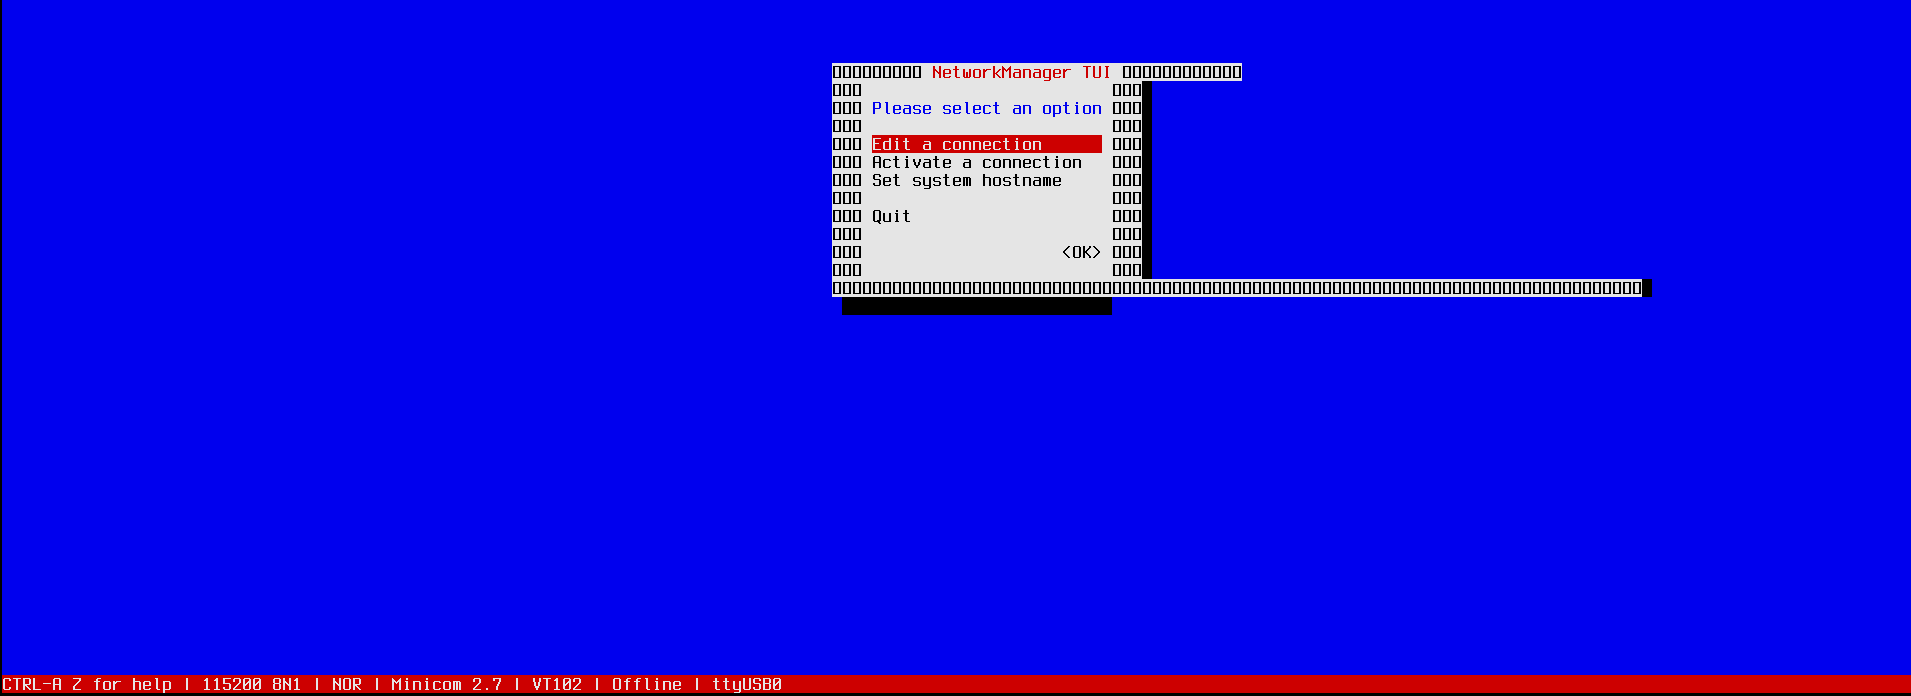
That is because /dev/ttyUSB0 is being initialized in cooked mode and therefore some translation is being done by the line discipline before it is received by the TTY and ultimately minicom. In order to run ncurses applications correctly we need the TTY to be initialized in raw mode. That can be achieved using the stty raw -F /dev/ttyUSB0. However, when raw mode is configured in this way, minicom still appears to perform its own bytestream translation. I also tried setting the -l optional flag to enable literal translation, which translates IBM line characters to ASCII. Perhaps there is something that I have missied here. Please feel free to comment if you have suggestions.
Conclusion
I hope that you learned something that interests you about serial communication. Please comment and ask questions. If you notice a mistake, let me know and I will correct it.
Here is some additional reading on the subject of serial communication. Also, here is a list of other serial communication programs and utilities that you might find useful.
In my next post, I will cover how to connect to a serial TTY initialized in raw mode and pass the untranslated byte stream to a terminal emulator that can render ncurses applications correctly.
Comments
Be the first to comment on this article.