Encapsulate Angular WebExtension Dependencies In a Docker Image
A quick recap
The purpose of this article is to provide a concrete example detailing precisely how to encapsulate the dependencies of an Angular WebExtension inside of a docker container whilst keeping the source code and optional tooling on the host system, thereby separating the dependencies from the implementation. In order for the two systems to work in tandem, files that are written to from within the container must remain writable outside of the container and vice versa. The mechanism that makes this possible is a combination of POSIX ACL rules with extended attributes enabled and setgit mode bit applied to a volume shared between the host and the container. In the previous article, titled Separate Dependencies From Implementation Using POSIX ACL Extended Attributes & Docker, I discussed these prerequisites in detail. There are clear benefits to this approach. By separating implementation concerns from the project dependencies, the resulting docker dependency image will be reusable in multiple projects. Moreover, on boarding remote collaborators will be made easier because the new recruits will be able to use implementation tools that they already have installed, customized and are intimately familiar with. The new recruits will be happier because they will not need to install or configure project dependencies that could cause conflicts in their host environment. By the end of this article you will be able to simultaneously build, deploy, and run an Angular WebExtension on both desktop and mobile browsers all from the comfort of your home directory.
If you are not familiar with the prerequisites then please read that section now. I also assume that you have read the Dockerfile reference documentation and are familiar with the Docker CLI.
Steps for the impatient
This section provides less verbose instructions for those knowledgeable enough to not need further explanation. It also provides an overview of the steps we will be taking throughout the rest of the article. For a deeper look into each step please continue to the next section titled – Build the dependency image.
- Read the prerequisite section and ensure that you have a directory setup with POSIX ACL support and extended attributes enabled. We will refer to this directory as
/shared/ Create a new group named developer and add your host user to that group.
You may call this group something other than developer, but then you will need to pass the
-doptional flag to the entrypoint in step 7 to override the default group name. See the nauci_base_init entrypoint usage documentation.groupadd -g 2000 developer usermod -aG developer dustfinger chown :developer -R src
run
ls -la /dev/bus/usb/*/and note the USB character device nodes group ownership. If your USB character device nodes do not have usb group ownership thencreate the USB group if needed.
groupadd -g 85 usb
usermod -aG usb dustfinger
set USB character device node group ownership
find /dev/bus/usb/ -type c -group root -exec chown :usb '{}' \;
Create the Dockerfile
First create the src directory and Dockerfile
mkdir -p ~/dev/hello_angular_webext/src/ && touch ~/dev/hello_angular_webext/DockerfileThen copy the Dockerfile content into
~/dev/hello_angular_webext/Dockerfile
Build the dependency image
Don’t forget to include the trailing period at the end of the command. That tells the Docker build command to grab content from the current directory.
cd ~/dev/hello_angular_webext/ && docker build -qt hello_angular_webext_deps .
-
All of the arguments following the name of the image are passed to the nauci_base_init entrypoint. The name of the image is hello_angular_webext_deps and the arguments being passed to the entrypoint are:
-s -n dustfinger,cenedra -u usb -U 85 -v /shared -gusers,sudo,video,plugdev,staffdocker run -it -p 127.0.0.1:24:22 --name nauci_dev -h nauci_dev --device=/dev/bus/usb -v /shared:/shared hello_angular_webext_deps -s -n dustfinger,cenedra -u usb -U 85 -v /shared -gusers,sudo,video,plugdev,staff
Set each user’s passwords with
passwd <user name>and restart the containerSetup an alias for X-Forwarding
This is optional, but I do recommend using an alias for frequently run commands.
echo "alias sshnauci_dev='ssh -Yt -p 24 dustfinger@localhost'" >> ~/.bashrc
source ~/.bashrc
Configure key-based authentication
If you don’t have an RSA key at =~.ssh/id_rsa=/ then generate one. Leave the password blank if you want password-less authentication (less secure, but more convenient)
ssh-keygenSend the public RSA id to the container
ssh-copy-id -p 24 dustfinger@localhost
-
Quote the commands that you want to send to the container for processing.
sshnauci_dev 'cd ~/dev; ng new hello-angular-webext'
Link project src with shared directory
Linking the shared source as a child of my home dev directory is convenient, but it also feels more natural to be working within a child of your home directory.
ln -sn /shared/dustfinger/dev/hello-angular-webext /home/dustfinger/dev/hello_angular_webext/src
Follow the steps in Transmogrify the Angular web application into a WebExtension through to the end.
Build the dependency image
In the previous article of this series I demonstrated how to create a basic image that inherits from nauci base entry and encapsulates the Firefox browser. Now it is time to encapsulate all of the dependencies necessary to create a simple Angular Hello World browser extension. Start by creating a project directory named hello_angular_webext.
mkdir -p ~/dev/hello_angular_webext/src/
touch ~/dev/hello_angular_webext/dockerfile
Create the Dockerfile
Fire up your favourite editor and replace the content of the Dockerfile with the following:
FROM node as n
FROM nauci/nauci_base_entry as nbe
MAINTAINER dustfinger@nauci.org

RUN apt-get -qqy install \
   # The Android Debug Bridge is used by webext to deploy the web
   # extension.
   android-tools-adb \
   # make is required for building node-gyp and possibly other
   # dependencies
   make \
   # I don't like having to install a bunch of browsers on my
   # development machine. I often have to test on several versions of
   # several browsers. It is nice to be able to encapsulate supported
   # browsers into one or more dependency containers.
   firefox-esr  \
   chromium;

# The node base image did a bunch of work. If we want our new image to
# reap the benefit then we must copy over the desired results.
COPY --from=n /opt /opt/
COPY --from=n /usr/local/bin/ /usr/local/binnode
COPY --from=n /usr/local/sbin/ /usr/local/sbinnode
COPY --from=n /usr/local/lib/ /usr/local/libnode

# Now let's recursively update the corresponding bin directories in
# our new image. We won't clobber existing files. There is some danger
# here, but how else is a programmer supposed to get cheap adrenaline
# thrills :-P
RUN cp -run /usr/local/binnode/* /usr/local/bin/; \
    cp -run /usr/local/libnode/* /usr/local/lib/; \
    rm -rf /usr/local/binnode/ && rm -rf /usr/local/libnode/;

# Next we will install the angular cli and web-ext
# dependencies. node-gyp is a dependency of web-ext. There seems to be
# a bug in the installation of the node-gyp package. When it installs
# globally it is trying to install itself directly in /root/ directory
# and makes that incorrect assumption that the directory already
# exists. We will help it along its way by creating the directory
# ahead of time.
RUN mkdir -p /root/.node-gyp; \
    npm install -g @angular/cli; \
    npm install web-ext;
You may have noticed that we are inheriting from both nauci_base_entry and the official node image. The Node image does a bunch of work for us and then we copy the results that we need into our image.
Build the image
From ~/dev/hello_angular_webext build the image in the usual way.
docker build -qt hello_angular_webext_deps .You should now have the following images in your local docker repository.
docker imagesREPOSITORY TAG IMAGE ID CREATED SIZE
hello_angular_webext_deps latest a0b8c8ee5ff6 2 minutes ago 874MB
<none> <none> 794f03619a67 3 minutes ago 922MB
my_project_deps latest 1dab70d08bd4 21 hours ago 601MB
node latest 462743bd5c7f 4 days ago 674MB
nauci/nauci_base_entry latest 82d57770d7cf 4 days ago 215MBCreate a shareable file system or directory
By default the base entry point init script expects to find the directory /shared/ with POSIX ACL support enabled. A different path can be provided using the -v option. The prerequisite section of the previous article contains sources that provide guidance on how to determine if your system supports POSIX ACL and how to install and configure POSIX ACL if necessary.
Moving forward, I am going to refer to the base entry point init script simply as entry point, which is a term defined in the Docker glossary. While writing this article I decided to provide better support for multi user collaboration. I know that sounds weird, after all what other kind of collaboration is there anyway? If you recall in the Preparing for collaboration section of the previous article in this series I drew a distinction between centrally hosted and distributed collaboration. The line I drew dividing these methodologies was too stark since it is perfectly valid for many locally centralized tiny groups to collaborate in a distributed fashion. That is why the entry point was designed to accept a CVS of user names in the first place. The trouble I ran into is that the tree structure of the /home/ directory separates each user’s ~/dev/ directory posing a challenge when it comes time to attach volumes to be shared by each host and guest pair. One strategy would be to attach many volumes, one for each pair, but that felt really cumbersome even with only a few users. A much better solution is to create a single shared volume and then create soft links inside each user’s directory.
Please create a shared directory with POSIX ACL support enabled before proceeding. Don’t worry about setting up the default ACL rules yourself. In the previous article, on setting up default permissions, I talked about manually setting the setgid mode bit and ACL rules. Since then I realized that with extended attributes enabled the ACL rules will be available inside the Docker container where the entry point is executed. Initially I didn’t think that was going to be possible due to container isolation. I have updated the entry point script to pragmatically set the setgid mode bit and ACL rules directly from within the running container :-).
A note to ZFS users using altroot
My drives are fully encrypted. I configured my boot loader to call a custom initramfs which deploys busybox, cryptsetup and all of the ZFS related modules. Since busybox claims normal root, zpool cannot be imported into the same. That is why my pool was created with altroot set to /mnt/root/ and each dataset was created with a mountpoint to altroot. When I add a new dataset to a running system I have to account for this. It is also convenient to set the acltype at creation time. Recall that if the acltype is not set we will not be able to create ACL rules.
/sbin/zfs create -o mountpoint=/shared -o acltype=posixacl tank/root/shared
mkdir /shared
mount --rbind /mnt/root/shared /shared
umount /mnt/root/shared
It is never a bad idea to run a sanity check on the extended attribute (xattr) and ACL type (acltype) property settings to ensure that they are set accordingly. In case you are not aware, setting xattr=sa means that it is stored as a system attribute as apposed to a file attribute. System attributes provide a more efficient storage and retrieval strategy, but not all systems support this feature. If your system lacks support for system attributes then you should set xattr=on instead.
/sbin/zfs get aclinherit,acltype,xattr tank/root/sharedNAME PROPERTY VALUE SOURCE
tank/root/shared aclinherit restricted default
tank/root/shared acltype posixacl local
tank/root/shared xattr sa inherited from tankEnsure USB Device Bus Bind Compatibility
In the conclusion of the previous article in this series I mentioned that I would explain why the entry point creates a USB user group. Just as the guest user you created in the Docker container must be bind compatible with the host user in order for the two to share read write access to the source code on the shared volume, so to must they be bind compatible with respect to the USB character device nodes. An alternative approach is to run Docker in privileged mode, but that is not as secure.
Let’s take a peek at how USB devices are represented in the file system:
tree -pugla /dev/bus/usb//dev/bus/usb/
├── [drwxr-xr-x root root ] 001
│ ├── [crw-rw-r-- root usb ] 001
│ ├── [crw-rw-r-- root usb ] 002
│ ├── [crw-rw-r-- root usb ] 003
│ ├── [crw-rw-r-- root usb ] 004
│ ├── [crw-rw---- root usb ] 011
│ └── [crw-rw---- root usb ] 012
└── [drwxr-xr-x root root ] 002
└── [crw-rw-r-- root usb ] 001
2 directories, 7 filesThe child nodes of dev/bus/usb are directories with names containing three digits that represent a bus number beginning sequentially from 001. Each Bus contains one or more character device nodes, which is why the file type symbol preceding the permissions is a c. The name of each of these character device nodes is also a three digit number that represents the bus ID of that node. The physical USB ports that you plug USB cables into are connected to an internal hub. Your computer may have multiple internal hubs supporting different versions of the USB protocol. Each time you attach a USB device into a USB port, that port’s associated hub will assign a new bus ID and create a character device node named accordingly. Each USB hub has a counter that determines the bus ID that will be created. The counter increments by one after each use until the system is rebooted. Bus ID 001 is reserved for the root of the USB hub itself.
This is where things get a little bit tricky. If your system sets the character device nodes group ownership to root, then you might have a polkit daemon managing authorization of those devices for non root users. If that is the case, I encourage you to read the polkit man page as well as the man pages referenced within to learn how to better manage user authorization for privileged processes on your system. I will not be delving into that in this article. Consider that the dependency container, which we will be attaching these device nodes to as a volume, does not have polkit installed. If you do have polkit running on the host, but do not know how to manage it, fear not! We are going to change the USB group ownership which hopefully will not cause you any problems. If you run into issues, you can set the group ownership back to root when you are finished.
If the group ownership of these character devices is something other than root or usb, such as plugdev for example, then you do not need to modify the group ownership. Instead, simply pass -u
Create the USB group if needed
You may skip this section if your USB character device nodes already have non root group ownership. Otherwise, you must ensure that the usb group exists. The following command will print the GID of the group named usb followed by the name of the group with GID 85. If either of the square brackets in the output enclose an empty string, then that indicates the group or GID is missing. If the group is missing, then you will need to create it. If the group is missing and GID 85 is assigned to another group, then you will need to create the group with a different GID – see Ensure that your chosen group id has not already been assigned.
getent group usb | cut -d: -f3 | uniq | xargs printf "The group named usb has GID [%s]\n"
getent group 85 | cut -d: -f1 | uniq | xargs printf "GID 85 has group name [%s]\n"
The group named usb has GID [85]
GID 85 has group name [usb]Below is an example of the command you should run if you need to create the group named usb and GID 85 is available. Replace dustfinger with your own username of course:
groupadd -g 85 usb
usermod -aG usb dustfinger
Set USB character device node group ownership
The following command will set group ownership to usb on all of the device nodes where the group ownership is root.
find /dev/bus/usb/ -type c -group root -exec chown :usb '{}' \;If you would like to set the group ownership back to root when you are done then run the following command:
find /dev/bus/usb/ -type c -group usb -exec chown :root '{}' \;Run the image
Before you run the image you should make sure that there are no containers listening on port 23. Note that I removed some of the columns from the next command’s output so that it would display nicely on the screen. I will consider doing a PR for my chosen Hugo theme to make code execution output responsive, but for now shortening the width of the output by removing some columns will have to do.
docker container lsCONTAINER ID IMAGE STATUS PORTS NAMES
2e233c30ebfa my_project_deps Up 21 hours 0.0.0.0:23->22/tcp goofy_fermatSince the container named goofy_fermat is listening on port 23 I must either map my new container to a different port or stop goofy_fermat. I am going to map my new container to port 24 so that I can run both containers at the same time. For your own benefit, you should browse over this list of known tcp / udb port mappings to avoid present or future conflicts when choosing a port for any of your projects.
You may want to take an opportunity now to look over the different optional parameters accepted by the entry point if you have not already done so. All of the arguments following the name of the image hello_angular_webext_deps are passed to the entry point script. If your USB group name is not usb or the USB GID is not 85 then you will want to override the defaults with the -u and -U options. Similarly, if your POSIX ACL enabled shared volume is not located at /shared/ then you will want to override the default path by passing in the -v option. For the sake of copy, paste, modify convenience I will apply the optional parameters -u,/-U/ and -v even though the values I pass in are the same as the defaults.
docker run -it -p 127.0.0.1:24:22 --name nauci_dev -h nauci_dev --device=/dev/bus/usb -v /shared:/shared hello_angular_webext_deps -s -n dustfinger,cenedra -u usb -U 85 -v /shared -gusers,sudo,video,plugdev,staffSet user passwords
Once the image has started successfully the execution context should switch to an interactive terminal command prompt. It is time to provide each user a password so that they can use ssh.
root@nauci_dev:/# passwd dustfinger
Enter new UNIX password:
Retype new UNIX password:
passwd: password updated successfully
root@nauci_dev:/# passwd cenedra
Enter new UNIX password:
Retype new UNIX password:
passwd: password updated successfully
Verify that setgid and ACL was applied
Let’s take this opportunity to verify that the setgid mode bit and ACL rules were correctly applied to the shared volume. If you attached a volume to a location other than /shared/ then you will need to modify the path argument passed to getfacl accordingly. Note that if the setgid mode bit is applied correctly then you should see the -S- flag in the printed metadata.
root@nauci_dev:/# getfacl /shared/*/dev
getfacl: Removing leading '/' from absolute path names
# file: shared/cenedra/dev
# owner: root
# group: developer
# flags: -s-
user::rwx
group::r-x
other::r-x
default:user::rwx
default:group::r-x
default:group:developer:rwx
default:mask::rwx
default:other::r-x

# file: shared/dustfinger/dev
# owner: root
# group: developer
# flags: -s-
user::rwx
group::r-x
other::r-x
default:user::rwx
default:group::r-x
default:group:developer:rwx
default:mask::rwx
default:other::r-x
Verify ~/dev soft links
When you run the next command look in the output following each user’s dev directory for -> followed by a path to that same user’s corresponding shared dev directory. It is very important that these links exist.
root@nauci_dev:/# ls -la /home/*/dev
lrwxrwxrwx 1 cenedra    developer 19 Oct 19 02:17 /home/cenedra/dev -> /shared/cenedra/dev
lrwxrwxrwx 1 dustfinger developer 22 Oct 19 02:17 /home/dustfinger/dev -> /shared/dustfinger/dev
Restart the container
Type exit and hit the enter key to leave the interactive terminal session with our Docker container. The container will stop running. Since we want to be able to continue to interact with the container via ssh we must start the container again.
root@nauci_dev:/# exit
logout
dustfinger@galactica ~/dev/hello_angular_webext $
Now start the container again. It is not a bad idea to take a quick peak at the container status and port mapping to make sure that it is running and mapped to the port that you expect. Once again I have removed unimportant columns from the output to make it fit nicely on the page. If you are viewing this from a mobile device the output might wrap and look awful.
docker start nauci_dev
docker container ls -a
nauci_dev
IMAGE STATUS PORTS NAMES
hello_angular_webext_deps Up Less than a second 127.0.0.1:24->22/tcp nauci_dev
my_project_deps Exited (0) 2 days ago goofy_fermatSetup an alias for x-forwarding
It is worth while setting up an alias for sending x-forwarding requests to the container. If you want the alias to be permanent then simply add it to your ~/.bashrc, or ~/.bash_aliases. Be aware that if you are thinking about scripting commands for automation, bash only expands aliases if the session is interactive. You can override this behaviour with the shopt builtin command shopt -s expand_aliases.
Below I append the alias to ~/.bashrc so that it will be available to new shell sessions and then I source ~/.bashrc making the alias available in the current shell session.
echo "alias sshnauci_dev='ssh -Yt -p 24 dustfinger@localhost'" >> ~/.bashrc
source ~/.bashrc
Test that x-forwarding is working
I have a love for x-forwarding via ssh and a hatred for remote desktop protocol (RDP). However, I find myself doing the latter for my day job more often then not. I am thankful for the enormous effort that the FreeRDP community has committed to disassembling the RDP proprietary protocol and bringing a usable solution to distributions running the Linux kernel.
We are going to quickly test a number of different programs using the alias that we setup in the previous section. If you did not create an alias then that is okay, you will need to substitute the actual command in place of sshnauci_dev in each of the following examples.
Test interactive shell:
dustfinger@galactica ~/dev/hello_angular_webext $ sshnauci_dev
The authenticity of host '[localhost]:24 ([127.0.0.1]:24)' can't be established.
ECDSA key fingerprint is SHA256:WDK+MuS5MXphhfRVRUdVTFr9DmBtoqCf4j8Sh1FMMGE.
Are you sure you want to continue connecting (yes/no)? yes
Warning: Permanently added '[localhost]:24' (ECDSA) to the list of known hosts.
dustfinger@localhost's password:
Linux nauci_dev 4.14.12-gentoo #17 SMP Tue Sep 18 05:07:39 MDT 2018 x86_64

The programs included with the Debian GNU/Linux system are free software;
the exact distribution terms for each program are described in the
individual files in /usr/share/doc/*/copyright.

Debian GNU/Linux comes with ABSOLUTELY NO WARRANTY, to the extent
permitted by applicable law.
/usr/bin/xauth:  file /home/dustfinger/.Xauthority does not exist

Last login: Mon Oct 22 13:55:26 2018 from 172.17.0.1
$
Test Display Environment Variable:
Now let’s just check that our display for x-forwarding is known to the container. We don’t need to actually sign in with an interactive login shell for this test. We can just send the commands to be run on the guest container. The single quotes around the command are important. Without them bash will expand the $DISPLAY environment variable, sending the resulting value to the guest.
sshnauci_dev echo "host display=$DISPLAY"
sshnauci_dev 'echo "guest display=$DISPLAY"'
host display=:0
guest display=nauci_dev:10.0Your display values might not be the same as mine. The important thing is that the guest display has a value. If it does not have a value, then somehow x-forwarding is not working on your system. You can increase verbosity by supplying the -vv optional parameter and then run the test again, but in that case look for errors or warnings in the output.
Test Firefox:
The purpose of this test is to ensure that both Firefox and x-forwarding are working. After Firefox opens you may close it.
sshnauci_dev firefox
dustfinger@localhost's password:
(firefox-esr:148): Gtk-WARNING **: Locale not supported by C library.
      Using the fallback 'C' locale.

(/usr/lib/firefox-esr/firefox-esr:209): Gtk-WARNING **: Locale not supported by C library.
        Using the fallback 'C' locale.

(/usr/lib/firefox-esr/firefox-esr:262): Gtk-WARNING **: Locale not supported by C library.
        Using the fallback 'C' locale.

(/usr/lib/firefox-esr/firefox-esr:297): Gtk-WARNING **: Locale not supported by C library.
        Using the fallback 'C' locale.
Test chromium:
I found that Chromium crashes catastrophically.
sshnauci_dev chromium
dustfinger@localhost's password:
Failed to move to new namespace: PID namespaces supported, Network namespace supported, but failed: errno = Operation not permitted
[962:962:1019/092456.311001:FATAL:zygote_host_impl_linux.cc(187)] Check failed: ReceiveFixedMessage(fds[0], kZygoteBootMessage, sizeof(kZygoteBootMessage), &boot_pid).
#0 0x55706718ee3e <unknown>
#1 0x5570670f86fc <unknown>
#2 0x557067cee720 <unknown>
#3 0x557066e21a74 <unknown>
#4 0x557067ced9fb <unknown>
#5 0x557067cef881 <unknown>
#6 0x557066e217db <unknown>
#7 0x557066e26d6e <unknown>
#8 0x557066e1ffa1 <unknown>
#9 0x5570655cbe90 ChromeMain
#10 0x7f116ece12e1 __libc_start_main
#11 0x5570655cbcea _start

Received signal 6
#0 0x55706718ee3e <unknown>
#1 0x55706718f23b <unknown>
#2 0x55706718f8be <unknown>
#3 0x7f117c6860c0 <unknown>
#4 0x7f116ecf3fff gsignal
#5 0x7f116ecf542a abort
#6 0x55706718ee05 <unknown>
#7 0x5570670f8676 <unknown>
#8 0x557067cee720 <unknown>
#9 0x557066e21a74 <unknown>
#10 0x557067ced9fb <unknown>
#11 0x557067cef881 <unknown>
#12 0x557066e217db <unknown>
#13 0x557066e26d6e <unknown>
#14 0x557066e1ffa1 <unknown>
#15 0x5570655cbe90 ChromeMain
#16 0x7f116ece12e1 __libc_start_main
#17 0x5570655cbcea _start
  r8: 0000000000000000  r9: 00007ffc367c3b70 r10: 0000000000000008 r11: 0000000000000246
 r12: 00007ffc367c3fe0 r13: 00007ffc367c4000 r14: 00000000000000a8 r15: 00007ffc367c3de0
  di: 0000000000000002  si: 00007ffc367c3b70  bp: 00007ffc367c3db0  bx: 0000000000000006
  dx: 0000000000000000  ax: 0000000000000000  cx: 00007f116ecf3fff  sp: 00007ffc367c3be8
  ip: 00007f116ecf3fff efl: 0000000000000246 cgf: 002b000000000033 erf: 0000000000000000
 trp: 0000000000000000 msk: 0000000000000000 cr2: 0000000000000000
[end of stack trace]
Calling _exit(1). Core file will not be generated.
Configure key-based authentication
We are going to be sending lots of commands to the container via ssh. If you don’t want to type in a password following every command then you should setup key-based authentication. However, doing so is less secure. If anyone were to gain access to your host and tried to ssh to the container they would not be asked to authenticate. If you feel the need to have a passphrase that is fine. You can always add or remove your passphrase at any time using ssh-keygen -p -f ~/.ssh/id_rsa. Alternatively, you can stick with simple password authentication, in which case you may skip this step.
If you already have an ssh key pair then skip the next section and proceed to Send the public key to the guest container unless you wish to manage multiple ssh keys.
Generate an ssh private and public key pair
Simply run the command and follow the instructions.
$ ssh-keygen
Generating public/private rsa key pair.
Enter file in which to save the key (/home/dustfinger/.ssh/id_rsa):
Enter passphrase (empty for no passphrase):
Enter same passphrase again:
Your identification has been saved in /home/dustfinger/.ssh/id_rsa.
Your public key has been saved in /home/dustfinger/.ssh/id_rsa.pub.
The key fingerprint is:
SHA256:+r4smZfvlz+TpC+ocm7p9eHlsFcKy+9zy4c0605xero dustfinger@galactica
The key's randomart image is:
+---[RSA 2048]----+
|                 |
|                 |
|                 |
|                 |
|        S     . .|
|       .    . ++.|
|      .o o.ooB+B.|
|      =o*..oBB@oo|
|       XO=o.+XEOo|
+----[SHA256]-----+
Send the public key to the guest container
$ ssh-copy-id -p 24 dustfinger@localhost
/usr/bin/ssh-copy-id: INFO: Source of key(s) to be installed: "/home/dustfinger/.ssh/id_rsa.pub"
/usr/bin/ssh-copy-id: INFO: attempting to log in with the new key(s), to filter out any that are already installed
/usr/bin/ssh-copy-id: INFO: 1 key(s) remain to be installed -- if you are prompted now it is to install the new keys
dustfinger@localhost's password:

Number of key(s) added: 1

Now try logging into the machine, with:   "ssh -p '24' 'dustfinger@localhost'"
and check to make sure that only the key(s) you wanted were added.
Now relish in the joy of password-less authentication. Let’s test it out by listing the contents of our guest user’s home directory.
s sshnauci_dev 'ls'Desktop
devYou should not have be prompted for a password. If you were, then something has gone wrong. In that case, increase verbosity by adding the -vv optional parameter before the ls command like this sshnauci_dev -vv ls
Build the Angular app
This is not an article about how to build an Angular application. Therefore we are going to cut a very long story short by taking advantage of the ng new command which creates a new hello-world-style application. The name of the angular app must start with a letter and may contain alphanumeric characters or dashes. There is a defect (issue 3816) though that causes an error if you end the project name with a number. In the next section we will be converting our Angular application into a WebExtension, so I aptly named the app hello-angular-webext. When prompted whether or not you would like to add Angular routing, type y and hit return.
sshnauci_dev 'cd ~/dev; ng new hello-angular-webext'? Would you like to add Angular routing? YesN) y
? Which stylesheet format would you like to use? Stylus [ http://stylus-lang.com ]
CREATE hello-angular-webext/README.md (1035 bytes)
CREATE hello-angular-webext/angular.json (3985 bytes)
CREATE hello-angular-webext/package.json (1327 bytes)
CREATE hello-angular-webext/tsconfig.json (408 bytes)
CREATE hello-angular-webext/tslint.json (2837 bytes)
CREATE hello-angular-webext/.editorconfig (245 bytes)
CREATE hello-angular-webext/.gitignore (503 bytes)
CREATE hello-angular-webext/src/favicon.ico (5430 bytes)
CREATE hello-angular-webext/src/index.html (305 bytes)
CREATE hello-angular-webext/src/main.ts (372 bytes)
CREATE hello-angular-webext/src/polyfills.ts (3234 bytes)
CREATE hello-angular-webext/src/test.ts (642 bytes)
CREATE hello-angular-webext/src/styles.styl (80 bytes)
CREATE hello-angular-webext/src/browserslist (388 bytes)
CREATE hello-angular-webext/src/karma.conf.js (964 bytes)
CREATE hello-angular-webext/src/tsconfig.app.json (166 bytes)
CREATE hello-angular-webext/src/tsconfig.spec.json (256 bytes)
CREATE hello-angular-webext/src/tslint.json (314 bytes)
CREATE hello-angular-webext/src/assets/.gitkeep (0 bytes)
CREATE hello-angular-webext/src/environments/environment.prod.ts (51 bytes)
CREATE hello-angular-webext/src/environments/environment.ts (662 bytes)
CREATE hello-angular-webext/src/app/app-routing.module.ts (245 bytes)
CREATE hello-angular-webext/src/app/app.module.ts (393 bytes)
CREATE hello-angular-webext/src/app/app.component.styl (0 bytes)
CREATE hello-angular-webext/src/app/app.component.html (1173 bytes)
CREATE hello-angular-webext/src/app/app.component.spec.ts (1137 bytes)
CREATE hello-angular-webext/src/app/app.component.ts (225 bytes)
CREATE hello-angular-webext/e2e/protractor.conf.js (752 bytes)
CREATE hello-angular-webext/e2e/tsconfig.e2e.json (213 bytes)
CREATE hello-angular-webext/e2e/src/app.e2e-spec.ts (316 bytes)
CREATE hello-angular-webext/e2e/src/app.po.ts (208 bytes)
> node-sass@4.9.3 install /shared/dustfinger/dev/hello-angular-webext/node_modules/node-sass
> node scripts/install.js
Downloading binary from https://github.com/sass/node-sass/releases/download/v4.9.3/linux-x64-64_binding.node
Download complete ] - :
Binary saved to /shared/dustfinger/dev/hello-angular-webext/node_modules/node-sass/vendor/linux-x64-64/binding.node
Caching binary to /home/dustfinger/.npm/node-sass/4.9.3/linux-x64-64_binding.node
> circular-json@0.5.7 postinstall /shared/dustfinger/dev/hello-angular-webext/node_modules/circular-json
> echo ''; echo "\x1B[1mCircularJSON\x1B[0m is in \x1B[4mmaintenance only\x1B[0m, \x1B[1mflatted\x1B[0m is its successor."; echo ''
\x1B[1mCircularJSON\x1B[0m is in \x1B[4mmaintenance only\x1B[0m, \x1B[1mflatted\x1B[0m is its successor.
> node-sass@4.9.3 postinstall /shared/dustfinger/dev/hello-angular-webext/node_modules/node-sass
> node scripts/build.js
Binary found at /shared/dustfinger/dev/hello-angular-webext/node_modules/node-sass/vendor/linux-x64-64/binding.node
Testing binary
Binary is fine
npm WARN optional SKIPPING OPTIONAL DEPENDENCY: fsevents@1.2.4 (node_modules/fsevents):
npm WARN notsup SKIPPING OPTIONAL DEPENDENCY: Unsupported platform for fsevents@1.2.4: wanted {"os":"darwin","arch":"any"} (current: {"os":"linux","arch":"x64"})
added 1097 packages from 1292 contributors and audited 39125 packages in 23.582s
found 0 vulnerabilities
/bin/sh: 1: git: not found
Connection to localhost closed.
#+END_SRC
now build the project
#+BEGIN_SRC sh :results output silent :shebang "#!/bin/env bash"
sshnauci_dev 'cd dev/hello-angular-webext; ng build'
dustfinger@localhost's password:
Date: 2018-10-19T10:14:52.725Z
Hash: 94301c33eb20663e3ad2
Time: 5278ms
chunk {main} main.js, main.js.map (main) 11.9 kB [initial] [rendered]
chunk {polyfills} polyfills.js, polyfills.js.map (polyfills) 228 kB [initial] [rendered]
chunk {runtime} runtime.js, runtime.js.map (runtime) 6.22 kB [entry] [rendered]
chunk {styles} styles.js, styles.js.map (styles) 17.1 kB [initial] [rendered]
chunk {vendor} vendor.js, vendor.js.map (vendor) 3.37 MB [initial] [rendered]
Connection to localhost closed.Link the host project src directory to the shared dev directory
Now that the Angular project source directory exists on the guest we can link it to our project’s src directory on the host as a nice convenience. After creating the link you may wish to create a .dockerignore file in ~/dev/hello_angular_webext/ with a rule to ignore the linked src directory in case you want to rebuild the image in the future.
ln -sn /shared/dustfinger/dev/hello-angular-webext /home/dustfinger/dev/hello_angular_webext/src
getfacl /home/dustfinger/dev/hello_angular_webext/src
# file: home/dustfinger/dev/hello_angular_webext/src
# owner: dustfinger
# group: developer
# flags: -s-
user::rwx
group::r-x
group:developer:rwx
mask::rwx
other::r-x
default:user::rwx
default:group::r-x
default:group:developer:rwx
default:mask::rwx
default:other::r-xMoving forward we will use editing tools on our host system to develop the Angular app into a WebExtension.
The project layout
This is the directory hierarchy from the ~/dev/hello_angular_webext directory where we built our docker image.
tree -puglad -I "node_modules" -L 4.
└── [lrwxrwxrwx dustfinger dustfinger] src -> /shared/dustfinger/dev/hello-angular-webext
├── [drwxr-sr-x dustfinger developer] dist
│ └── [drwxr-sr-x dustfinger developer] hello-angular-webext
├── [drwxrwsr-x dustfinger developer] e2e
│ └── [drwxrwsr-x dustfinger developer] src
└── [drwxrwsr-x dustfinger developer] src
├── [drwxrwsr-x dustfinger developer] app
├── [drwxrwsr-x dustfinger developer] assets
└── [drwxrwsr-x dustfinger developer] environments
9 directoriesAt the top most level you can see that the src subdirectory is soft linked to our project’s Angular source on the shared file system for the guest user named dustfinger. From now on I will use src/ when referring to this soft link.
Taking a closer look down the tree you can see a directory named src/dist/hello-angular-webext. The dist folder is where ng build places the transpiled angular app. Do not modify anything under the dist directory because it is replaced with each run of ng build. The non-transpiled source code for the Angular app which you can edit is located under src/src/ along with the applications static assets located src/src/assets/.
Transmogrify the Angular web application into a WebExtension
A WebExtension needs the following things:
- a manifest.json file
- an extension icon
- one or more templates
We have arrived at the final leg of the journey. In the remaining sections everything should come together and make sense. Our dependencies which include web browsers, JavaScript libraries, package management, transpiler, deployment tooling etc are all in the container. With all of those dependencies separated from our favourite development tools we can edit the project source code, send shell commands to build the app in the container, and as you will soon see, deploy and run the app in multiple devices simultaneously without having to install any of that project specific cruft on our host - w00t!
You may want to refer to the project layout from time to time. Also, in that section I mentioned that we will be using src/ as shorthand for the link /home/dustfinger/dev/hello_angular_webext/src/.
Create the manifest.json
From the host use your favourite text editor to create a file called src/src/manifest.json with the following content:
{
  "manifest_version": 2,
  "applications": {
    "gecko": {
      "id": "trevor.wilson@bloggerbust.ca"
    }
  },
  "name": "Hello Angular Extension",
  "description": "a simple hello world extension using angular",
  "version": "1.0",
  "browser_action": {
    "default_icon": "assets/hello-angular-icon-48.svg",
    "default_popup": "index.html"
  },
  "permissions": [],
  "content_security_policy": "script-src 'self' 'unsafe-eval'; object-src 'self'",
  "web_accessible_resources": [
    "assets/css/*",
    "assets/js/*",
    "assets/fonts/*"
  ]
}
Add an icon
Our WebExtension will have an Angular view that is accessible from a toolbar button embellished with an icon. For our example I used the BulbIcon By Respublika Narodnaya - Own work, CC BY-SA 4.0, a simple SVG courteously uploaded to Wikimedia commons. Download BulbIcon.svg and save it as src/src/assets/hello-angular-icon-48.svg.
Declare the assets
In order for our Angular application to be a valid WebExtension we need to place the manifest.json in the root directory of the transpiled application. Recall that the Angular transpiler places the application in src/dist/hello-angular-webext/. Each time the Angular transpiler builds the application the old src/dist/hello-angular-webext/ is replaced. Thankfully, Angular provides a way of dealing with this behaviour. By declaring our manifest and icon an asset in the angular.json file the transpiler will copy our manifest and icon into the transpiled application for us each time we run a build. Open src/angular.json and locate the assets node located at projects.hello-angular-webext.architect.build.options.assets. The assets node will already list the assets directory which contains the hello-angular-icon-48.svg. Add the manifest.json as a root level asset.
"assets": [
  "src/favicon.ico",
  "src/assets",
  "src/manifest.json"
],
Test the extension in Firefox from your development machine
You will need to build the app once again so that our assets are deployed to the dist directory.
sshnauci_dev 'cd dev/hello-angular-webext; ng build; echo "\nlisting content of dist/hello-angular-webext ...\n"; ls dist/hello-angular-webext'Date: 2018-10-21T11:36:16.677Z
Hash: 94301c33eb20663e3ad2
Time: 4852ms
chunk {main} main.js, main.js.map (main) 11.9 kB [initial] [rendered]
chunk {polyfills} polyfills.js, polyfills.js.map (polyfills) 228 kB [initial] [rendered]
chunk {runtime} runtime.js, runtime.js.map (runtime) 6.22 kB [entry] [rendered]
chunk {styles} styles.js, styles.js.map (styles) 17.1 kB [initial] [rendered]
chunk {vendor} vendor.js, vendor.js.map (vendor) 3.37 MB [initial] [rendered]
listing content of dist/hello-angular-webext ...
assets
favicon.ico
index.html
main.js
main.js.map
manifest.json
polyfills.js
polyfills.js.map
runtime.js
runtime.js.map
styles.js
styles.js.map
vendor.js
vendor.js.mapLet’s manually test our WebExtension using Firefox. By manually testing the WebExtension you will understand how to temporarily install a local WebExtension in a browser. You will also gain an appreciation for how cumbersome things would be if you had to manually deploy the WebExtension each time you modified it during development :-). Now launch Firefox and follow the steps listed below:
sshnauci_dev 'firefox'Manual Deployment Steps:
- In Firefox’s address bar type about:debugging and hit enter
- Click the button labelled Load Temporary Add-on
- A dialog will open which will allow you to select a manifest or a package. The path is going to be relative to the container since that is where Firefox is actually running. Open
~/dev/hello-angular-webext/dist/hello-angular-webext/manifest.json - Now you should see the light bulb icon appear in the right hand corner of the browser. Click the light bulb. A popup window should appear with the heading Welcome to hello-angular-webext!. Congratulations you just deployed an Angular WebExtension!
WebExtension removal Steps:
- In Firefox’s address bar type Enter about:addons and hit enter
- Click on the Extensions menu item in the left hand pane
- Locate the add-on titled Hello Angular Extension in the right hand pane
- Click the remove button.
Test that web-ext is working
You may rest at ease. Thanks to web-ext there will be no need for manual deployment during the develop-test-repeat loop. Let’s quickly test that web-ext is working.
sshnauci_dev 'web-ext run -s dev/hello-angular-webext/dist/hello-angular-webext/'Running WebExtension from /home/dustfinger/dev/hello-angular-webext/dist/hello-angular-webext
Use --verbose or open Tools > Web Developer > Browser Console to see logging
Installed /home/dustfinger/dev/hello-angular-webext/dist/hello-angular-webext as a temporary add-on
The extension will reload if any source file changes
Press R to reload (and Ctrl-C to quit)
Connection to localhost closed.The Firefox browser should launch with the extension already loaded. Whew!
Setup an Android Device For WebExtension Deployment
If you don’t have an Android device then you can skip this step. Alternatively, you could try to figure out the steps required for the device that you do have :-) If that is the path you choose, then I welcome you to make a pull request or submit your instructions so that I may update this post with support for additional devices.
In this section you may refer to Developing WebExtensions for Firefox and Android and get started with web-ext if you run into difficulty. Otherwise, as long as you have an Android device with Firefox installed you may proceed with the sub-section below.
Establish an USB Debugging Session With Android Debug Bridge (ADB)
Web-ext depends on ADB for deployment to Android devices. The hello-angular-webext Dockerfile installed the standalone Android SDK Platform-Tools package named android-tools-adb into the dependency image. The Platform-Tools package contains the ADB CLI which we will now use to establish a USB debugging session with our Android device. First, follow these instructions to enable USB debugging on your Android device. Next, plug your Android device into a USB port on your host machine and test that ADB CLI can detect it. You will need to ensure that your device is not locked while trying to establish a debugging session. As mentioned previously, an important concept to understand is that a new BUS ID will be created each time a device is connected to the host machine even if the device had been previously connected. Consequently, if the Android device was not connected to the container with USB debugging enabled at the time that the container was started then the container will need to be restarted in order to pick up the newly assigned USB character device node.
docker container restart nauci_devnauci_devSend a command to the ADB CLI which will ask the ADB daemon to list all of the devices that it can find attached to the container. The first time you run this command the ADB daemon will start if it is not currently running. When the ADB attempts a handshake with your device a popup will appear on your device requesting that you acknowledge the debug session. If you do not click okay then the ADB daemon will not be able to establish the USB debugging session with your device. The message will read:
Allow USB debugging?
The computer’s RSA key fingerprint is:
<your-host-containers-RSA-key-fingerprint>
Now send a remote command to tell ADB to list all Android devices that it can detect inside of the container.
sshnauci_dev 'adb devices -l'List of devices attached
* daemon not running. starting it now on port 5037 *
* daemon started successfully *
84B7N15A28004543 device usb:1-8 product:angler model:Nexus_6P device:anglerIf you accidentally click outside of the popup requesting authorization to establish the USB debugging session then it will disappear from view. In that case you will need to kill the ADB daemon with sshnauci_dev 'adb kill-server' and run the command to list the devices again.
Simultaneous automatic code reload on both desktop and Android
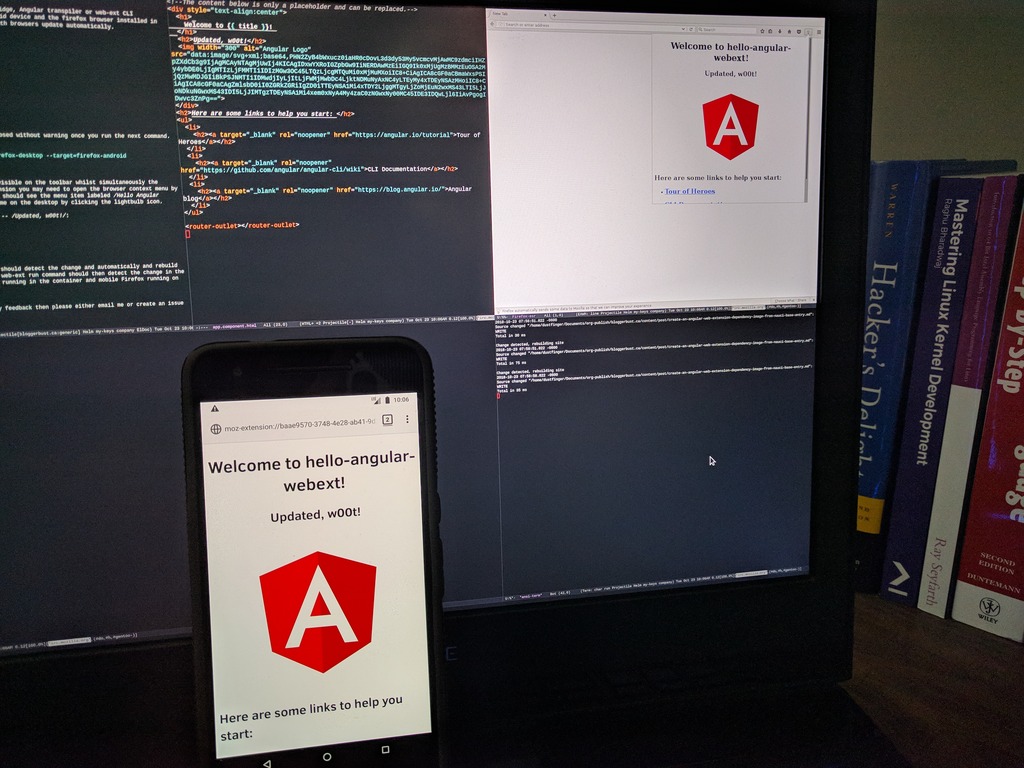
This is the moment I have been leading up to. From my host, with no Node.js server, Android Debug Bridge, Angular transpiler or web-ext CLI installed I will send a remote command that will deploy and launch the WebExtension in both my Android device and the desktop Firefox browser installed in the container. I will then edit the source using my favourite editor on my host machine and watch both browsers update automatically.
sshnauci_dev 'cd dev/hello-angular-webext; ng build --watch'Date: 2018-10-21T17:37:32.496Z
Hash: 94301c33eb20663e3ad2
Time: 5122ms
chunk {main} main.js, main.js.map (main) 11.9 kB [initial] [rendered]
chunk {polyfills} polyfills.js, polyfills.js.map (polyfills) 228 kB [initial] [rendered]
chunk {runtime} runtime.js, runtime.js.map (runtime) 6.22 kB [entry] [rendered]
chunk {styles} styles.js, styles.js.map (styles) 17.1 kB [initial] [rendered]
chunk {vendor} vendor.js, vendor.js.map (vendor) 3.37 MB [initial] [rendered]I should warn you that if you have any tabs open in the Android Firefox browser they will disappear without warning once you run the next command. I believe that the command starts a new guest session in Firefox, but I have not investigated. If this does happen then don’t panic, if you reboot the device (or probably just exit the guest session), then your lost tabs will return.
In a separate terminal run the following web-ext command.
sshnauci_dev 'web-ext run -s dev/hello-angular-webext/dist/hello-angular-webext/ --target=firefox-desktop --target=firefox-android --android-device 84B7N15A28004543'You should now see the desktop Firefox browser open via x-forwarding with the light-bulb icon visible on the toolbar whilst simultaneously the Firefox browser on your Android should launch with the extension also loaded. To see the extension on Android Firefox you may need to open the browser context menu by touching the ellipses in the upper right corner, then look to the bottom of the menu where you should see the menu item libelled Hello Angular Extension. Touch the Hello Angular Extension menu item to load the welcome screen. Do the same on the desktop by clicking the light-bulb icon.
From your host edit src/src/app/app.component.html. Add some text beneath the header such as – Updated, w00t!:
<h1>
  Welcome to {{ title }}!
</h1>
Updated, w00t!
Since we passed the –watch optional parameter to the ng build command the Angular CLI should detect the change automatically and rebuild the app. The app should be transpiled, and copied to the src/dist/ directory. The web-ext run command should then detect the change in the src/dist/ directory and automatically deploy the WebExtension to both desktop Firefox running in the container and mobile Firefox running on the Android device.
Double W00t!
Retrospective
That is the end of my first series. I hope you learned something. I sure did, though I will admit that this solution is not without its drawbacks.
Drawbacks:
- The file system used as the shared volume must have POSIX ACL enabled with extended attributes. Will this work with other ACL models? NSFv4ACL for example? ACL interoperability is not standardized, but it might work. I have not tested it
- The entry point does not setup user passwords
- Chromium bails when run in docker
- Everyone in the developer group has
rwxaccess to each other’s shared dev folders - Developer dev directories are on the host
It does have some nice benefits though:
- Separates project dependencies from source code allowing dependency image reuse
- Separates project dependencies from tooling allowing developers to choose emacs. err… I mean optional tooling. i.e. editor, network analyzer, debugger, performance profiler etc.
- The entry point automates quite a bit of the required user and file system setup
- Supports bind compatible USB character device nodes and shared file system
- Makes it easier for remote collaborates to contribute to your project
Here are some improvement ideas:
- Update the base entry point init script with optional support for the newusers command making it possible to securely create a batch of users with default passwords
- Test the current solutions interoperability with other ACL models. Add support for ACL models that are not interoperable with the current solution.
- Investigate Docker’s user namespace remap support to see if it is possible to use subordinate GID remapping to replace the current developer / usb group bind compatibility strategy
- A NAS device could be mounted as a volume on the container as well as the individual developer machines to help address drawback number 5
If you have any feedback, please either email me, create an issue in my GitHub or post to the HN discussion. For the time being I do not have comments setup for this blog.
Comments
Be the first to comment on this article.